
This article is part of a series.
View all 17 parts
- Part 1 – The Hunter S. Thompson Board -- Arduino Mega Mini
- Part 2 – Make an ADXL345 Breakout Board
- Part 3 – Mega Mini Motor Shield (M^3)
- Part 4 – My Eagle PCB Walkthrough
- Part 5 – Populating and Programming and APM
- Part 6 – Incomplete Works
- Part 7 – HM-10
- Part 8 – Jot
- Part 9 – Homemade Pulse Sensor
- Part 10 – ATtiny Adventure -- I2C on ATtiny 84/85
- Part 11 – ATtiny Bitsy Spider
- Part 12 – Kobold
- Part 13 – Scarab
- Part 14 – The Valdez Mutant -- LPC1114 QFN
- Part 15 – Lab Controller PCB
- Part 16 – This Article
- Part 17 – Robber Board
Revising Board
This is an extension of previous work. I had finished a LED driver for the lab, hooked it up, and found it was a fire hazard. For the amount of lumen I wanted out of them I was having to set the current resistor to .47ohm. This was pushing nearly 2amps of current through the little FQP40N06L . The LEDs were bright, but immediately the TO-220 became too hot to touch. Two choices, either redesign or use less current, resulting in dimmer LEDs. Easy choice, redesign.
The first thing I realized was I need a heat-sink. Ironically, I had gone with TO-220s, a through-hole package, because I felt they would do better handling the heat. Ended up using the BS103AL , which is in an TO-263 package. This is an SMD package that lies on its belly exposing its back for heatsink placement.
This heatsink looked beefy enough and had the correct dimensions (5CM).

The notch on the heatsink will lie against the array of TO-263s, hopefully, drawing all excessive heat. However, the contingency is to place a fan on the back of the heatsink.
There is also an ESP8266 on the board. I decided it was a better option for controlling the LEDs, since they wouldn't be used outside the house and would always be connected to mains. Of course, I've never turned on an ESP8266, so I'm hoping I strung it correctly. It does have level conversion for TX, RX, and RESET lines.
I have also added a CH340G for USB-to-UART. The CH340G SOIC chips were ordered awhile back, but before I put them into this board I threw it on an ATTiny84 breakout and tested it. I didn't hold much hope for it, but it worked like a charm. Huh.

These little chips only cost me like $.65
CH340G $5 / 10 = .50
12mhz Crystal 1.42 / 01 = .14
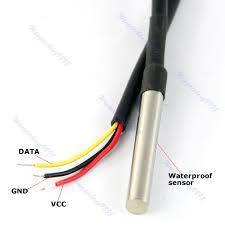
The last piece of interest added to this board was a DS18B20. This is a one wire temperature probe, which I plan to thermal-paste on the heatsink as an auto-shutdown measure. Or perhaps, to reduce the amount of time a fan makes noise by kicking it on-and-off.


The design files can be found,