Ladvien's Lab

Latest Posts

Jazzy, Jekyll, and Swift 2.1

I wanted to take a a moment and write out how I plan to document future Swift projectss.

Step One: Install

I found Jazzy . It's a command line utility for documenting Xcode projectss. Nifty thing is, it is one of the few which works with Swift 2+. Anyway, it is pretty painless to get up and going.

The one catch I found was Swift is changing versions often, so you may have to wait a bit for the developers to catch up. However, when the updates are released it is pretty easy to get things working again, simply run, sudo gem update in the terminal.

Step Two: Running

To run Jazzy you simply open a terminal window on your Mac, navigate to the top folder of your Xcode projects, and run jazzy . You should get something like the following,

Running xcodebuild
Parsing ViewController.swift (1/3)
Parsing bleTableViewController.swift (2/3)
Parsing AppDelegate.swift (3/3)
building site
jam out ♪♫ to your fresh new docs in `docs`

One super important note here. By default Jazzy only documents public methods. Therefore, you must pass Jazzy the flag

jazzy --min-acl internal private

This is the only way you will get everything. If not, you will end up with an empty projects, most likely. Had to find this out the hard way. Reference to the solution .

If jazzy parsed everything correctly you will have a docs folder in your projects folder. This docs folder is a pseudo-website build.

Step Three: Push to Pages

To get your documentation online, copy the docs folder to your an appropriate directory in your Jekyll site map. Commit and push. Now your projects's documentation is apparent of the global singleton known as human knowledge. To get a link to the index of your documentation add the following,

[Test](director_you_chose_to_put_docs_folder/docs/index.html)

Here's an example: behavioralBluetooth Docs

Step Four: Document your projects

I wont rehash Jazzy instructions. In short, you can put Markdown in your comments within the code and the parser will pick up the comments and associate them with the methods etc they are close.

Jazzy Instructions

Addendum

Apparently excluding files from the documentation process is a little tricky.

jazzy  --exclude /Users/Ladvien/Desktop/behavioralBluetooth/behavioralBluetooth/AppDelegate.swift,/Users/Ladvien/Desktop/behavioralBluetooth/deviceState.swift

It should look like above, "--exclude" (not the double dash) followed by the absolute path of the file to be excluded. Then a comma (","), no space, and then the absolute path of the second file you wish to exclude. It's pretty easy to make this into a script by doing the following.

1. From the terminal type: nano my_jazzy_script
2. Paste the finished command, such as the one listed above.
3. "Write-Out" the changes.
4. Exit nano.
5. At the terminal type: chmod +x my_jazzy_script (this makes the file executable).
6. To run the script type: ./my_jazzy_script
HM-1X Aid

Overview

Well, I've had the urge to hack. It's been strong for awhile now, sadly, with a more than fullt-time job and Bek in graduate school, I've just had no time. Until now! The new job I have (HMIS Database Manager) has actual vacation time. I've had almost two weeks off (combined with the Christmas holiday). The first few days were obviously spent working... But! After turning my phone and email I was able to...catch up on family time. Sigh. Then, clean house. Then, get bored. But with a few days left I actually got some hacking in.

I downloaded Visual Studio Express on my work computer a few months ago. (Shh. Don't tell the boss.) But I've not had time to write a single line of code. This holiday was a good time to learn C#!

Two weeks later I had this monster,

It is meant to be a GUI for the HM-10, HM-11, and HM-15 modules. The highlights,

HM-1X Aid Download

The source can be found,

HM-1X Aid Source

  1. It uses threads to prevent any "Sleeping." Keeps the UI healthy.
  2. IO.SerialPorts should allow a lot of USB-to-UART chips to work.
  3. Basic Terminal App features (view as ASCII, HEC, Decimal, etc.) like RealTerm and the others. BUT! With one feature I've longed for in a terminal app for so damn long. The ability to save your settings on exit. No more selecting 9600 baud for the billionth time.
  4. I've put a lot of command validity checks in the system. For example, if you were to type "AT+CON0123 S 6789012" Would not be a valid command normally, but terminal will convert the "S" to "F."
  5. I have also imbued it with a bit my understanding of the HM-1X datasheets. This is probably the greatest selling point of the program, sadly.
  6. C# is my new favorite. Don't judge me :P.

I thought I would take some time to go into the code involved in the little terminal, not for posterity, merely for my own reference.

Quick reminder, for anyone unfamiliar with my posts: I am not a profesionnal. These writings are not great. They are simply my journal towards understanding what the hell I'm doing

Object Oriented Programming

I have not posted as much lately. It is a combination of losing LMR and not having time since Bek started school. But I have definitely been writing code. The focus has been on learning OOP design. This this C# program was probably my first real object-oriented program. But I have also been writing in Swift for iOS, which is an OOP language as well.

Arlight, so what's the difference between OOP and the other thing? And why learn OOP? I thought robots used microcontollers which are much too small to handle OOP? Well, I'm learning every robot builder is already an object oriented programmer.

Difference between OOP and Procedural programming

I wont butcher others' explanations by rephrasing them. Instead, I'm going to list what helped me understand.

  1. Object-Oriented programming (Wikipedia)
  2. Object-Oriented programming (video)
  3. Procedural Programming (video)
  4. Derek Banas' Design Patterns Series (examples in Java, but it helped me the most. Got to see OOP in action.)

I believe every roboticist is both an object oriented programmer and a procedural programmer. They create objects with specific functions (PCBs, STLs, etc.), holding on to the plans so copies can be made. They instantiate those objects (print the STL, send the PCB file to OSHPark, etc). Each of these objects created usually has a specific purpose. The design of the object, a motor-controller for instance, is often only accessible by a specific input such as UART connection. Its outputs are controlled by how the inputs are digested by the motor-controller itself. The robot-builder may decide to add an accelerometer to the motor-controller by copying the design files and adding the needed accelerometer circuit (inheritance). And so forth.

It seems like a lot of the the concepts are supported by this metaphor,

  1. Abstraction
  2. Encapsulation
  3. Polymorhphism
  4. Inheritance

Objects are great. Especially when they are walking, talking, grasping robotic sort of objects. However, each roboticist must line the insides of objects with procedures that move data through in a predictable manner. This means, at some granularity, objects are filled with small runs of procedural programming. Ultimately, it takes both for roboticists, object oriented programming and procedural programming. And I argue, whether aware or not, the roboticist practices both continuously.

Moving away from the hippy-dippy stuff; for my personal development as a robot builder I will be taking time to learn both, regardless of my possibly metaphor of convenience, as they both appear as roots of computational-thinking

In application, I want to know procedural programming to be effective. Microcontrollers often have small memory sets and the code needs to move from input to output with little overhead (hmm, procedural programming is a linear style and a line is the shortest distance between two points, there's gotta be something there). But I want to know how to connect my robot to large systems, such as a Raspberry Pi, PC, or the whooooole Internet. To do this effectively I need to be able to pass data between procedural and object based programs.

Avoiding Sleep

My program is walking between the microcontroller world and the big-boy-PC world. As I stated above, at some point the HM-1X module would need to pass its data to the PC. Here in lies a dilemma best explained by a picture,

For the HM-1X Aid the data is passed through the Serial connection. Of course, as I stated above, I am using the Systems.IO.Ports.SerialPorts framework to handle the incoming serial data. A nifty little aspect of IO.Ports is it actually has the DataReceivedEvent on a separate thread (more on threads in a moment). This event is triggered by an RX interrupt on whatever USB-to- UART chip, which allows data to be handled as it is coming in.

Now, I mentioned methods for handling data probably go from procedural to object-oriented when moving upstream from a microcontroller to a PC. A USB-to-UART bridge is a perfect example. Receiving UART data for a microntroller looks like this,

int incomingByte = 0;   // for incoming serial data

void setup() {
        Serial.begin(9600);     // opens serial port, sets data rate to 9600 bps
}

void loop() {
        // send data only when you receive data:
        if (Serial.available() > 0) {
                // read the incoming byte:
                incomingByte = Serial.read();
                // say what you got:
                Serial.print("I received: ");
                Serial.println(incomingByte, DEC);
        }
}

Here, the microcontroller is looping over a if-statement to see if there is any data available in the RX buffer. Whenever the loop() finds there are data available, then it will run through some procedures on handling those data. This method works OK, your microcontroller's program is only dealing with serial data. But what happens if is supposed to handle other tasks and your microcontroller has a never-ending stream of data? Whatever code is after the if(Serial.available() > 0) will not execute, since the available serial data will never be less than 0. This is referred to as using a "blocking" serial data method. Not sure how this term was derived, but I'm guessing "blocking" comes from how the method prevents the program from doing anything else

Hmm, wouldn't be better to handle serial data "immediately" when it comes in? That's where interrupts come in.

The Serial.onReceive() is an interrupt vector which fires every time the serial data is received. The interrupt vector calls a method which copies the data received from the serial buffer into the string_buffer .

void MyFunction(){
   int i;
   int length = Serial.available();
   int string_buffer[32];   

   //copy data out of the receive buffer
   for(i = 0; i < length; i++){
      string_buffer[i] = Serial.read();
   }

   //run a string compare function, or otherwise parse the received data
   if(MySpecialStingCompare(string_buffer,"Hello Arduino")){
      Serial.println("Hello World");
   }
}

void setup(){
   Serial.begin(9600);
   Serial.onReceive(MyFunction);
}

void loop(){
   //do nothing
}

This is a non-blocking method of handling serial data. It takes advantage of a hardware level peripheral on the Atmel chips known as an interrupt vector . This particular interrupt is fired any time the RX pin receives a series of LOWs which resemble incoming data.

This method has the advantage of freeing the microcontroller to do other things in the main loop and handle data only when new data is received. This saves program from having to make a comparison every clock cycle. Also, and more importantly, it allows the microcontroller to immediately update data important to the purpose of the main process; this is critical in processes which are time sensitive, such as remote control on a quadcopter.

For example, if we wrote a radio controller for our quadcopter using a Bluetooth device which talks to an Arduino Pro Mini. If we used the blocking method the Arduino receives any data from the radio controller, like, oh I don't know, "Don't run into that tree!" the main process on the Arduino would not have this information until it gets back to the Serial.available() > 0 . Not cool if milliseconds matter.

However, if you were to write the same radio controller using non-blocking, interrupt based serial communication, then whenever you send the signal to the Bluetooth device, and that device sends it serially to the Arduino, the Arduino will basically bookmark its place in the main process and handle any data regarding its immediate crash.

Another example, what happens if your Arduino has an LCD which is meant to display the output of a temperature sensor. Yet, the temperature sensor and display are a small portion of what the Arduino is doing. If the temperature changes using the blocking methods, then the LCD will not be updated until the Arduino finishes whatever tasks and makes it back around to the if(Serial.available() > 0) . This will make your LCD's responsiveness be clunky.

Contrast this with the non-blocking method (see what I did there?). Setting up an interrupt on the temperature sensor to update the LCD whenever the temperature changes will make LCD appear responsive to temperature changes. This is how a 3D Printer handles the thousands of tasks it must complete and still keep its LCD responsive.

Good stuff.

Alright, so that's how a microcontroller handles things--even with interrupts it's still processing tasks one at a time. We can avoid the appearance of slowing the microcontroller with processing intensive tasks, like waiting on serial data to be received, but ultimately, the microcontroller is handling the tasks one at a time. So what does this have to do with my C# program?

Let's take a look at C#'s version of 'Serial.onReceive()'

string InputData = "";

// Read Data.
private void DataReceivedHandler(object sender, SerialDataReceivedEventArgs e)
{
    // Gets incoming data from open port and passes it to a handler.
    InputData = ComPort.ReadExisting();
    data = "";
    data = InputData;
}

This is probably the simplest version of a DataReceivedHandler() using C#. In short, it fires whenever data is received; so it's non-blocking. The method, as I have it written, simply grabs the data from the interrupt buffer using ComPort.ReadExisting() and shoves it into the inputData . Pretty simple, right? Being candid, I believe it is one reason so many poo-poo using IO.Ports.SerialPort framework. But how is IO.Ports.SerialPorts different than the Arduino HAL Serial.onReceive() ? Hmm, perhaps I should have used a more credible comparison.

But coming back to the complex command. What if a computer sends a command to the microcontroller and expects a response? It's going to take some time for the microcontroller to reply. In the meantime, what does the PC do? It could run off to do other tasks and wait for the onReceive to fire. But, what if one of those tasks requires some information from microcontroller. In short, the microcontroller is holding up the show and little can be done but wait.

We know the PC is going to need to wait. Coming back to the blocking and non-blocking methods we looked at on microntroller, the only option really available in C# is the non-blocking, which is good because it's our favorite. But is it really enough?

If our PC program is serial-data centric, meaning the PC's processes are dependent on the microcontrollers data and vice-versa, then simply using the non-blocking helps us little. The PC could move from waiting on serial data to painting a label on the UI, but what if the text in that label is meant to be data from the microcontroller? Regardless of how we look at at it, it seems like it would be best for the sake of our program to throttle the PC to the microcontroller.

But exactly how much slower would our program go?

Let's say you have the following:

Device Speed
Arduino Uno (Atmega328P) 16mhz
PC 2.2ghz
UART-to-USB 9600bps

Let's find the common denominator and compare.

Arduino:

16mhz = 16 * 1,000,000 = 16,000,000
1 to 2 clock cycles for each instruction
1 to 2 / 16,000,000 = 62.5 to 125 nano-seconds  
(Who said Arduinos were slow? Pfft)

PC:

2.2ghz = 2.2 * 11,000,000,000 = 2,200,000,000
1 to 2 clock cycles for each instruction
1 to 2 / 2,200,000,000 = .45456 to .90900 nano-seconds
(Oh, I guess it's slow to the PC.)

UART-to-USB:

bytes x bits_per_character / bits_per_second
1 byte x 10 / 9600
10 / 9600 = 10416666.66 nano-seconds (~10 milliseconds)

Remember, this is for one byte, so if we send the string, "Mario, your princess is in another castle" (41 x chars) it will take approximately half a second (41 x 10 = 410 milliseconds = ~0.5 second), which will definitely be noticeable if it is meant to be displayed. Hmm, I guess we identified the hold up, eh? This means even if we were limited to the Arduino speed we would probably still get a smooth UI--without it appearing clunky. But, limited to the UART-to-USB; well, crap. This affirms my speculation, we will need to throttle the PC, the UI, the microcontroller, pretty much to the whole system to be respective of the sluggishness of the UART-to-USB.

Alright, if I've sold you on the program we are ready to ask, "What's the best way to throttle the program?" Let me jump how I did this in C#.

The main difference between C# and Arduino's data receive methods is the C# method takes place on a separate thread. Now days most PCs have multiple cores and in object oriented programming these are harnessed through threading . Most microcontrollers have one core (yes, yes, except the Parrallax), so threading is not common on a microcontroller. Now, I'm going to dare to oversimplify what little understanding I have regarding threads. Since I came from the hardware side the way I think of threading is having two Arduinos connected by I2C. One of the Arduinos is the master and the other the slave. Whenever the master Arduino gets data from the USB-to-UART there is code on the master which sends half the data to the slave Arduino via I2C, with some instructions it should do some particular tasks with the data and send the results back to the master Arduino. While the slave works on its half of the data, the master is working on the other half. If the slave gets done first (there is nothing dictating which order they finish in; they are asynchronous) the master has an interrupt on the I2C, it sees the slave is done, and tells him to wait to send its results. After the master finishes, it sends a request for the completed data from the slave. Lastly, if the master finishes first, then it waits with a dirty-look only 8-bit ICs can give while the slave finishes its crunching. Ultimately, when all the data is crunched the main processor does something with it. Each Arduino here would be a processor and the tasks running on them would be a thread.

Inside the PC we have something similar going on, but instead of two Arduninos you would have two processors on the same die.

I like to think of a thread as a separate process within our system. Of course, we can't call the second process, "main process." We've already got one of those. And computers don't like ambiguity. Instead, let's get creative and call the second process something wild, fun, and bizarre! Like..."second process."

Let me to try and explain how this is different than the Arduino HAL. In C# the second process is pretty much like the main process. With one grand honking exception: The user interface (UI) runs on the main process and cannot be updated by any other process. This makes perfect sense; you wouldn't want half a button to show on your UI, right? Instead, a protocol saving data in a space both processes can access it and a flag to look in the shared space when updated. This is like the old snail-mail mailbox where the flag is raised when you want the post-person to look for an epistel.

Bringing it back to my code. The HM-1X's serial DataReceivedEvent is on one process and my UI is on another. This means, when my program gets data serially then it puts that data in the shared space and lets the main process know data has been received.

Those of you who are probably sharper than me will notice an issue similar to the Arduino and its LCD. If the data coming in and the UI are working out of sync what happens if a user does something like continually hit the Send on a command without waiting for a serial response to be received. The best case scenario is we got an "OK" for every time the command was sent. However, if it is a more complicated command which requires a back-and-forth between the microcontroller and the PC, well, big problems. It would be like a sloth and a rabbit trying to have a conversation . Those of you from the Arduino world know the common (however, I'll argue poor) answer to this dilemma: delay() .

The delay() in the Arduino basically tells the microcontroller to do nothing for however long you tell it. After waiting the Arduino can then check to see if there is an answer waiting for it. There are two main reasons this isn't diserable. But let's take a look at this delay setup in C#.

//Write Data
public void WriteData(string dataToWrite)
{
  ComPort.Write(dataToWrite);
  *System.Threading.Thread.Sleep(5000);*
}

The above code will write data to the serialport and will sleep for 5 seconds after. This System.Threading.Thread.Sleep() call will actually puts the main thread to sleep. This means all of the UI will become non-responsive and anything which might happen on the main thread will be blocked. This is very similar to our first Arduino code set, but instead of receiving data, we are writing it.

The intention of this solution is to send a command to the UART-to-USB and wait for a response. A couple of problems,

  1. The main thread is shut down while waiting.
  2. Response time must be predetermined.

Now, the response time can be taken care of with better code handling it. However, the "frozen" UI posed an issue. I tried to keep it pretty simple by removing the System.Threading.Thread.Sleep() .

//Write Data
public void WriteData(string dataToWrite)
{
  ComPort.Write(dataToWrite);
  DisableUI();
}

With this code the WriteMethod() is called all most of the non-critical UI elements are disabled. This gives the user the impression he or she needs to wait, without making the program appear frozen. This worked great. Not only was my RX method interrupt driven, it was on a whole different thread. There were no worries about losing important data received from the USB-to-UART. Oh, but wait, the UI never was re-enabled. Hmm.

No problem. I added a method to our DataReceivedHandler() to re-enable the UI

string InputData = "";

// Read Data.
private void DataReceivedHandler(object sender, SerialDataReceivedEventArgs e)
{
    // Gets incoming data from open port and passes it to a handler.
    InputData = ComPort.ReadExisting();
    data = "";
    data = InputData;
    enableUI();
}

This worked great! Oh, but wait, if there was a problem and a response was never received then the UI was never re-enabled. No worries, let's add a timeout feature.

//Write Data
public void WriteData(string dataToWrite)
{
  ComPort.Write(dataToWrite);
  DisableUI();
  setResponseTimeout(500);
}

// Read Data.
private void DataReceivedHandler(object sender, SerialDataReceivedEventArgs e)
{
    // Gets incoming data from open port and passes it to a handler.
    InputData = ComPort.ReadExisting();
    data = "";
    data = InputData;
    enableUI();
    // Let's disable the timer since we didn't use it.
    HM1Xtimer.Enabled = false;
}


// The consumer interface for the response timer.
public void setResponseTimeout(int responseTime)
{
    responseTimeout = responseTime;
}

// Creates the response timers and attaches the elapse method.
private void HM1XCallbackSetTimer(int milliseconds)
{
    // Create a timer
    HM1Xtimer = new System.Timers.Timer(milliseconds);
    // Hook up the Elapsed event for the timer.
    HM1Xtimer.Elapsed += hm1xCommandTimedCallback;
    HM1Xtimer.AutoReset = false;
    HM1Xtimer.Enabled = true;
}

// This event is fired if the response timer elapses.
private void hm1xCommandTimedCallback(Object source, EventArgs e)
{
    if (data == "")
    {
        waitingOn = hm1xConstants.hm1xEnumCommands.ERROR;
    }
}

Yay! That code is darn clever, right? Let's compile, run it, and celeb...son-of-a-B! It wouldn't compile.

The problem is with the enableUI() call in the DataReceivedHandler() method. It seems the DataReceivedHandler() is actually taking place on a separate thread from the main thread, and the main thread is where the UI is being maintained. This is where the good-ole-Ghostbusters adage is important to recall: Don't cross the streams! EVER! Staying away from explaining what I don't understand, I'll simply say: Don't cross thread. One thread should not be updating what another thread is working on. Instead, information from one thread should be set down and the other thread notified it is ready.

These metaphors are nice and all, but how do we implement a thread friendly solution?

//Write Data
public void WriteData(string dataToWrite)
{
  ComPort.Write(dataToWrite);
  DisableUI();
  setResponseTimeout(500);
}

// Read Data.
private void DataReceivedHandler(object sender, SerialDataReceivedEventArgs e)
{
    // Gets incoming data from open port and passes it to a handler.
    InputData = ComPort.ReadExisting();
    data = "";
    data = InputData;
    enableUI();
    // Let's disable the timer since we didn't use it.
    HM1Xtimer.Enabled = false;

    // Pass data to main thread.
    gotData(sender, data)
}

....

// RX event handler triggered by SerialPort.  Hands off data quick.  
// If you try to update UI from this method, threads tangel.
public void gotData(object sender, string data)
{
    // Incoming data is on another thread UI cannot be updated without crashing.
    this.BeginInvoke(new SetTextCallback(SetText), new object[] { data });
}

// This method happens on main thread.
public void(string text){
  txbMainDisplay.Text = text;
}

This is pretty complex and I poorly understand it. In fact, I wrote this whole article with the hope it would help me understand this part. Here's what I think is going on:

We create an event which will fire every time the USB-to-UART, DataReceivedHandler() in this method there is a call to gotData() . In the gotData() call we use the BeginInvoke method. The BeginInvoke then executes SetText() method on the main thread. We know 'SetText' is being called from the main thread because of the word this in the command. This is a place holders for the object of origination. It looks complicated, but really, the thread controlling the UART-to-USB is simply calling a method on the main thread whenever it has received data, and passing it the data it received.

And that's it. Using this method we can enable and disable the UI every time data is sent or received.

A few more notes,

  1. This method doesn't need to be used for disabling the UI. The WriteData() is actually executed on the main thread. It is the DataReceivedEvent() which is executed on a different thread.
  2. This process gets a little more complicated when you are dealing with multiple objects, which is what I did. In my code SerialPortsExtended object handles all the data receiving and sending of data, so delegates are used to pass data back-and-forth between threads and objects.

That's about it. Let me know what questions I can try to answer.

iOS Serial Manager

Apple doesn't like robots.

It's strange, since they have some great hardware and some excellent software.  But alas, trying to get a robot to connect to any iOS product is like asking Steve Jobs to come to dinner; you'll get your hopes up, but, alas, he's dead.  So, short of a necromancy and some Frebreeze, it's not going to happen.

But, I've found the backdoor to getting your iOS device to help your robot, and my friend, I'm going to give you the key.

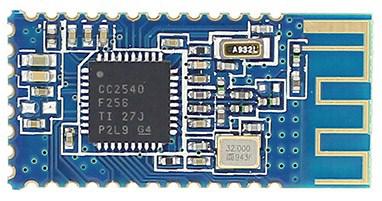
Those little HM-10 Bluetooth Low Energy PCBs that I've written about for so long.  Those combined with a iOS developer license ($99 a year) and you can get your robot to do all sorts of neat tricks using your iOS device for higher functions.

To catch you up on the HM-10,

Ok.  Now, for the purpose of this post.  I have created some breakout boards that'll let you interface your microcontroller with Bluetooth, which will let you access your iOS device from your robot, but, not easily.

The CoreBluetooth API is a little abstract and cumbersome.  I've found myself writing the same code over-and-over as I try to get my robot to do cool tricks.  I think the closest I've come to something neat has been using my iOS device (iPhone 4S) as a robot radio controller.  Well, I decided I needed to start using the DRY method when I programmed.  It's funny. I think I've been writing in Swift since the first day you could compile in it, but I have been treating my writing as procedural programming .  It was mainly out of ignorance, since I've always programmed procedurally, and when I started in languages which were meant to be written as object-oriented (OO) languages I never took the time to learn the differences, nor how I should write.  It has made me very frustrated.

But after some advice form Mr. Bdk6 I took some time to try and understand the purpose of OOP.  Really, all I did was watch this video:

It was seriously enlightening.  Maybe I was primed for a thought-shift (for you 90's kids, "A paradigm shift.")  But the concepts of a encapsulation and message-passing were are forcefully explicit to a robot rebel.  A robot is self-contained system.  It has internal and external behaviors.  It has some information it shares with others; the same as message passing.  But other parts of its memory reserved for the robot only.  Object-oriented programming is something roboticist cannot help but do.

All right, to the point of this article.

I am writing a CoreBluetooth handling class in Swift.  It is meant to take care of a lot of the boring responsibilities when communicating to a serial BLE device from an iOS device.  Things discovering services or characteristics, setting up buffers, handling autoreconnect on disconnect, or perhaps mapping the -20 to 127 RSSI on to a green to red color.  In short, all the boring stuff you must do to get your HM-10/11 to talk to an iOS and help a robot brother out, well, I hope this class will make it easy.  It should be noted, this Class is written in Swit 2.0, tested on an iPhone 6 with iOS 9.0.2 and 9.1.

Let's jump in,

The projects can be found here:

The projects is an app meant for a iPhone.  It is simple.  It has one View which is blank, but has a "Scan" button which will provide a table list of all BLE devices in range.

The handler Class is here,

The following will be the explanation of the class API.

**This is a Work-in-Progress! **

Initialize an instance of the bleSerialManager Class

Before you can do anything with the class you must create an instance,

//
//  ViewController.swift
//  HM10Terminal2
//
//  Created by Casey Brittain on 8/22/15.
//  Copyright © 2015 Honeysuckle Hardware. All rights reserved.
//

import UIKit
import CoreBluetooth

let hm10serialManager = bleSerialManager()

class ViewController: UIViewController, bleSerialDelegate {

Here we create an immutable instance of the bleSerialManager , we call it hm10serialManager .  This initializes a lot of properties you will need to handle the BLE devices discovered.  It _also _starts searching for advertising BLE devices.

Also, notice I initialized this instance before any other classes.  This is on purpose.  I want my hm10serialManager instance to be visible to all other Swift files in the projects.  And a benefit of Swift design is such a declaration will do that, make your instance visible to all files.  After my bleSerialManager instance is initialized _then _ our ViewController class is initialized.  Notice, any Class which is meant to access the instance should include the bleSerialDelegate .  This requires the ViewController class to conform to the protocol of our instance.  Currently, there are no required methods, but there are several optional methods, which I will detail later, but for now they are named:

optional func searchTimerExpired()
optional func deviceStatusChanged()
optional func connectedToDevice()

They are meant to be call back functions.

Set your bleSerialDelegate

After you initialize your bleSerialManager instance you must set the delegate in every class that will be receiving data from CoreBluetooth .  This should be accomplished in the viewWillAppear, not viewDidLoad.  This will assure everytime the view is visible it is ready for the data coming from the Bluetooth device.

class ViewController: UIViewController, bleSerialDelegate {

    override func viewDidLoad() {
        super.viewDidLoad()
        // Do any additional setup after loading the view, typically from a nib.
    }

    override func viewWillAppear(animated: Bool) {
        hm10serialManager.delegate = self
    }

Define Device Behavior

In all honesty, a lot of what has been done before is baked into the CoreBluetooth API, but here is where I start bringing added value.

setAutomaticReconnectOnDisconnect(on: Bool, tries: Int, timeBetweenTries: Double)

This allows you to set whether you want your iOS device (usually the acting as the Master / Central) to automatically reconnect to the laster peripheral it was connected.  It takes three parameters.  The first, on: Bool , sets whether you want a reconnect behavior.  Then, tries: Int tells the instance how many times you want to try to reconnect to the last peripheral before it gives up.  And timeBetweenTries: Double is the amount of time in seconds you would like wait before your iOS devices tries to reconnect.

setRetryConnectAfterFail(on: Bool, tries: Int, timeBetweenTries: Double)

Much like the afore stated function, this function defines what actions will be taken if your Central device is unable to connect to a device you tell it to connect.  To be specific, this function would execute if you tell your Central (iOS device) to connect to a peripheral, it begins to the steps intended for establishing connection, but is disrupted sometime before it establishes solid connection.

setMutipleConnections(numberOfDevices: Int)

Here, you tell the iOS device to limit its number of connected devices.  It should be noted, this function does not look as how many connections are possible, but rather, how many connection you would like to limit your program to attempt.

I found this function helpful since I had several HM-10 devices I was trying to connect.  Strangely, the HM-10 when in peripheral role can connect to a central role which has other connections established, but if the HM-10 is in central role it can only handle one connection.  Regardless, this is to prevent you program from wasting time attempting establishing a connection which is not needed.

A few notes, none of these behavior functions are required to be called.  The bleSerialManager will work proper without the calls; it defaults to the following,

Default:

automaticReconnectOnDisconnect(on: true, tries: 3, timeBetweenTries: 1.0)
setRetryConnectAfterFail(on: true, tries: 3, timeBetweenTries: 1.0)
setMutipleConnections(numberOfDevices: 1)

Search for Devices

After we have setup it's time to find some devices.

// Begin search automatically.
hm10serialManager.search(1.0)

This manually initiates the Central Manager search for peripherals.  If it discovers a peripheral it logs its information (mostly) in a Swift dictionary .  Each dictionary's values are keyed by the NSUUID discovered for a respective device.  Here are the types of data collected by the Central Manager,

// Dictionaries for device details on discovered devices.
private var discoveredDeviceList: Dictionary<NSUUID, CBPeripheral>
private var discoveredDeviceListRSSI: Dictionary<NSUUID, NSNumber>
private var discoveredDeviceListUUIDString: Dictionary<NSUUID, String>
private var discoveredDeviceListNameString: Dictionary<NSUUID, String>
private var discoveredDeviceListAdvertisementData: Dictionary<NSUUID, [String : AnyObject]>

Notice, these fields are all private (i.e., none are made into properties ).  This is purposeful and doesn't necessarily comply with suggested Swift design.  I chose to follow the strict OOP design pattern of only exposing fields through methods.  That is, each of the properties other instances will have access to will be done so through a getter method.

Optional Call Back Method #1

Included in the bleSerialManager are several optional methods meant to serve as callbacks in your main instance.  The searchTimerExpired() method is called when the amount of search time passed to the search() has expired. Note, the method is only called if it is unwrapped, which means you must declare the method in your main class for it to fire.  These methods are only attached if you include the bleSerialDelegate.

For example,

//  Copyright © 2015 Honeysuckle Hardware. All rights reserved.
//

import UIKit
import CoreBluetooth

class mainViewController: UITableViewController, bleSerialDelegate {

    func searchTimerExpired() {
         // Only called at the end of search
         print("Your search for peripheral devices is over!")
    }

....

Again , if the searchTimerExpired method is not declared and you have not conformed to the bleSerialManager protocol by attaching the bleSerialDelegate this method will never fire.

Get Discovered Devices' Information

Let's go over the info which has been collected on our discovered devices.

discoveredDeviceList: Dictionary<NSUUID, CBPeripheral>

This field contains dictionary items for each device discovered.  The items are a CBPeripheral instance.  Each instance contains most of the info you would like to know about the device.  In fact, the following dictionaries are simply this info broken out into separate dictionaries for ease of handling.

As I stated earlier, you cannot access bleSerialManager properties directly.  Instead, there is a getter method which will allow you get at the stored list.

let myDiscoveredPeripheralDictioanry = hm10serialManager.getdiscoveredDeviceDictionary()

This will retrieve a dictionary in the form of Dictionary .  It really isn't my intention for this to be used often.  In fact, if you find yourself using it, please email me.  It means I didn't do a good job at making this class as versatile and easy as intended.  Nevertheless, it's there just in case.

discoveredDeviceListRSSI: Dictionary<NSUUID, NSNumber>

This is one of my favorite attributes of BLE, the radio signal strength indicator.  It can be used for all sorts of neat tricks, especially for robots.  For example, let's say you put an HM-10 on a quadcopter and another on a controller. You've got a quadcopter controlled through Bluetooth.  But you start flying it away from you at high-speeds, yanno, to test it out.  Well, all of a sudden your HM-10s lose connection due to distance and your quadcopter flies off to oblivion, right?  Nope!  You have the quadcopter checking the RSSI as part of its flight procedures and if the RSSI is too great, then it will simply stop its existing flight and lower itself gently to the ground.  Cool, right?

Of course, there are two different points which you can access the RSSI, when the device has been discovered but not connected, and then when the device is connected.  How current the RSSI for discovered devices is dependent on several factors, but primarily, how often your central device is scanning for advertised packages and how often a peripheral is advertising.  It is usually somewhere between 200ms and 1500ms.

This one feature allows you to do neat stuff like this,

Video

Ok.  It's a neat feature, how do we get to it?

func getDeviceRSSI(deviceOfInterest: NSUUID)->Int()

This method takes a NSUUID object as a key, looks through the discovered device list, and returns the RSSI indicator as an integer.  It should be called something like this,

let myDeviceRSSI = hm10serialManager.getDeviceRSSI(myDeviceNSUUID)

Note, the RSSI value is updated every time the search method is called.

Another fun RSSI function is,

func getSortedArraysBasedOnRSSI()-> (nsuuids: Array<NSUUID>, rssies: Array<NSNumber>)

This function takes no variables and returns two objects.  One is is an array of discovered NSUUIDs in ascending order of their RSSI (i.e., the closer they are the closer they are to 0-indexed).  The other is an array of NSNumbers representing the RSSI values of the corresponding NSUUID in the NSUUID array.

This method is meant for you to do neat things like shown in the image.  Here, I used an range mapping function to map the RSSI values onto a simple color scheme (red = -127 and green = -20).

Eventually, I will write a function to take the RSSI and return a UIColor value.

func getDeviceName(deviceOfInterest: NSUUID)-> String

A fairly straight forward call.  It is meant to provide you quick access to a particular discovered device's name, as a string.  For example,

let deviceName = getDeviceName(interestingDeviceNSUUID)
print("The name of my the interesting device is: " + deviceName)

Along with this,

func getDeviceUUIDAsString(deviceOfInterest: NSUUID)->String

This is a convenience method.  It is meant quickly get you a NSUUID as String.

Discovered Peripheral Advertisement Data

I'm still experimenting with this section -- I'll have it up soon.

Get Connected

After a search it's time to connect to a particular device.

func connectToDevice(deviceNSUUID: NSUUID) -> Bool

When connectoToDevice() is called it takes one argument, the NSUUID of the discovered device you want to connect.  It will return true if the method is able to connect to the chosen device.  It will return false if you are already connected to that particular device, or if you have reached the maximum number of connected devices, or if the device was not found.

connectToDevice() Example:

if(hm10serialManager.connectToDevice(myDeviceNSUUID)){
    print("Connected!")
} else {
    print("Was unable to connect")
}

This should attempt to connect to whatever device myDeviceNSUUID corresponds.  Aftere connecting to your device the bleSerialManager takes care of discovering the device's services, characteristics, and characteristics descriptors.  This can then be accessed with the following method calls.

Huh, haven't written these methods yet

Optional Call Back Method #2

optional func connectedToDevice()

The connectedToDevice() method is a call-back method which is part of the bleSerialManager protocol.  It is called whenever the bleSerialManager has successfully connected to a device. Note, the method is only called if it is unwrapped, which means you must declare the method in your main class.  You must also conform to the bleSerialManager protocol.  This method is meant to update an UI with connection status.  Or do any house-cleaning after connection has been confirmed.

10-05-16: Ok.  Got tired.  I'll write some more tomorrow.

Lab Controller PCB

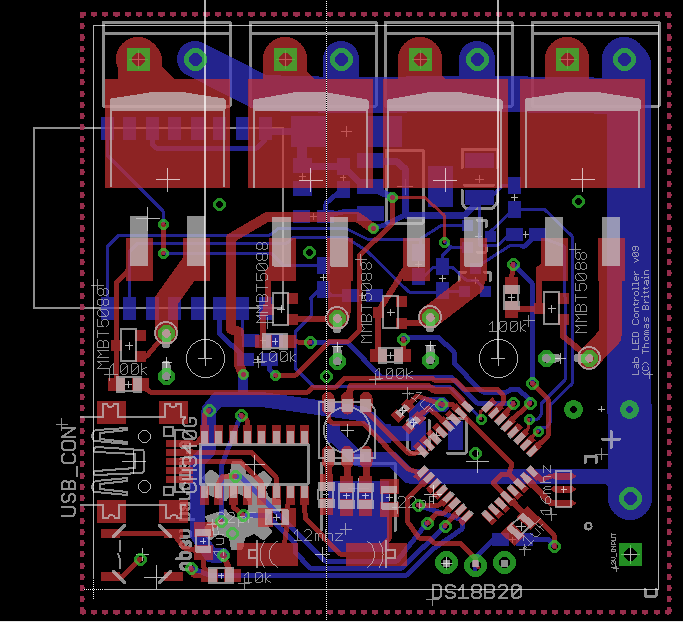
A little lab controller PCB I'm working on.  It centers around four high-power constant current circuits meant to be driven by an Atmega328's PWM.

I hate working on anything mechanical in dim light; comes from dropping parts down under the engine when working on cars.  I'm also pretty particular about my type of light.  The "Cool White" or CFLs really bother me. I feel like I'm a bug headed towards a bug-zapper.

I have a few design goals,

  1. Warm white is the way to go.  I'm shooting for four 1k lumen warm-white LEDs at 12v at ~1A.
  2. I've a plug for an Arduino Pro Mini (APM).  It's hard to fight the APM when it comes to small footprint and versatility, oh, and price.  They are super cheap if you buy them on eBay.
  3. I want to make a BLE serial interface using my HM-10.  This would allow me to control my LEDs using my iOS devices.  A few supporting posts,
    1. iOS to µC Using an HM-1X
    2. HM-10
    3. Advanced(ish) HM-10
  4. The A4 and A5 pins are broken out, this is meant to make the boards chainable using I2C.

The heart of the circuit is around a high-power constant current driver.  I ripped the circuit from this fellows, somewhat, excellent post:

Here is my go at adding the circuit to a controller board,

PDF

Regarding how the circuit it works....black magic.  Well, at least, that's how I understand it.  I tried reading this excellent article but ended up deciding it was attempting to reason away what was obviously black magic.

I originally designed a minimal PCB to hold the circuit.  I was hoping a small little board would allow me to attach it wherever needed,

5V regulator

Here's where it gets fun.  See that red alligator clip so neatly gripping the leg of the 5V regulator, well, just keep it in mind when looking at our next exhibit.

Gross and note safe, right? C'est la vie, it has been working for a about a year this way.

BOM Time!

  1. 4 x 2N5088
  2. 4 x FQP40N06L
  3. 4 x 0.47 ohm resistor or 0.75ohm.
  4. 4 x 12v, 900mA (0.47ohm) or 12v, 600m A (0.75ohm)
  5. 1 x Arduino Pro Mini
  6. 1 x Big (size TBD) Electrolytic Capacitor
  7. 5 x 2-Pin Plug-in Screw Terminal Block Connector 5mm Pitch Panel PCB Mount
  8. 2 x 4.7k ohm 0805 resistor
  9. 4 x 10k ohm 0805 resistor
  10. 1 x 470 ohm 0805 resistor
  11. 2 x 330 ohm 0805 resistor
  12. 1 x 50-50 SMD RGB LED
  13. 1 x 5V SMD linear regulator MC7805CD2TR4 D2PAK

Anyway, the boards are at the fabricator, so I'll report back when I've populated and test them.  I've already got ideas for iteration v2.

Command Line Menu in C

Originally posted on www.letsmakerobots.com

Nostalgia

I wanted to post this simply because it working on it brought my a dry nostalgic joy. When I was young, 8-9, my parents got a old computer. All I remember was its screen was orange and black; having a Hercules graphics card . I quickly learned to get around from the command prompt. But I was always thrilled to run into menu driven program. It was like going to a fancy restaurant of abstractness. Anyway, when I wanted my code to slow down a bit and branch directions based upon user input, a command menu was a natural choice.

A Break from the LPC1114 Uploader

I thought I'd take some time away from coding my LPC1114 Uploader and verbally process a few things I've learned. As always, feel free to critique any of it; it'll only serve to make my code more robust in the end.

This post will be a series of post leading up to the large post I'll make on writing the uploader. All posts will rely on the GCC compiler.

Setting Up the GCC Compiler

I setup a C environment as basic I could. There may be easier ways to go about this, but I wanted to use GCC to compile.

To setup the environment:

1. I downloaded and setup MinGW32 .

2. I added these includes to make the code go.

#include <stdio.h>
#include <stdarg.h>
#include <stdlib.h>
#include <windows.h>
#include <windef.h>
#include <winnt.h>
#include <winbase.h>
#include <string.h>
#include <math.h>
#include <stdbool.h>
#include <stdint.h>
#include <sys/time.h>

I used this line to build it:

$ gcc -o main main.c

As for editing, I've really grown to love Sublime Text 2 .

If you have issues , make sure directory containing your files is in your PATH environment variable (I go over how to add the directory to your environment variables in this post ).

How to Write a Command Line Menu

There really isn't much to the code here. Basically, it it prints out the options you want your user to know. Then, it starts a do-while loop until the user selects an appropriate number.

Hmm. Not really much to it, not sure it deserves its own post. But what the hell.

void main_menu()
{
    char char_choice[3];
    int int_choice = 0;

    do
    {
        system("cls");
        startScreen();
        printf("\n");
        printf("Vorpal Hoff -- Main Menu: \n\n");
        printf("1. Quick Connect\n");
        printf("2. FTDI Menu\n");
        printf("3. Open HM-1X Menu\n");
        printf("4. Connect LPC\n");
        printf("5. Program Chip\n");
        printf("6. Erase LPC\n");
        printf("7. Decode UUE debug file\n");
        printf("8. Parse hex-file and write to debug.hex\n");
        printf("9. Exit\n");

        scanf("%s", char_choice);
        int_choice = atoi(char_choice);

        switch (int_choice)
        {
            case 1:
                quick_connect();
                break;
            case 2:
                ftdi_menu();
                break;
            case 3:
                                HM_1X_main_menu();
                break;
            case 4:
                // Not yet used.
                break;
            case 5:
                program_chip(file_name);
                    break;
            case 6:
                // Not yet used.
                   break;
            case 8:
                debug_hex_file(file_name);
                    break;
            case 9:
                shut_down();
                    break;
            default:printf("Wrong choice. Enter Again");
                    break;
        }
    }while(int_choice !=99);
}

6 and 54: This is the beginning and the end of the do-while loop . Basically, the do-while is a fancy loop which says to do everything in the brackets over and over, until the boolean variable is met (line 54).

The do-while loop if the equivalent in effect to the follow code,

while (true) {
   do_work();
   if (!condition) break;
}
  • 8: Clears the screen. This removes the command prompt; giving a clean slate to paint our menu.
  • 9: I put a function in to paint my menu header. This allows me easily change the header for a menu. It also makes the menu code easier to read.
  • 12-20: We print the menu options for the user.
  • 22: scanf is a tricky command. It pauses and waits for the user to input followed by 'n'. It takes a variable respective to the data type you want to get from the user. Here, we are hoping the user enters one or two numbers. These are put into the string provided.
  • 23: We use the atoi function to take a string and turn it into an integer. This value we store in the integer int_choice .
  • 25: The beginning of the switch-statement which does the real work for us. It test the int_choice value you against predefined values (1-9 here). If the one of the values is equal, it executes the code found there before breaking from the switch-statement.
  • 51: If a number besides 1-9 is entered the default will be true. Let's gripe at the user for selecting a bad number.

And that's it. You simply put the functions you want to be called in the appropriate values in the switch-statement. Because of the do-while loop, once a selection has been made and executed, the menu will be displayed again.

You can also make limit a selection to showing by doing something like the following,

bool connected_flag = false;
    do
    {
        system("cls");
        printf("FTDI Menu: ");
        printf("1. Quick Connect\n");
        printf("2. Device List\n");
        if (got_list == true) // Only display option if devices list.
        {
        printf("3. Connect Device\n");
        }

        printf("9. Main Menu\n");


        // Get user choice.
        scanf("%s", char_choice);

        // Convert string to int for switch statement.
        int_choice = atoi(char_choice);

        switch (int_choice)
        {
            case 1:
                quick_connect();
                baud_rate = 115200;
                connected_flag = true;
            case 2:
                got_list = get_device_list();
                break;
            case 3:
                if (got_list == true) // Only display option if devices listed.
                {
                    connected_flag = connect_device(&baud_rate);
                }
                break;
            case 9:
                main_menu();
                break;
            default:printf("""Bad choice. Hot glue!""");
                break;
        }
    }while(int_choice !=99);
}

Here, option "3. Connect Device" doesn't show until option "2. Device List" is run. On line 34 the connect_device() function sets the connected_flag variable to true if the function was successful. Then, after the break is hit and the menu is repainted the option "3. Connect Device" will show. Also, '3' will become a valid user selection.

A Submenu

One last note. If you want to make a sub-menu, you simply use the same code as above, just take the do-while loop out. This states you only want the sub-menu to run once, the return to the main menu.

FTDI in C

Originally posted on www.letsmakerobots.com

Part of my C journal -- Writing an LPC1114 bootloader

Setting Up the GCC Compiler

I setup a C environment as basic I could. There may be easier ways to go about this, but I wanted to use GCC to compile.

To setup the environment:

1. I downloaded and setup MinGW32 .

2. I then downloaded FTD2XX libraries . This included the ftd2xx.h file and ftd2xx.lib .

3. I then stole the test code from Hack-a-Day's article on bitbanging with the FTDI .

4. I modified the code as they suggested by including, in this order, the Windows compatibility files:

#include <stdio.h>
#include <stdarg.h>
#include <stdlib.h>
#include <windows.h>
#include <windef.h>
#include <winnt.h>
#include <winbase.h>
#include <string.h>
#include <math.h>
#include <stdbool.h>
#include <stdint.h>
#include "ftd2xx.h"
#include <sys/time.h>

I used this line to build it:

$ gcc -o main main.c -L./ -lftd2xx

You must have both the ftd2xx.h and ftd2xx.lib in the same directory as you attempt to build.

As for editing, I've really grown to love Sublime Text 2 .

If you have issues , make sure directory containing your files is in your PATH environment variable (I go over how to add the directory to your environment variables in this post ).

D2XX -- FTDI Support

The FTDI chips are highly controversial chips in the embedded world. I will not begin the debate on their efficacy. I chose this particular serializer since I felt most roboticist would have at least one, making software released using the chips reach a greater range of people on the spectrum of hobbyist to professional.

Also, the supporting tools went well with one of the design goals for this project: Simplicity. I wanted to keep the code as near to machine code as I could easily write. Bdk6 described C to me as, "A high-level assembly language."

There are two basic interfaces for the FTDI chips

  1. Virtual COM port.
  2. FTD2XX.DLL

I will be using the DLL. This is what the " -L./ -lftd2xx" part of our compile command is referring. It is including the ftd2xx library found in working directory.

The D2XX library is pretty nifty. It provides a collections of C++ functions to interact with the FTDI chip, and thereby, anything speaking UART.

A full list of the commands and C code examples may be found in the,

One last caveat regarding the reason I selected using the D2XX libraries instead of using the chip as a virtual COM port. I wanted as much control over the metal of the chip is possible. Originally, I had set out to write a downloader that'd use the already existing Sparkfun FTDI breakout , meant to program the Arduino Pro Mini and LilyPad, as no-need-to-modify programmer for my LPC1114 board. To accomplish this, I needed bit level control over all of the pins of the FTDI chip, which the D2XX has, but the COM port does not. Therefore, it was the deciding factor for using the D2XX library. Plus, I didn't know the difference when I started, so that whole explanation was baloney . But, even if I realized it post-fact, it was the reason I didn't switch to COM port.

Setup Menu

I found the easiest way to work with the D2XX is to setup a menu.

YOUR_CODE.C

I'm writing this article as if someone were importing my FTDI_HELPER module to use in their code. A few important notes: First, the variables we will use are actually declared in YOUR_CODE.C. They are global variables. We then redeclare them as extern variables in the FTDI_HELPER.H. This tells the compiler it's going to be using several global variables, but they were actually declared in the YOUR_CODE.C. This allows the FTDI_HELPER module to setup the FTDI device, but your code will be able to act on all the major variables, such as the RxBuffer, ftHandle, etc.

YOUR_CODE.C

FT_DEVICE_LIST_INFO_NODE *devInfo;
bool FTDI_open_flag;


uint8_t RawRxBuffer[2048];


FT_STATUS ftSvtatus;
DWORD EventDWord;
DWORD TxBytes;
DWORD BytesWritten;
DWORD RxBytes;
DWORD BytesReceived;
  • 3: A pointer variable which will store all the connected device information.
  • 4: A flag set whenever we actually connect to an FTDI device. This allows your program to detect the connection.
  • 7: An RX buffer. It will fill automatically when we receive data. You may adjust the size if needed; I think the FTDI chip only sends 20 bytes at time, but I was lazy.
  • 10: Variable to store boolean flag for whether an D2XX command was successful.
  • 12: Used to store bytes to be sent.
  • 13: BytesWritten is used to store how many bytes were actually written by the FT_Write command.
  • 14: RxBytes stores how many bytes are waiting to be read.
  • 15: BytesReceived is used by FT_Read to store how many bytes have been read out of the RX buffer.

FTDI_HELPER.H

FTDI_HELPER.H

#ifndef FTDI_HELPER
#define FTDI_HELPER

#include <stdio.h>
#include <stdarg.h>
#include <stdlib.h>
#include <windows.h>
#include <windef.h>
#include <winnt.h>
#include <winbase.h>
#include <string.h>
#include <math.h>
#include <stdbool.h>
#include <stdint.h>
#include "ftd2xx.h"
#include <sys/time.h>

extern uint8_t ParsedRxBuffer[2048];
extern uint8_t RawRxBuffer[2048];

extern FT_HANDLE handle;
extern FT_Status ftStatus;
extern DWORD EventDWord;
extern DWORD TxBytes;
extern DWORD BytesWritten;
extern DWORD RxBytes;
extern DWORD BytesReceived;

int connected_device_num;

// Lists FTDI commands.
void ftdi_menu();

void quick_connect();

// Lists FTDI devices connected.
bool get_device_list();
bool connect_device(int * local_baud_rate);
bool close_device(int * local_baud_rate);
bool reset_device(int * local_baud_rate);
bool set_baud_rate(int * local_baud_rate);
bool set_baud_rate_auto(int * local_baud_rate);

#endif /* FTDI_helper.h */

Again, the extern variables are to let the compiler know we will be using the variables of the same name found in YOUR_CODE.C.

Main Menu

FTDI_HELPER.C

void ftdi_menu()
{
    int baud_rate = 0;
    char char_choice[3];
    int int_choice = 0;

    bool got_list = false;
    bool connected_flag = false;
    bool close_device_flag = false;
    bool set_baud_flag = false;

    // FTDI Menu
    do
    {
        system("cls");
        printf("FTDI Menu: ");
        if (connected_flag == true)
        {
            printf("       Connected: %lu, N, 1     \n\n", baud_rate);
        }
        else
        {
            printf("       Not Connected:               \n\n");
        }
        printf("1. Quick Connect\n");
        printf("2. Device List\n");
        if (got_list == true) // Only display option if devices list.
        {
        printf("3. Connect Device\n");
        }
        if (connected_flag == true) // Only give display if connected.
        {
        printf("4. Close Device\n");
        }
        if (connected_flag == true) // Only give display if connected.
        {
        printf("5. Change baud-rate\n");
        }

        printf("9. Main Menu\n");

        // If connected, display the connected device info.
        if (connected_flag == true)
        {
            printf("\n");
            printf("Connected Device: %d:\n", connected_device_num);
            printf("    Flags:         0x%02X\n",devInfo[connected_device_num].Flags);
            printf("    Type:          0x%02X\n",devInfo[connected_device_num].Type);
            printf("    ID:            0x%02X\n",devInfo[connected_device_num].ID);
            printf("    Local ID:      0x%02X\n",devInfo[connected_device_num].LocId);
            printf("    Serial Number: %s\n",devInfo[connected_device_num].SerialNumber);
            printf("    Description:   %s\n",devInfo[connected_device_num].Description);
            printf("    ftHandle =     0x%02X\n",devInfo[connected_device_num].ftHandle);
        }

        // Get user choice.
        scanf("%s", char_choice);

        // Convert string to int for switch statement.
        int_choice = atoi(char_choice);

        switch (int_choice)
        {
            case 1:
                quick_connect();
                baud_rate = 115200;
                connected_flag = true;
            case 2:
                got_list = get_device_list();
                break;
            case 3:
                if (got_list == true) // Only display option if devices listed.
                {
                    connected_flag = connect_device(&baud_rate);
                }
                break;
            case 4:
                if (connected_flag == true) // Only give display if connected.
                {
                    close_device_flag = close_device();
                    if(close_device_flag == true){connected_flag = false;}
                    close_device_flag = false;
                }
                break;
            case 5:
                if (connected_flag == true) // Only give display if connected.
                {
                    set_baud_flag = set_baud_rate(&baud_rate);
                    // set_baud_flag is not used, yet.

}
                break;
            case 9:
                main_menu();
                break;
            default:printf("""Bad choice. Hot glue!""");
                break;
        }
    }while(int_choice !=99);
}

I found the easiest way to setup a FTDI device in C is using a menu. I've provided five options: (1) Quick Connect, (2) Device List, (3) Connect Device, (4) Close Device, (5) and Set Baud Rate. Several options require running the other options first. For example, before "Connect Device" is displayed you must run "Device List." Let's walk through the code,

  • 5-7: Variables for the scanf and switch-statement deriving the menu.
  • 9-12: Boolean flags for controlling the flow of the menu.
  • 15: We want a menu which is persistent, therefore, we use the do-while loop.
  • 19-22: Let's display the connection information, but only if we have a device connected.
  • 27-42: We print the rest of the menu. Some items only print if boolean flags are set to true.
  • 44-56: Prints out the device details, if connected.
  • 58-64: Gets a users input, converts it to an int, store it, then selects a switch-case based upon input.
  • 67: The quick_connect() function creates an FTDI connection based upon default attributes.
  • 68: Sets the local baud_rate variable to the quick_connect() baud rate.
  • 71: We get run the get_list() function, which lists all FTDI devices currently connected to the USB ports.
  • 74: We check to see if get_list() has already been run, before we allow the user to connect to a device.
  • 76: Connect_device() takes a pointer to the holding the value of the baud-rate the user has selected. It then attempts to connect to the device. If successful, the function returns true.
  • 80: Only allow a device to be closed, if one is connected.
  • 82: Close_device() attempts to shut-down the currently connected FTDI device. If it is successful, it returns true.
  • 83-84: If the close_device() function was a success, the connected_flag is set to false, to show there is no device connected. Then, the close_device flag is reset to false to prepare for the next close_device() call.
  • 90: The set_baud() takes a pointer to a value for the desired baud rate. The function attempts to set the baud rate and returns true if successful.

Quick Connect

This function is meant for the lazy user. He or she does not want to select the device, or the baud rate, they'll simply take whatever your program gives you. In my case, I wrote my quick connect to open device '0' and set the baud rate to 115,200.

FTDI_HELPER.C

void quick_connect()
{
    int local_baud_rate = 115200;
    // Create the device information list
    ftStatus = FT_CreateDeviceInfoList(&numDevs);
    // get the device information list
    ftStatus = FT_GetDeviceInfoList(devInfo,&numDevs);
    // Open user's selection.
    // Allocate storage for list based on numDevs.
    devInfo =
    (FT_DEVICE_LIST_INFO_NODE*)malloc(sizeof(FT_DEVICE_LIST_INFO_NODE)*numDevs);
    FT_Open(0, &devInfo[0].ftHandle);
    FT_SetBaudRate(devInfo[0].ftHandle, local_baud_rate);
}
  • 5: Place the baud rate into a variable to be set.
  • 7: We create a list of devices, placing them in our global InfoList variable.
  • 9: We get the device info on the created device list.
  • 12-13: We allocate enough space for info on each device enumerated.
  • 14: Opens the device at '0' in the device list.
  • 15: Sets the baud rate to 115,200.

Device List

The get_device_list() function is for the more cautious user. First, a list of FTDI devices is generated. After, enough space is allocated in an array for each device's info. Lastly, the device details gathered are placed in this list. If the process of generating and storing the device details was successful the function returns true.

FTDI_HELPER.C

bool get_device_list()
{
    // Create the device information list.
    ftStatus = FT_CreateDeviceInfoList(&numDevs);

    if (ftStatus == FT_OK) {
        printf("Number of devices is %d\n",numDevs);
    }
    else {
        printf("Failed to get FTDI device list.\n");
    }

    if (numDevs > 0) {

        // Allocate storage for list based on numDevs.
        devInfo =
        (FT_DEVICE_LIST_INFO_NODE*)malloc(sizeof(FT_DEVICE_LIST_INFO_NODE)*numDevs);

        // Get the device information list.
        ftStatus = FT_GetDeviceInfoList(devInfo,&numDevs);
        if (ftStatus == FT_OK) {
                printf("Got Devices\n");
            }
        else
            {
                printf("Failed to get device list.\n");
                Sleep(3000);
            }
            // Set flag if we got at least on device.
            return true;
        }
    return false;
}
  • 6: Creates a device list.
  • 8-13: If the attempt to create a device list fails, we tell the user. Otherwise, we list the number of FTDI devices currently connected.
  • 15: If at least one device was detected, we proceed with listing the devices.
  • 18-19: We allocate enough memory space to store the device info of each connected device.
  • 22: We read each device, get the info, and put the info in the list respectively.
  • 23-30: If we got the device info, we tell the user, "We got devices." Otherwise, we tell the user we failed. Failed, failed, failed!
  • 32: Since we gathered some device info, the function returns true.
  • 34: If no device info was gathered, the function returns false.

Connect Device from List

Once the get_device_list() function is run, then we are free to connect to one of the listed devices. The connect_device() function takes a pointer to the desired baud-rate value for the connection. This function requires the user enter a number 0-8, which is correlated to the devices gathered from the get_device_list() function. The connect_device() function then connects to the respective FTDI device at the baud-rate passed to it.

FTDI_HELPER.C

bool connect_device(int * local_baud_rate)
{

    char char_choice[3];
    int int_choice = 0;

    bool connected_flag = false;

    system("cls");
    printf("Which device # (0-8)?\n\n");
    printf("9. Return\n");

    printf("\n\nConnected FTDI:");
    for (int i = 0; i < numDevs && i < 8; i++) {
        printf("\nDevice: %d:\n",i);
        printf("    Flags:         0x%02X\n",devInfo[i].Flags);
        printf("    Type:          0x%02X\n",devInfo[i].Type);
        printf("    ID:            0x%02X\n",devInfo[i].ID);
        printf("    Local ID:      0x%02X\n",devInfo[i].LocId);
        printf("    Serial Number: %s\n",devInfo[i].SerialNumber);
        printf("    Description:   %s\n",devInfo[i].Description);
        printf("    ftHandle =     0x%02X\n",devInfo[i].ftHandle);
    }

    scanf("%s", char_choice);
    int_choice = atoi(char_choice);

    // Limit list to 9 devices.  Really, who has more connected at once?
    if (int_choice == 9)
    {
        return false;
    }
    else if (int_choice > -1 && int_choice < 9 && int_choice <= numDevs)
    {
        // Open user's selection.
        FT_Open(int_choice, &devInfo[int_choice].ftHandle);

        // Set default baud rate.
        *local_baud_rate = 115200;

        FT_SetBaudRate(devInfo[connected_device_num].ftHandle, *local_baud_rate);

        if (FT_status != FT_OK)
        {
            printf("Could not open FTDI device #%i.\n", int_choice);
            Sleep(3000);
        }
        else
        {
            connected_device_num = int_choice;
            return true;
        }
    }
    else
    {
        return false;
    }
    return false;
}
  • 6-28: User and device information displayed. Then, the user input is requested. The user must enter 0-8 for the selection to be valid.
  • 31: If the user selects option '9', we return false, since no device was connected.
  • 35: Else if the user selects a 0-8 then the function will attempt to the respective device in the list we generated in earlier functions.
  • 38: Here we actually open the device corresponding to the user's selection.
  • 41: We load the default baud-rate into the baud-rate variable.
  • 43: We set the baud-rate to 115,200. This is the default speed.

Close Device

FTDI_HELPER.C

bool close_device()
{
    FT_Close(devInfo[connected_device_num].ftHandle);

    if (FT_status != FT_OK)
    {
        printf("Could not close FTDI device.\n");
        Sleep(3000);
        return false;
    }
    else
    {
        return true;
    }
    return false;
}

Reset Device

The reset function is pretty straightfoward. It simply resets the connected FTDI device. The baud-rate apparently has to be set again after reset.

FTDI_HELPER.C

bool reset_device(int * local_baud_rate)
{
    FT_ResetPort(devInfo[connected_device_num].ftHandle);
    Sleep(50);
    FT_SetBaudRate(devInfo[connected_device_num].ftHandle, *local_baud_rate);
    Sleep(50);

    if (FT_status != FT_OK)
    {
        printf("Could not reset FTDI device.\n");
        Sleep(3000);
        return false;
    }
    else
    {
        // Device reset a success.
        return true;
    }
    return false; // Just in case.
}
  • 5: Connected FTDI device is reset.
  • 7: The baud-rate is reapplied.

Set Baud

The set_baud() funciton sets the connected device to whatever value the user selects.

FTDI_HELPER.C

bool set_baud_rate(int * local_baud_rate)
{

    char char_choice[3];
    int int_choice = 0;

    system("cls");
    printf("Set baud: \n");
    printf("1. 9600\n");
    printf("2. 19200\n");
    printf("3. 38400\n");
    printf("4. 57600\n");
    printf("5. 115200\n");
    printf("6. 230400\n");
    printf("9. Exit\n");

    scanf("%s", char_choice);
    int_choice = atoi(char_choice);

    switch (int_choice)
    {
        case 1:
            *local_baud_rate = 9600;
            break;
        case 2:
            *local_baud_rate = 19200;
            break;
        case 3:
            *local_baud_rate = 38400;
            break;
        case 4:
            *local_baud_rate = 57600;
            break;
        case 5:
            *local_baud_rate = 115200;
            break;
        case 6:
            *local_baud_rate = 230400;
            break;
        case 9:
            return false;
            break;
        default:printf("""Bad choice. Hot glue!""");
            break;
    }

    FT_SetBaudRate(devInfo[connected_device_num].ftHandle, *local_baud_rate);
    if (FT_OK != FT_OK)
     {
        printf("Unable to change baud-rate\n");
        Sleep(3000);
        return false;
     }
     else
     {
        return true;
     }
     return false;
}
  • 6-47: The menu. Each selection corresponds a predefined baud-rate value.
  • 49: The connected device's baud-rate is changed to the user's selected value.
  • 58: If the baud-rate was changed successfully, the funciton returns true. Otherwise, it returns false.

Auto Set Baud Rate

The set_baud_rate_auto() is meant to be used to programmatically change the baud-rate, rather than have the use define the baud-rate. The command call is the same.

FTDI_HELPER.C

bool set_baud_rate_auto(int * local_baud_rate)
{
    FT_SetBaudRate(devInfo[connected_device_num].ftHandle, *local_baud_rate);

    if (FT_OK != FT_OK)
     {
        printf("Unable to change baud-rate\n");
        Sleep(3000);
        return false;
     }
     else
     {
        return true;
     }
     return false;
}

We are finally passed the setup functions, we get to the functions we are really interested. This is the rx(). It is called when you want to get user from the RX buffer. There are two buffers, by the way. There is the buffer on the FTDI, which holds 20 characters (I believe). But then, there is the buffer on your PC, which is largely limited to the amount of memory you computer has.

RX Function

The We are finally passed the setup functions! Now, for the functions we are really interested in. This is the rx(). It is called when you want to user from the RX buffer. There are two RX buffers, by the way. There is the buffer on the FTDI, which holds 20 characters (I believe).

But, then there is the buffer on your PC, which is largely limited to the amount of memory your computer has. And remember, this is C. If you set your PC's RxBuffer to be limited to 256 characters and you get character 257, it's not going to complain. Rather, you will simply have a buffer overrun and hell trying to debug it.

Once the D2XX function FT_Read has been called, the PC buffer is cleared. Therefore, getting the data you want comes down to calling rx() at the appropriate time.

Most of our variables declared to support this module are used in the rx() and tx() functions.

  1. RxBytes holds how many bytes are waiting to be read.
  2. RawRXBuffer is the actual computer RX buffer. Again, we set this buffer for 2048 characters, but if you receive character number 2049 it will not complain. You will simply have a buffer overrun. Cue sinister music.
  3. BytesReceived is how many bytes have been received to be read.
FTDI_HELPER.C

bool rx(bool print_or_not)
{
    // We need to get the status to see if we have characters in buffer.
    FT_GetStatus(devInfo[connected_device_num].ftHandle, &RxBytes, &TxBytes, &EventDWord);
    // We turn the buffer into a string; this is for easy parsing.
    RawRxBuffer[RxBytes+1] = '\0';
    // We only want to read the FTDI if there are bytes to read.
    if (RxBytes > 0) {
        // Read the bytes.  They are stored in the RawRxBuffer, BytesReceived is how many bytes we got
        // instead of how many bytes we should get.
        FT_status = FT_Read(devInfo[connected_device_num].ftHandle,RawRxBuffer,RxBytes,&BytesReceived);
        if (FT_status == FT_OK) {
            if(print_or_not)
            {
                printf("%s\n", RawRxBuffer);
            }
            // Put code here to copy string out of function.
            return true;
        }
        else {
            printf("RX FAILED \n");
            return false;
        }
    }
    return false;
}
  • 3: The rx() function has a print to screen option. Meaning, if we get data and call the rx() function by passing it a true, then it will print the data received to the screen.
  • 6: We get the status of the devices. This will tell us how many bytes are waiting to be read (RxBytes).
  • 8: At is a simple way to convert our received data into a string, for easy parsing.
  • 10: If we actually got some bytes, lets do something with them.
  • 13: Actually loads the received data into our RawRxBuffer. It also gets how many bytes have been read since the last FT_GetStatus call.
  • 15: If we got some bytes and we wanted to print, well, then let's print them.
  • 19: This is an important spot . Here is where you want to put code to copy the data from the RawRxBuffer, to a more permanent home.
  • 20: If we got some data, then return true.
  • 27: If we didn't get any data, return false.

You'd call the rx() function like so,

rx(true);

This would print out whatever data is in the rx buffer to the screen.

TX Function

We saved the best function for last: tx().

This function takes two primary variables. A pointer to a character array and an integer indicating how many characters are found in the data array. Also, it wants a boolean value representing whether you want the function to echo the data sent to the screen.

In the heart of a function is a loop, which writes a character at a time to the FTDI device. The loop continues until the count is equal to the integer past to the function indicating how many characters are found in the array. Then, if all characters have been written, then it returns true. Otherwise, it returns false.

FTDI_HELPER.C

bool tx(char data[], int tx_data_size, bool print_or_not)
{
    uint8_t FTWrite_Check;
    int char_tx_count = 0;

    while(char_tx_count != tx_data_size)
    {
        //This should print just data (ie, no Start Code, Byte Count, Address, Record type, or Checksum).
        FTWrite_Check = FT_Write(devInfo[connected_device_num].ftHandle, &data[char_tx_count], (DWORD)sizeof(data[char_tx_count]), &BytesWritten);
        if (FTWrite_Check != FT_OK)
        {
            printf("Bad write!\n");
        }
        if(print_or_not)
        {
            printf("%C", data[char_tx_count]);
        }
        char_tx_count++;
    }

    if (char_tx_count == tx_data_size)
    {
        return true;
    }
    return false;
}
  • 11: Actually writes the data to the FTDI device.

You can call this function from your code like so,

char data[] = "ALABTU!"

tx(data, sizeof(data), true);

This will cause the FTDI to write "ALABTU!" It will also be displayed on the screen.

UUEncode in C

Originally posted on www.letsmakerobots.com

I want to take a moment to thank Bdk6 . The man is a walking Stack Overflow, with more patience for stupid. I doubt I'd understand any of this without his guidance.

I thought I'd take some time away from coding my LPC1114 Uploader and verbally process a few things I've learned. As always, feel free to critique any of it; it'll only serve to make my code more robust in the end.

This post will be a series of post leading up to the large post I'll make on writing the uploader. All posts will rely on the GCC compiler.

Setting Up the GCC Compiler

I setup a C environment as basic I could. There may be easier ways to go about this, but I wanted to use GCC to compile.

To setup the environment:

1. I downloaded and setup MinGW32 .

2. I added these includes to make the code go.

#include <stdio.h>
#include <stdarg.h>
#include <stdlib.h>
#include <windows.h>
#include <windef.h>
#include <winnt.h>
#include <winbase.h>
#include <string.h>
#include <math.h>
#include <stdbool.h>
#include <stdint.h>
#include <sys/time.h>

I used this line to build it:

$ gcc -o main main.c

As for editing, I've really grown to love Sublime Text 2 .

If you have issues , make sure directory containing your files is in your PATH environment variable (I go over how to add the directory to your environment variables in this post ).

How to Convert Hex Data to UUE

"What is 'UUEncoding'?"

Unix-to-Unix encoding (UUE) is the process where binary data is converted to a form which can be represented using ASCII character values from space (32) to underscore (95) . These 64 characters allow us to express any binary stream of data.

I will not spend a lot of time explaining UUEncoding since the Wikipedia article is excellent .

"Why UUEncode?"

Have you written a program to look for a particular value? Like this,

int i;
char tCollection[32];
char c;``

if( c == 'T')
{
    Serial.print("I found a T!");
    tCollection[i] = c;
else if (c == '\r')
{
    exit();
}

You begin running your program and everything seems fine. It is inspecting data looking for the letter T (0x54), but then, all of a sudden your program exits without reason. You're upset, because the sensor sending you the data didn't send the exit code, which is a carriage return ('\r', or 0x13), but still, your program ended like it did.

Really, we know the reason, your program came across a random 0x13, which it interpreted as an exit command. Maybe a different special character?

But you realize, if you are dealing with a 8-bit data stream any ASCII character might be found in the incoming stream. So, how can the communicating devices know when it is getting data, versus, when it is receiving a command?

This is where UUE comes in. As I stated earlier, UUE is a way to represent the same 8-bit data using only hex values 0x32 through 0x95 (the two middle columns in the ASCII chart above). This means characters 0x00 through 0x1F and 0x60 through 0x7F are free to be used for command functions.

Returning to the above example, this means we could now us the CR value to signal the end-of-transmission, since CR is 0x13.

Ok, I hope I've sold you on UUE's utility, let me attempt to explain the basics of how hexadecimal data is converted into a form which may be represented with only 64 values.

UUE conversion works with three bytes of data at a time and follows this algorithm.

  1. The individual bits of 3 HEX bytes are put into a series.
  2. The 24-bit series is then divided into four bytes of 6-bits.
  3. Then, 32 is added to the decimal value representing each of the 6-bit bytes.
  4. The resulting four values are UUEncoded bytes.

Confused as hell? I was too. Pictures are good. Let's follow the Wiki example and use: Cat

The first step is to take the binary values for each ASCII character.

  • 'C' = 01000011
  • 'a' = 01100001
  • 't' = 01110100

This means the resulting 24-bit binary series is,

24-bit: 010000110110000101110100

This is then divided into four 6-bit bytes,

  • 6-bit Byte: 1 2 3 4
  • Binary: 010000 110110 000101 110100

The new decimal values are,

  • 6-bit Byte: 1 2 3 4
  • Decimal: 16 54 5 52

At this point the 6-bit (senary) byte gave me a little trouble. I didn't understand how 6-bits were treated by the 8-bit variable I was putting them in. For example, how could I get an int variable to take only 6 bits, not 8? The trick is understanding the 8-bit variable is only the width of the allotted space provided in a register, it has no influence on what you put in it. It finally dawned on me, I didn't need to worry about the empty bits in a register.

Examples are good:

010000 = 16 in Decimal

00010000 = 16 in Decimal

010000 = 00010000

Anyway, this is how I finally made sense of it. As long as when I did my bit manipulations I kept unused bits of the register towards the "left" side, the my 6-bit values could be put into a 8-bit register and there value would remain the same.

Alright, back to our example.

Our next step is to add 32 to each of the decimal value of our new four bytes.

  • 6-bit Byte: 1 2 3 4
  • Decimal: 16 54 5 52
  • Add 32 +32 +32 +32 +32
  • New Dec. 48 86 37 84
  • UUE char: 0 V % T

And...that's it. Your data is now UUEncoded. When it is sent through whatever transmission medium it wont be bothered with special character protocals. For our Cat, we have transformed it into: 0V%T

Let's hope for the Cat's sake, there is decoding algorithm.

Those sharper than myself may have already noticed a couple of problems. For instance, what if our data doesn't come in increments of threes? For example, how do we send Cats?

The answer? We make nothing up. In the instance of Cats, we simply pad the end of the character series with two nulls on the end. For example,

  • 'C' = 01000011
  • 'a' = 01100001
  • 't' = 01110100
  • 's' = 01110011
  • NUL = 00000000
  • NUL = 00000000

48-bit: 010000110110000101110100011100110000000000000000

  • 6-bit Byte: 1 2 3 4 5 6 7 8
  • Binary: 010000 110110 000101 110100 011100 110000 000000 000000

The new decimal values are,

  • 6-bit Byte: 1 2 3 4 5 6 7 8
  • Decimal: 16 54 5 52 28 48 0 0

  • 6-bit Byte: 1 2 3 4 5 6 7 8

  • Decimal: 16 54 5 52 28 48 0 0
  • Add 32 +32 +32 +32 +32 +32 +32 +32 +32
  • New Dec. 48 86 37 84 60 80 32 32
  • UUE char: 0 V % T < P SPC SPC

We have turned "Cats" into " 0V%T<P " Well, almost, we aren't quite done here.

Uh-oh. Another problem. The whole point of UUE was to stay away from special characters like the space character (0x32). But now we have two of them in our transmission. Well, the UUE protocol addresses this. It states,

  • If the result of the 6-bit encoding process is the space character, we convert this to the grave characte r, ' ` '. (The grave accent character is 0x60 in hexadecimal, by the way).

Therefore, our "Cats" actually becomes.

  • Almost UUE char: 0 V % T < P SPC SPC
  • UUE char: 0 V % T < P

Finally! We have encoded "Cats"

We've turned:

into -------------> ** 0V%T<P `` Now, that's science folks!**

Hmm, what else are you going to need to know? Oh, right, how the UUE data is stored.****

UUE stores and sends data in lines. A line of UUE data consist of a start character, which represents how many bytes have been encoded in the line ( not how many UUE characters are in the line) by using a 6-bit number stored as an ASCII char. The line of UUE data ends with a new line character (i.e., '\n'). Lastly, a UUE line is limited to 45 bytes of data. This means, the maximum amount of data characters in on line of UUE should be no more than 60. Or, 62, if you count the start character and the end character.

Again, examples are good. For our Cats, the line would look something like this,

  • $ 0V%T<P `` \n

Let me take a moment to describe how we get the start character. Basically, we count how many bytes we are sending, in our case 4, and we add 32. This gives us the decimal representation of the ASCII character we will use as our start character. Therefore,

  • 4 + 32 = 36 as ASCII = $

Confusing? It'll probably make more sense when we look at the code.

Speaking of which, I think I've covered the basics, time to jump into implementation.

Implementing UUEncoding in C

Well, here it is. My shoddy implementation of a UUEncoder in C.

The function takes several variables.

  1. UUE_data_array is a pointer to an uint8_t array where the encoded characters will be stored.
  2. hex_data_array is a pointer to an uint8_t array containing the hexadecimal values to be encoded (to learn where I get my hexadecimal data, checkout another one of this inglorious post: Intel HEX File to Array ).
  3. hex_data_array size is an integer representing how many bytes of data might be found in the hex_data_array .
  4. After the function is complete, it returns how many ASCII UUE characters were created. This is meant for parsing the UUE array at a later time.
int UUEncode(uint8_t * UUE_data_array, uint8_t * hex_data_array, int hex_data_array_size)
{
    // 1. Add char for characters per line.
    // 2. Load 3 bytes into an array.
    // 3. Encode array.
    // 4. Add padding.
    // 5. Replace ' ' with '''
    // 6. Return UUE data array (implicit) and size.
    uint8_t byte_to_encode[3];
    uint8_t uue_char[4];

    int UUEncoded_array_index = 0;
    int uue_length_char_index = 45;
    int padded_index = 0;
    int bytes_left = 0;

    // 1. Add char for characters per line.
    if(hex_data_array_size < 45)
    {
         UUE_data_array[UUEncoded_array_index] = ((hex_data_array_size & 0x3f) + ' ');
    }
    else
    {
        UUE_data_array[UUEncoded_array_index] = 'M';
    }

    UUEncoded_array_index++;

    // Encode loop.
    for (int hex_data_array_index = 0; hex_data_array_index < hex_data_array_size; hex_data_array_index)
    {
        // 2. Load 3 bytes into an array.
        for (int i = 0; i < 3; ++i)
        {
            // Load bytes into array
            if (hex_data_array_index < hex_data_array_size)
            {
                byte_to_encode[i] = hex_data_array[hex_data_array_index];
                hex_data_array_index++;
            }
            else
            {
                // 4. Add padding.
                byte_to_encode[i] = 0;
                padded_index++;
            }
            uue_length_char_index--;
        }

        // 3. Encode array.
        uue_char[0] = ((byte_to_encode[0] >> 2) & 0x3f);
        uue_char[1] = (((byte_to_encode[0] << 4) | ((byte_to_encode[1] >> 4) & 0x0f)) & 0x3f);
        uue_char[2] = (((byte_to_encode[1] << 2) | ((byte_to_encode[2] >> 6) & 0x03)) & 0x3f);
        uue_char[3] = (byte_to_encode[2] & 0x3f);

        for (int i = 0; i < 4; i++)
        {
            // 5. Replace ' ' with '''
            if (uue_char[i] == 0x00)
            {
                UUE_data_array[UUEncoded_array_index] = 0x60;
            }
            else
            {
                UUE_data_array[UUEncoded_array_index] = (uue_char[i] + ' ');
            }

            UUEncoded_array_index++;
        }

        // Data bytes left.
        bytes_left = (hex_data_array_size - hex_data_array_index);

        if (uue_length_char_index == 0 && bytes_left > 0)
        {
            // NOTE: Could be simplified to include first char
            // and additional characters, using a positive index.
            // 1. Add char for characters per line.
            UUE_data_array[UUEncoded_array_index] = '\n';
            UUEncoded_array_index++;

            if(bytes_left < 45)
            {
                // Find how many characters are left.
                UUE_data_array[UUEncoded_array_index] = ((bytes_left & 0x3f) + ' ');
            }
            else
            {
                UUE_data_array[UUEncoded_array_index] = 'M';
            }
            UUEncoded_array_index++;
            uue_length_char_index = 45;
        }

    } // End UUE loop
    UUE_data_array[UUEncoded_array_index] = '\n';

    // 6. Return UUE data array (implicit) and size.
    return UUEncoded_array_index;
}

int check_sum(uint8_t * hex_data_array, int hex_data_array_size)
{
    int check_sum = 0;
    int char_index = 0;

    while(char_index < hex_data_array_size)
    {
        check_sum += hex_data_array[char_index];
        char_index++;
    }
    return check_sum;
}
  • 3-8: Here, I outline in pseudo-code what I wanted to get done in this function.
  • 17-25: I deal with the start character of the first line. I do this by checking if hex data we were handed is more than the UUE line limit, 45 bytes. If it is, I place an M as the start character (45 + 32 = 77 = ASCII M ). If the data we've been handed is less than 45 bytes, let's calculate the start character. We take 65 bits of the 8-bit number representing how many bytes are here, then add 32, this will give us our start character.
  • 30-96: This is the main loop where the work is done. We loop through all the hexadecimal data provided us, encoding as we go.
  • 33-48: The loop here deals with 3 bytes of data at a time. It also checks to see if we have less than 3 bytes left, if so, it pads the remaining space with 0 (null).
  • 47: This index is used in combination with the if statement found one lines 82-90. It is in essence repeating the beginning if statement where we determined what the start character for this line will be.
  • 51-54: This is where the magic happens. Here, we are turning the 3 bytes of 8 bits, into 4 bytes of 6 bits. We store the resulting bits in an 8-bit variable. But remember, we can put 6 bit data in a 8 bit jar, as long as we remember to be careful how we place the bits.
  • 56-69: The resulting 6-bit characters are checked to see if they are a space character (0x20), if they are, we turn them into a grave ' ' ' character (0x60). If they are not a space, we add 32 to the decimal value (' ' = 32 in decimal), this completes the encoding process.
  • 72: We calculate how many data bytes are left, in preparation for calculating the next line's start character.
  • 74-96: This loop serves two purposes. One, to place a new-line character ('\n') at the end of our last encoded line. Two, to calculate and load the next line's start character.
  • 96: When we've reached the end of our data, we place a new-line character to mark the end.
  • 112: We return the number of ASCII characters used to represent our encoded data.

And there you go. UUE!

Here are some additional resources I found helpful,

  1. Wikipedia's article on UUEncoding
  2. NXP's Application Note on UUEncoded for their uCs
  3. Bdk6
Intel Hexfile to Array

Originally posted on www.letsmakerobots.com my_uC_icon_5_300x300.png

Not All Those Who Wander are Lost (but I am)

I thought I'd take some time away from coding my LPC1114 Uploader and verbally process a few things I've learned. As always, feel free to critique any of it; it'll only serve to make my code more robust in the end.

This post will be a series of post leading up to the large post I'll make on writing the uploader. All posts will rely on the GCC compiler.

Setting Up the GCC Compiler

I setup a C environment as basic I could. There may be easier ways to go about this, but I wanted to use GCC to compile.

To setup the environment:

1. I downloaded and setup MinGW32 .

2. I added these includes to make the code go.

#include <stdio.h>
#include <stdarg.h>
#include <stdlib.h>
#include <windows.h>
#include <windef.h>
#include <winnt.h>
#include <winbase.h>
#include <string.h>
#include <math.h>
#include <stdbool.h>
#include <stdint.h>
#include <sys/time.h>

I used this line to build it:

$ gcc -o main main.c

As for editing, I've really grown to love Sublime Text 2 .

If you have issues , make sure directory containing your files is in your PATH environment variable (I go over how to add the directory to your environment variables in this post ).

Intel Hexfile to An Array Based on Data Address

To load data from an Intel HEX format file I used several functions, open_file() to create a data stream, more commonly know as a file pointer , from the file I wanted to read. And hex_file_to_array(), to parse the hex file and extract the data.

main.c

MAIN.C

int main(int argc, char *argv[])
{
    //If the user fails to give us two arguments yell at him.
    if ( argc != 2 ) {
        fprintf ( stderr, "Usage: %s <readfile1>\n", argv[0] );
        exit ( EXIT_FAILURE );
    }
    // Data array
    uint8_t HEX_array[32768];

    // Bytes read into array.
    int HEX_array_size;

    //File to be loaded.
    FILE *hex_file;

    //Open file using command-line info; for reading.
    hex_file = open_file (argv[0], "rb" );

    // Load the data from file
    HEX_array_size = hex_file_to_array(hex_file, HEX_array);


} // END PROGRAM
  • 6: Let's check the number of arguments passed in by the user. If there is no file name, then we exit.
  • 11: Declare a unsigned array for the data. I've set it arbitrarily, but it will need to be large enough for the amount of data to be extracted from the hexfile.
  • 17: Here we create a pointer to a file data stream.
  • 20: We pass the pointer to the data stream to the open_file function. We are setting up to only read the file in binary. We pass it the file we wish to open and it returns the opened file.
  • 23: We pass hex_file_to_array a file pointer and pointer to an an array. This function reads the hex file, parses it, extracting the data and placing them into the the uint8_t array based on the data's address found in the hexfile. The function then returns the number of data bytes found in the hex file.

open_file()

This function takes the name of a file and the mode under which to open it, then attempts to open a file pointer to this file. If it is is successful, it returns the pointer to the now open file. If it it fails, the program exits with an error code.

MAIN.C

//Open file for reading, function.
FILE *open_file ( uint8_t *file, uint8_t *mode )
{
  FILE *fileOpen = fopen ( file, mode );

  if ( fileOpen == NULL ) {
    perror ( "Unable to open file" );
    exit (EXIT_FAILURE);
  }

  return fileOpen;
}

To understand this function it pays to understand well the Intel HEX file format.

Parsed HEX file:

Let's take a look at the raw data,

:10010000214601360121470136007EFE09D2190140
:100110002146017E17C20001FF5F16002148011928
:10012000194E79234623965778239EDA3F01B2CAA7
:100130003F0156702B5E712B722B732146013421C7
:00000001FF

Parsed HEX file:

: 11 2222 33 44444444444444444444444444444444 55 \n
  1. ' : ' = Start Code.
  2. 11 = Byte Count
  3. 2222 = Address
  4. 33 = Data Type
  5. 44 = Data
  6. 55 = Check Sum
  7. '\n' = End Code

All of the information in the file is important, but we are only looking to put the Data into the array. To extract this data we are going to use three sub-routines:

  1. read_byte_from_file()
  2. Ascii2Hex()
  3. clear_special_char()

read_byte_from_file()

One bit to understand about hex files is the data is actually stored as ASCII characters. When we open a file pointer to these ASCII characters, we can't just read the bytes, since they'd simply be an ASCII character representing the nibble read. To make the conversion we get a character, store it as a binary nibble A, get another character and store it as binary nibble B. We then combine nibble A and B into a single byte.

The function takes three parameters: the file pointer, a uint8_t pointer for storing the complete byte, and the total_chars_read, which allows us to track how far we are into the file.

DATA.C

uint8_t read_byte_from_file(FILE * file, uint8_t * char_to_put, int * total_chars_read)
{
    //Holds combined nibbles.
    uint8_t hexValue;
    //Get first nibble.
    *char_to_put = fgetc (file);
    clear_special_char(file, char_to_put, total_chars_read);
    //Put first nibble in.
    hexValue = (Ascii2Hex(*char_to_put));
    //Slide the nibble.
    hexValue = ((hexValue << 4) & 0xF0);
    //Put second nibble in.
    *char_to_put = fgetc (file);
    clear_special_char(file, char_to_put, total_chars_read);
    //Put the nibbles together.
    hexValue |= (Ascii2Hex(*char_to_put));
    //Return the byte.
    *total_chars_read += 2;

    return hexValue;
}
  • 6: Declaring a 8-bit unsinged integer to hold the finished byte.
  • 8: Get an ASCII character from the file pointer.
  • 9: Here we call the cleaer_special_char function to remove '\n' and '\r' found in the hex file.
  • 11: We then convert the ASCII character into a true binary nibble. The result is stored in the string. (I will cover the Ascii2Hex function below.)
  • The above steps are repeated for nibble B.
  • 18: We combine the string of nibbles into a byte.
  • 26: We increment two ASCII characters read from the file pointer.

clear_special_char()

The clear special character function is simply meant to remove the ':', '\n', and '\r' characters from the data stream. It simply looks through the character pulled from the data stream. If it is not a special character, it does nothing. If it is, it increments the character counter and discards the character.

DATA.C

void clear_special_char(FILE * file, uint8_t * charToPut, int * totalCharsRead)
{
    //Removes CR, LF, ':'  --Bdk6's
    while (*charToPut == '\n' || *charToPut == '\r' || *charToPut ==':'){
        (*charToPut = fgetc (file));
        *totalCharsRead++;
    }
}

Ascii2Hex()

Another fairly simple function. Here, we simply find the numeric value of the ASCII character and convert it to its binary equivalent.

DATA.C

//Copied in from lpc21isp.c
uint8_t Ascii2Hex(uint8_t c)
{
    if (c >= '0' && c <= '9')
    {
        return (uint8_t)(c - '0');
    }
    if (c >= 'A' && c <= 'F')
    {
        return (uint8_t)(c - 'A' + 10);
    }
    if (c >= 'a' && c <= 'f')
    {
        return (uint8_t)(c - 'a' + 10);
    }

    return 0;  // this "return" will never be reached, but some compilers give a warning if it is not present
}

This function is pretty simple, if you keep in mind each character is actually an integer. For example, the if-statements could be re-written as follows,

if (c >= 0 && c <= 9)
   { return (uint8_t)(c - 0) }

if (c >= 65 && c <= 70)
   { return (uint8_t)(c - 65 + 10)}

if (c >= 97 && c <= 102)
   {return (uint8_t)(c - 97 + 10)}

You can use an ASCII reference table to determine how a character read will be interpreted. For instance, 'D' or 'd' would be 68 or 100. 68 - 65 + 10 = 13. We know D is hexadecimal for 13 (0 = 0, 1 = 1, 1 = 2, etc... A = 10, B, = 11, C = 12, D = 13 , E = 14, F = 15).

This brings us to the main function,

read_line_from_hex_file()

DATA.C

bool read_line_from_hex_file(FILE * file, uint8_t line_of_data[], long int * combined_address, int * bytes_this_line)
{
        int data_index = 0;
        uint8_t char_to_put;
        int total_chars_read = 0;

        //To hold file hex values.
        uint8_t byte_count;
        uint8_t datum_address1;
        uint8_t datum_address2;
        uint8_t datum_record_type;
        uint8_t datum_check_sum;

        //BYTE COUNT
        byte_count = read_byte_from_file(file, &char_to_put, &total_chars_read);

        // No need to read, if no data.
        if (byte_count == 0){return false;}

        //ADDRESS1 //Will create an 8 bit shift. --Bdk6's
        datum_address1 = read_byte_from_file(file, &char_to_put, &total_chars_read);

        //ADDRESS2
        datum_address2 = read_byte_from_file(file, &char_to_put, &total_chars_read);

        //RECORD TYPE
        datum_record_type = read_byte_from_file(file, &char_to_put, &total_chars_read);

        // No need to read, if not data.
        if (datum_record_type != 0){return false;}

        *combined_address = ((uint16_t)datum_address1 << 8) | datum_address2;

        // DATA
        while(data_index < byte_count)
        {
            line_of_data[data_index] = read_byte_from_file(file, &char_to_put, &total_chars_read);
            data_index++;
        }
        *bytes_this_line = data_index;

        // CHECKSUM
        datum_check_sum = read_byte_from_file(file, &char_to_put, &total_chars_read);

        return true;
}

The above code parses exactly one line of hex data from the file pointer.

  • 17: We read the first byte of a line. This should be the ':' character, but remember our clear_special_char() should skip this and read the next two bytes '1' and '0' (green). The "10" is how many bytes of data (blue) found on this line. Note, 10 is not a decimal number, it's hexadecimal. Meaning, there should be 16 bytes of data found on this line.
  • 20: We check if there was any data on this line. If there are zero data, we return false.
  • 23: Take the first byte of the data address (purple).
  • 26: Take the second byte of the data address (purple).
  • 29: Get the byte (red) identifying the type of information found on this line. We are only looking for data ('00'). The other types are explained well at the ole' Wiki article: Intel HEX record types .
  • 32: If the record type is not data, we don't want it. We return false.
  • 34: Combine the two 8-bit address bytes into one 16-bit address.
  • 37: Let's get all the data found on this line and put it into the array we provided the function.
  • 42: We have to keep track of how many bytes are on each line, to complete our address of the data. Therefore, we pass it back to hex_file_to_array().
  • 45: I read the checksum, but I don't do anything with it. I probably should.

hex_file_line_count()

To properly parse the hexfile we need to know how many lines are found in the the file. We can find this information several ways, but I counted the number of line start characters ':'.

MAIN.C

int hex_file_line_count(FILE * file_to_count)
{
    int line_count = 0;
    char got_char;

    while(got_char != EOF)
    {
        got_char = fgetc(file_to_count);
        if (got_char == ':'){line_count++;}
    }
    rewind(file_to_count);
    return line_count;
}
  • 8: Loops until the end-of-file character is reached.
  • 10: Gets a ASCII character from the file pointer.
  • 11: We check to see if the character we go was line start character ':'.
  • 13: This function iterates through the entire file, but we want to start pulling data from the beginning of the file, so we rewind the file to the first character.
  • 14: We return the number of lines.

hex_file_to_array()

DATA.C

int hex_file_to_array(FILE * file, uint8_t hex_data[])
{
    // 1. Get line count.
    // 2. Read a line. From ':' to '\n'
    // 3. Parse a line.
    //   Repeat for all lines.

    // Data per line.
    uint8_t line_of_data[32];
    long int combined_address[4096];

    // Indices and counters
    int hex_line_index = 0;
    int chars_this_line = 0;
    int total_chars_read = 0;
    // How many lines in the hexfile?
    int hex_lines_in_file = 0;
    int bytes_this_line[4096];

    // Let's count how many lines are in this file.
    hex_lines_in_file = hex_file_line_count(file);

    // Indices for parsing.
    int line_index = 0;
    int byte_index = 0;
    bool read_line_ok = false;

    // Parse all lines in file.
    while(line_index < hex_lines_in_file)
    {
        read_line_ok = read_line_from_hex_file(file, line_of_data, &combined_address[line_index], &bytes_this_line[line_index]);
        if (!read_line_ok)
        {
            printf("Line#: %i. Dude, that's not data!\n", line_index);
            read_line_ok = true;
        }
        while(byte_index < bytes_this_line[line_index])
        {
            hex_data[combined_address[line_index] + byte_index] = line_of_data[byte_index];
            line_of_data[byte_index] = '\0';
            byte_index++;
        }
        byte_index = 0;
        line_index++;
    }

    // Print out parsed data.
    int k = 0;
    int j = 0;
    int printed_bytes = 0;
    while (k < hex_lines_in_file)
    {
        while(j < bytes_this_line[k])
        {
            printf("%02X ", hex_data[j+(printed_bytes)]);
            j++;
        }
        printed_bytes += bytes_this_line[k];
        j=0;
        printf("\n");
        k++;
    }

    return total_chars_read;
} // End hex_file_to_array
  • 23: We count the number of lines in the file we wish to extract data.
  • 31: This is the work-horse loop. We loop until the we have read through all the lines we counted.
  • 33: We pass read_line_from_hex() our variables we wish to fill. The hex file we want to parse (file), the buffer we hold the line data in, the int array which will serve to hold the address of this line of data, a variable to hold the number of bytes in this line. If the function was got data, it will return true. Otherwise, it will return false. We store this flag to make sure we got something.
  • 34: We check to see if we actually got data from our attempt.
  • 39: Here, we move the line of data from the buffer into the final array.
  • 41: We place the data into the array based upon the address we pulled from the line (address1 + address2) and the byte number.
  • 42: Reset the buffer to nil.
  • 49-64: Finally, we print out the data. The k-loop goes through each line we extracted; the j-loop goes through each byte found on the respective line.

And that's it. Note, 49-64 is meant to demonstrate the data is properly extracted. These lines could be moved to another function where the data may be used as needed.

The Valdez Mutant -- LPC1114 QFN

Originally posted on www.letsmakerobots.com

Valdez Mutant Files

This is a little board I made in anticipation of Mr. Bdk6's toolchain for the LPC1114.

This toolchain is amazing. Really, if you are wanting to break away from Arduino / AVR, into the ARM chips, Bdk6's toolchain for the LPC1114 is the way to go.

The Valdez Mutant v04

The chip has ROM boot loader. This allows you to program the chip right out of the box. The programming is done over the traditional serial line. Most ARM chips require a JTAG programmer, which are usually a $50 investment. This leads into a few of my design goals.

A-1. Cheap, cheap ARM entry.

BOM:

  1. PCB : $2.18 (minimum 3).
  2. 3.3V LDO Regulator : .56
  3. 12.5 MHZ Crystal : .74
  4. LPC1114 FHN302:5 (QFN): 2.80
  5. SMD DPDT Switch : .44
  6. 2 x 10uF SMD Tant Cap : .74
  7. 50-50 RGB SMD LED : .10
  8. BSS138 : .22
  9. HM-11: 7.20

Passives are 0402:

  1. 2 x 22pF
  2. 3 x 1uF
  3. 6 x 330 Ohm
  4. 1 x 1k
  5. 3 x 10k
  6. 1 x 20k
  7. 3 x 470 Ohm
  8. 2 x 4.7k
  9. Total for Passives: ~ .22

Total Cost for Board HM-11: $8

Total Cost with HM-11: $15.20

A- 2. Arduino Pro Mini (APM) FTDI programmer to program the LPC1114

After doing a bit of AVR programming I toyed with the idea of getting into the Atmel ARM chips. One barrier to entry is cost, and now that we are down to one income this is a Hannibal to Rome grade barrier. Not only were most of the chips in the $6-20 range, they required a JTAG connector to program. Ultimately, price kept me from building a board around an Atmel ARM chip.

But then Mr. Bdk6 introduced me to the LPC1114. Not only was the chip sub $3 in single quantities (cheaper than the Atmega328P), but it was also programmable with a typical serial-USB interface. I figured, if it was programmable by serial then I could program it with my Arduino Pro Mini FTDI Breakout, which I bought from SparkFun long ago. I did this selfishly, but I assumed a lot of Arduino roboticists here have also switched to the APM as their go to board. I further assumed most would probably have a APM FTDI connector. I took this into account because my goal was to reduce as many barriers in switching from Arduino to the LPC1114, short of writing simple and opaque support libraries.

I'm going to take a brief moment and explain the LPC1114's ISP ROM. The LPC1114 has a built in bootloader, which resides in a ROM block on the chip. When the chip is provided power, either on initial or reset, it runs this bootloader. The bootloader polls PIN 1 on PORT 0 (PIO0_1), if this pin is high or floating, then the bootloader executes whatever is in the program memory blocks. If PIO0_1 is low, then the LPC1114 enters in-system programming mode .

When I discovered this, I got excited. Why not use the DTR/CTS pins to control the ISP? I added it to my design goals.

A few problems:

1. The LPC1114 operates on 3.3v . And don't let your "3.3V" FTDI breakout fool you. They still spit out 5V on for VCC, RX, and TX, at least until you jumper the solder-jumper on the underside. No sweat, I'll add a logic-level translator .

2. There is no existing LPC1114 programming software that controls DTR/CTS. FlashMagic and lpc21isp both use DTR/RTS, while the APM FTDI breakout I have uses DTR/CTS. Stupid dung-beetles in the ointment. I was committed to the idea of using the APM FTDI connector as a "no-modification" way to program the LPC. Thus my toils began.

I started by trying to change the source of the lpc21isp. I was successful in manipulating the source, but the lpc21isp relies on Windows communication protocol drivers, which don't allow for the bit level control of the CTS pin. Damnit.

Still committed.

I started re-rolling my own bootloader using FTDI drivers, which do allow for bit level control of all pins ( FTDI Bitbanging ). Sadly, I got distracted by writing a iPhone app for the HM-10 . By the time I finished the app, Bdk6, who heavily guided me on how to re-roll the programmer, stated he was writing one and would attempt including the features I requested. I figure, "I think this is one time being lazy is in the best interest of everyone." I let Bdk6 write the programmer. :)

A-3. _Almost _the same size as the Arduino Pro Mini, but with Mounting holes.

I love the Arduino Pro Mini (APM) for robot building. It is small, powerful, robust, it's just good stuff all around. When I decided to build an LPC board I wanted it to copy it in design.

Here are the features I pulled:

1. All components are on one side (except for the HM-11). This allows for easy reflow.

2. Small. The Valdez Mutant is the same dimensions as the Arduino Pro Mini, except for the "diving board" area where the HM-11 sits. APM is 18x33mm and the Valdez Mutant is 18x46.97mm

Features lost:

1. I didn't put a reset switch. I was banking on the BLE being able to reset the HM-11 serially (I'll get to that in a bit).

2. A power LED. I decided the RGB LED blinking for the HM-11 could double as a power-led, since the power-rail is the same for the HM-11 and the LPC1114

I added one feature that I've always felt the APM was lacking: Mounting Holes. Some time ago I realized as I continued challenging myself to make smaller and smaller PCB solutions, there gets a point where the board is too small to easily work with. The connecting wires hold it in the air, or pull it off where you set it. I decided I'd add 3mm mounting holes to hold my board in place.

A-4. Wireless Programming Over BLE.

I've always dreamed of hooking up a Bluetooth module to an Arduino and uploading sketches wirelessly. When I discovered the HM-10 I thought I had a real chance (I've not completely given up on the idea), but it took editing the Arduino IDE source. I was able to tweak and compile it, but if anyone who has been through the Arduino IDE source will tell you, it's a friggin mess. But when I went over the design of the LPC programmer interface, I realized the process of flipping bits on the ISP SELECT and RESET lines with the FTDI could be done remotely by the HM-10, using the PIO pins. Hmm. Light bulb.

I therefore set out to design a board that would allow for wireless uploading of programs.

Instead of using my traditional go-to HM-10 , I decided to switch it up and attempt using the HM-11 .

The HM-11 is pretty much the same board as the HM-11, but instead having the 8 or so IO pins, it only has 2. Perfect. One for RESET and one for SELECT.

I thought the HM-11 would allow me to stay consistent with design goal #3: Itty-Bitty.

In theory, this is how the wireless uploading would work.

  1. HM-11- A sends "AT+PIO30"
  2. The HM-11- B PIO3 will go low, which sets the LPC1114 ISP MODE to LOW.
  3. HM-11- A sends "AT+PIO20"
  4. Then, the HM-11- B PIO2 goes LOW for ~5uS. This will reset the LPC.
  5. As the LPC comes back up it checks the ISP MODE pin and sees it LOW.
  6. HM-11- A sends "AT+PIO31" waits ~100mS then sends "AT+PIO21"
  7. The HM-11- B PIO3 and PIO2 will go HIGH.
  8. The LPC enters ISP mode.
  9. The HM-11 PIO2 & PIO3 go HIGH.
  10. The program is uploaded to the LPC.
  11. HM-11- A sends "AT+PIO20"
  12. HM-11- B PIO2 goes LOW, resetting the LPC.
  13. HM-11- A sends "AT+PIO21"
  14. HM-11- B PIO2 goes HIGH and the LPC runs the uploaded program.

B-1. Testing

Testing this board was a bit of a bitch. The first version (v02) I printed had several major flaws:

Mistakes on 1st iteration :

  1. The RX/TX lines were flipped (I swear, I never get that right).
  2. The CONN pin on the HM-11 was wrong.
  3. I routed the CTS pin to pin PIO0_2, which is not the reset pin.
  4. There was a N-Chan flipping for the HM-11 to flip the LPC power. I got rid of that and simply ran a line to the reset (duh).

I quickly corrected these problems and sent the board off again. When the 2nd Iteration came in I wasn't able to test it. No matter what I did I couldn't get it to go into ISP mode. I got pretty harsh on myself, blaming my "crappy soldering skills and dellusions of ability." Then it hit me, I had added 10uF and those take a bit to discharge. I threw the multi-meter on it and sure enough, when I pulled the power from the LPC, then reapplied it (I was using this method instead of the reset line) it took a good 30 seconds for the voltage to drop near nominal. I quickly strung up a momentary switch on the reset line, first time I hit the button it went right into ISP mode. Son-of-a-badger !

Therefore, I consider the 2nd iteration a hardware success.

But there was a big let down. I tried both FlashMagic and lpc21isp to get them to upload across the BLE connection, but they both timed out. Ugh. I guess no wireless download?

Features tested:

  1. FTDI pinout -- Working -- 50% tested -- (works to provide power and RX/TX work, ability to reset and select mode not yet tested. This will require customer software).
  2. 5v/3.3v RX/TX converter -- 100% tested -- Working
  3. DPDT Switch to select HM-11 or USB -- 100% tested -- Working
  4. Crystal -- not yet tested 0%
  5. HM-11 -- RX/TX -- 100% tested -- Working
  6. RGB TX/RX/CONN -- 33% tested -- CONN Working
  7. LPC reseting HM-11 -- not yet tested 0%
  8. HM-11 controlling RESET and ISP MODE -- not yet tested 0%

Board Tested and Working: 48%

B-2. Support and Design Files

I'm a hack. I wouldn't even be hacking with LPC1114 if it weren't for the support tools put together by Mr. Bdk6.

Bdk6's work on the LPC1114

  1. Bdkdev -- Bdk6's LPC1114 toolchain and uploader.
  2. Valdez Family -- LPC1114 Robot
  3. Bdkdev LMR Thread (for error reporting).

Some of my work with the LPC1114

  1. Setting up GCC ARM compiler for LPC.
  2. Bitbanging with FTDI .
  3. Re-rolling LPC uploader (incomplete).

Here are some files specific to the Valdez Mutant:

  1. Valdez Mutant Schematic v04
  2. Eagle Files -- Valdez Mutant v04
  3. Pinout Valdez_Mutant_Pins.h (working on).

B-3. Future

Alright, so now what? Um, let's build a robot with it. To do this, I'm going to design a motor PCB with the DRV8837. And I'm hoping that Mr. Bdk6 doesn't mind adding the FTDI reset features and the HM-11 upload features. If he doesn't have time, then I'll probably pick back up my attempt to write my own bootloader.

I did notice a few problems. First, I didn't allow for a VIN pin. This means I'm going to have jumper between a "shield" board and the Mutant. Also, I'm worried about fitting two H-bridges on a PCB as small as the Mutant, the DRV8837 is very small, but the traces to it take a lot of real-estate.

Well, that's it.

A huge thanks to Mr. Bdk6. These tools are amazing; finally escaping Arduino!

iOS to µC Using HM-1X in Objective-C

Originally posted on www.letsmakerobots.com

(This node will probably float a bit, have lots of work to do on it. My apologies.)

I'd been wanting to create a bridge between Arduino and iOS for awhile. Not going to lie, not a huge fan of iOS devices, but since my wife won an iPad Mini I've begrudgingly accepted they fill a need. Still, my hacking has orbited robotics and any device I can't connect to a robot frustrate me. Well, a year ago I realized an iPad Mini would connect to an HM-10 , and therefore, robot.

Sadly, the app used to connect to the HM-10 was LightBlue , an app with little versatility. However, it allowed me to confirm everything was in place to the connect the iPad Mini and a robot. Of course, I wasn't willing to pay several hundreds of dollars at the chance I could develop an app. Well, the idea got filed under "NSF."

But, two months ago I was contacted by Simon Riley, the CEO of Carduino . He asked why I had stopped short of developing an iOS app to interface with the HM-10 BLE Serial modules. My response was short: Lack of funds. I explained to develop in iOS (legally, and therefore weary and worry free) you need an iOS developer's license and a Mac to develop from; I hadn't money for either. Simon responded the next day, "Maybe we can help with that."

Long story short, Carduino donated to the cause and I used my robot allowance (you married guys understand) to purchase the rest. So, what did I get?

Mac Mid 2009

Price ended at $469.99. I spent a little more than I should, but since Carduino had added to the kitty I was worried about getting something I'd be unable to run Xcode. Therefore, I spent a little extra in hopes to get a machine that would allow me to write code efficiently.

I have to take a moment and remind people, I wear a white hat. Dear Amy2865 , before you sell a laptop, be sure to log out of your eBay account. Also, Jared Kusma , I'm liking your laptop, but I _did _clean the keyboard thoroughly before using it. And the spots on the screen.

Alright, enough of the teasing. Moving on.

I deal with clinical delusions . But, I'm learning to force them to serve me. I realize I'll never be as good as I feel in the throes of a delusion. Yet, I've allowed these words to guide me,

Believing I can do anything, may not be true. But believing it is enables me to do_ almost_ anything.

Well, when I accepted Carduino's funds to help develop an app I might have been delusional. I didn't tell anyone I'd never used a Mac before, let alone wrote Objective-C. But one thing I believed, if I determine myself to do something I will. Of course, my timeframe is my own and the product might be apparently hackish, but it will get done.

Anyway, I admittedly had no idea what I was doing, so I decided to journal as I went.

This brings me to my disclaimer:

I am not a professional programmer. I do not pretend to be. With that, please feel free to point out my mistakes, inefficiencies, or ineffective code in general. Part of the reason I post articles like this is for the peer-review. But don't expect me to apologize much for stuff I didn't catch. Working a full-time job in a non-tech field, having a wife in graduate school, raising a four-year-old, well, these things leave me little time to program, and nearly no time for code review.

I don't think there are mistakes in my code, I know there are. Alright, self-deprecation aside, let's get going.

1. Setting up the Environment

First, you need a Mac and a Developer's License. The Mac really needs to be at least 2008 or later to effectively code for the current iOS (7.1 at writing, 8.0 being in beta).

After looking over many "deals" on eBay I decided on a Mac Book Pro 2009. It seemed old enough people didn't have an unhealthy attachment. Later than 2009, it was like people were selling their pretty daughter.

I chose the Mac Book over Mac Mini. The Mac Book came with a monitor and peripherals. Maxhirez warned me some Mac Mini's have proprietary video out, which would force me to buy a monitor as well.

I was a a lot worried an eBay Mac would be DOA. When it finally came in, I was relieved to see it boot up. But, within an hour it overheated and crashed. Worried the crap out of me. I then realized this laptop had two video cards and the display settings were full-blast. I backed down the video settings and the temperature seemed to hold. Still a little worried. When I get the app written for Carduino I'll probably take it apart, clean the heat-sink fins and reapply thermal paste.

So, price for the Mac: $469.99

Well, I had the Mac, now what?

I began researching costs for iOS developers' license . It's $99 a year.

This is supposed to allow you to write and publish iOS for the entire year. I bit the bullet and ordered it.

Purchase the Publisher's License:

Download Xcode

Once you have your Mac and Developer License, time to setup Xcode.

If you try to compile your app and you get an error regarding a certificate, and doesn't automatically resolve, you can download a certificate manually.

Download Developer certificate

1. Log on to iOS Dev Center and Download you Developer Certificate

You will need to apply this certificate to the apps you write to publish them--even on an ad hoc basis.

2. The App We'll Write

This write-up describes writing an app for Bluetooth 4.0 iOS devices to enable a serial connection to an Arduino. To facilitate the serial connection on the Arduino-end a HM-10 acts as a peripheral, which in turn, interacts with the Ardunio via a serial connection.

The HM-10 operates on 3.3v and the Arduino 5v, but I created an Instructable on how to convert the HM-10 to 5v.

The HM-10 is a low cost (6.87 USD, shipping ~.20) Bluetooth 4.0 module.

3. Preparing to Develop in Xcode 5

Before I started this projects I'd never used a Mac, never seen Xcode 5, let alone looked at Objective-C code. But, like the delusional man I am, I thought, "Well, it's got the word 'C' in its name; couldn't be that hard for me to learn." Stupid me.

Objective-C is silly. Well, I shouldn't say its entirety is silly; the verbosity and syntax are silly, though. The idea being everything is spelled out, nothing abbreviated, which makes the code chewy to read. Anyway, I'll stay away from psychological rants about brevity being the essence of wit. Or how humans will psychologically gravitate towards messages easy to encode and decode .

This article isn't going to go into much on how to write Objective-C or use Xcode, since there are already many excellent guides.

The site I found most useful was Ray Wenderlich's

His written tutorials are free, but giving the visual component of Xcode I paid $15 for a subscription to his video tutorials. Both written and video tutorials are excellent. Learned pretty much everything I needed from him and his peers.

I would list other tutorials, but really, Ray's covers everything you'd need to write this app--well, besides the Bluetooth part, which I'll cover. But one surprisingly helpful video was Apple's introduction to CoreBluetooth Framework .

  1. 101 Core Bluetooth (You need an Apple Device to watch it.)
  2. Advanced Core Bluetooth (You need an Apple Device to watch it .)

Also, several videos and articles I found:

  1. InvasiveCode
  2. Chris Miles

Lastly, the iOS code I have was not written by me. I've just chopped it up in hopes to understand it. The original author is a friend of mine:

4. The UI Layout

The app we're going to write is pretty simple. Really , it is. It takes the values from two Slider Controls and sends them via Bluetooth to an Ardunio. The Arduino in turn converts these values into direction and PWM values for two wheeled-motors.

Ok, open Xcode and let's start a new projects. We are going to use a Single View projects.

The first step in creating our app will be laying out the user interface. This boils down to a few items.

View for Background Image:

  • 3 x Labels -- Steer Value, Acceleration Value, RX Data
  • 2 x Image Views -- for Slider Tracks
  • 2 x Slider Controllers -- For PWM Values
  • 2 x Buttons -- TEST Send and Scan Devices Menu Button
  • 1 x View -- Acts as a hideable container for scanned devices.

The Scan Devices View will act as a container for the Devices Table View. We will set its initial state to hidden and then reveal it programmatically triggered by the Devices Menu Button.

The Scan Devices View will have 2 items.

  • 1 x Button -- Back
  • 1 x Table View -- Contains BLE Device information

If all goes right, our UI should end up looking something like this:

If you'd like to create your own layout, I've created a video you can follow along:

Or if you prefer, you can download my skeleton layout:

Just download the projects as zip. Then, within the projects there is another zip titled: bleAppStartLayout.zip Simply unzip this projects and open it in xCode if you'd like to write your own code to go with the skeleton layout.

5. Code

There are three parts to the code of our app.

Code to control...

  1. The Bluetooth connection
  2. User interface
  3. Devices List

In this article I'm only going to cover the Bluetooth code in depth. The rest is either pretty straightforward

Objective-C Bluetooth Code (and some UI):

Before we get going, it'll help to be slightly familiar with Bluetooth 4.0's standards and protocols. Also, iOS' recommendations on using CoreBluetooth, Apple's API for Bluetooth 4.0 hardware.

The big take away for us is the differences between Central and Peripheral roles.

This doesn't mean our bot cant receive data or iOS device can't send data, it simply defines the relationship between the devices. The role decides which device controls the connection and data flow. For the sake of this app the bot will be setup as a Peripheral and the iOS device will be the Central . This is my opinion, but it seems the BLE hardware connected to the uC or CPU with the greatest speed should take the Central role.

The header file -- bleApp.h

To access the Bluetooth 4.0 functionality of compatible iOS devices, Apple provide the CoreBluetooth Framework . This framework is brought into your app code in the typical C fashion, by importing it in bleApp.h

#import <CoreBluetooth/CoreBluetooth.h>

Once the framework is imported we have access to the API methods.

References to the methods can be found here:

Alright, I'm going to attempt explaining something I poorly understand, Objective-C Delegates.

I believe a delegate is a collection of services your code can subscribe. I think of them much like interrupts in Arduino. Each time a specific event happens a method is called. You setup the delegates you wish to subscribe at the top of your bleApp.h :

@interface ViewController : UIViewController <CBPeripheralDelegate,
CBCentralManagerDelegate, UITableViewDelegate, UITableViewDataSource>

Here we are calling on subscribing to four delegates:

  1. CBPeripheralDelegate
  2. CBCentralMAnagerDelegate
  3. UITableViewDelegate
  4. UITableViewDataSource

The CoreBluetooth Central Manager, the CoreBluetooth Peripheral, User Interface Table View Delegate, and the User Interface Table View Data Source. Right now we are only going to focus on the Bluetooth delegates .

Another way to think of delegates is a collection of little scout robots who report when a specific event takes place.

These delegates are a collection of little methods who will be called at specific events. For example, the CBPeripheralDelegate has the method -(void)peripheral:(CBPeripheral )peripheral didDiscoverServices:(NSError )error . This method is called whenever iOS app discovers BLE peripheral. Again, these methods are event driven--this means something usually has to happen before the come report to your code.

Here are the major methods we will be using to control the iOS BLE hardware:

  1. centralManagerDidUpdateState
  2. centralManager DidDiscoverPeripheral
  3. centralManager didConnectPeripheral
  4. peripheral didDiscoverServices
  5. peripheral didDiscoverCharacteristicsForService
  6. pierpheral didDiscoverDescriptorsForCharacteristic

Next, we declare the properties we will need. If you know as little about Objective-C properties as I did here's a good tutorial .

//
//  ViewController.h
//  Carduino
//
//  Created by Ladvien on 6/21/14.
//  Copyright (c) 2014 Honeysuckle Hardware. All rights reserved.
//

#import <UIKit/UIKit.h>
#import <CoreBluetooth/CoreBluetooth.h>

@interface ViewController : UIViewController <CBPeripheralDelegate,
CBCentralManagerDelegate, UITableViewDelegate, UITableViewDataSource>

// Instance of Central Manager.
@property (strong, nonatomic) CBCentralManager *centralManager;
// Stores a list of discovered devices, the key being their UUID.
@property (strong, nonatomic) NSMutableDictionary *devices;
// Instance method, used to act when a peripheral is discovered.
@property (strong, nonatomic) CBPeripheral *discoveredPeripheral;
// Instance method, used to act when a peripheral is selected to connect.
@property (strong, nonatomic) CBPeripheral *selectedPeripheral;
// Holds UUIDs.
@property (readonly, nonatomic) CFUUIDRef UUID;
// Stores peripheral characteristics.
@property (strong, nonatomic) CBCharacteristic *characteristics;
// Stores the advertising data of a peripheral.
@property (strong, nonatomic) NSMutableData *data;
@end

That should be all the code we need in our header file.

bleApp.m -- Our Implementation

1. The UI Connection

Objective-C operates under the Modal-View-Controller design modal. We don't have to go too deep into this design theory to be dangerous, the main thing we want to take away is UI elements are connected to our code with keywords. For UI elements we wish to change programmatically we set a IBOutlet and for UI elements we wish to generate an action we use the -(IBAction) methods.

An example of using an IBOutlet would like this: rxLabel.text = @"Got data";

An example of a -(IBAction) method would be:

-(IBAction)menuButtonTouchUp:(id)sender{ [do stuff] };

All good, now how do we make IBOutlets and IBActions? First, click on the "Tuxedo" button

Now, hold CONTROL and click on the UI element you want to create an Action or Outlet, then drag to your code between @interface and @end.

Ray Wenderlich's tutorials explain this process well. So, I wont rehash. A couple hints though, you can type out each of the IBOutlets and IBActions, but unless the dot on the bar next to where it is written is filled in, it is not connected to an element. Also, if you hover your mouse over the little dot while in tuxedo-view, the element it is connected to will be highlighted.

Ok. So, we need to connect up all of our UI elements. I'll simply refer back to my video on the layout. Or I suggest you use the skeleton bleApp layout, since I've already wired up the UI elements.

Either way, we need to end up with code that looks something like this:

#import "ViewController.h"
@interface ViewController ()

// Timers.
@property (nonatomic, retain) NSTimer *steerSliderRecoilTimer;
@property (nonatomic, retain) NSTimer *accelerationSliderRecoilTimer;
@property (strong, nonatomic) IBOutlet UITableView *tableView;

//Outlets.
@property (strong, nonatomic) IBOutlet UIView *mainView;
@property (strong, nonatomic) IBOutlet UILabel *steerLabel;
@property (strong, nonatomic) IBOutlet UISlider *steerSlider;
@property (strong, nonatomic) IBOutlet UISlider *accelerationSlider;
@property (strong, nonatomic) IBOutlet UILabel *accelerationLabel;
@property (strong, nonatomic) IBOutlet UIView *devicesView;
@property (strong, nonatomic) IBOutlet UILabel *RSSI;
@property (strong, nonatomic) IBOutlet UILabel *rxDataLabel;

//Buttons in Devices Table.
@property (strong, nonatomic) IBOutlet UIButton *backFromDevices;
@property (strong, nonatomic) IBOutlet UIButton *test;

//BLE
@property (strong, nonatomic) IBOutlet UIButton *scanForDevices;

// Bytes used for switch-array.
@property (assign) uint8_t accelerationByte;
@property (assign) uint8_t steeringByte;

//Steer slider.
- (IBAction)steerSlider:(id)sender;
- (IBAction)steerSliderTouchUp:(id)sender;
- (IBAction)steerSliderTouchUpOutside:(id)sender;
- (IBAction)steerSliderTouchDown:(id)sender;


// Accceleration slider.
- (IBAction)accelerationSlider:(id)sender;
- (IBAction)accelerationSliderTouchUp:(id)sender;
- (IBAction)accelerationSliderTouchUpOutside:(id)sender;
- (IBAction)accelerationSliderTouchDown:(id)sender;

// Menu
- (IBAction)menuButtonTouchUp:(id)sender;
@end

1. CBCentralManager

Ok, let's get our Bluetooth going. Objective-C has a method that runs once if the UI loads, -(void)viewDidLoad method.

- (void)viewDidLoad
{
    [super viewDidLoad];

    // Allocates and initializes an instance of the CBCentralManager.
    _centralManager = [[CBCentralManager alloc] initWithDelegate:self queue:nil];
}

We will add more code in this method later, but for now this will work. Here, we are simply allocating and initializing an instance of the CBCentralManager object. It has two arguments, initWithDelegate , we set this to self and the queue we set to nil. This allows us to inherit the CBDelegate from the ViewController.h. The queue being set to nil simply means we are going to allow the CentralManager to manage our data.

centralManagerDidUpdateState

This method is called each time the BLE hardware on the iOS device changes state. Here, we are using it to check if the iOS' Bluetooth hardware has been turned on.

The centralManagerDidUpdateState is a method called by the CoreBluetooth (CB) Central Manager Delegate whenever the BLE hardware in your device changes state. Here, it is being called when our app first begins. It will also be called each time the iOS Bluetooth is turned on or off.

// Make sure iOS BT is on.  Then start scanning.
- (void)centralManagerDidUpdateState:(CBCentralManager *)central {
    // You should test all scenarios
    if (central.state != CBCentralManagerStatePoweredOn) {
        // In case Bluetooth is off.
        return;
        // Need to add code here stating unable to access Bluetooth.
    }
    if (central.state == CBCentralManagerStatePoweredOn) {
        //If it's on, scan for devices.
        [_centralManager scanForPeripheralsWithServices:nil options:nil];
    }
}

The central.state property is set by the CBCentralManager Delegate. It has six states:

  1. CBCentralManagerStateUnknown -- Device can't be read, etc.
  2. CBCentralManagerStateResetting -- Device is resetting
  3. CBCentralManagerStateUnsupported -- this device doesn't support BLE.
  4. CBCentralManagerStateUnauthorized -- Your app isn't authorized to use BLE
  5. CBCentralManagerStatePoweredOff
  6. CBCentralManagerStatePoweredOn

We will only be using the last two states. Our code checks if the BLE hardware is enabled; if it is not, it does nothing. Eventually, I'll probably add an alert to notify the user, but right now, it does nothing. If the hardware is enabled, then it executes the centralManager instance method with two arguments scanForPeripheralsWithServices: nil and options: nil.

In case you didn't have time to read the BLE protocol manual, I'm going to give you a crash course. Let's start with the service tree. The magic of Bluetooth lies in its advertisment protocol. The Central BLE device is scanning the air, while the Peripheral is advertising its information. The information advertised coordinates services the peripheral device has available.

If you have a minute, Ada has an excellent article on Generic Attribute Profile (GATT) written by Keven Townsend (I like his stuff).

Keep two things in mind, first, I'm still learning what the hell I'm talking about. Two, jnhuamao and I have a history. I've watched their BLE firmware develop over the years. When the first procuded the HM-10, it didn't conform to any BLE protocols. Now, they've got a damn fine product. Of course, they seem to be trying to get old school Bluetooth thinking to fit BLE. For instance, they equate the "Master" role of their modules with Central role protocol. Likewise, they equate "Slave" with Peripheral role. This confuses me a little, since

For the HM-10 it looks something like this,

When iDevice scans the HM-10 it'll report back the FFE1 characteristic, which is the characteristic address for RX/TX on the HM-10.

centralManager didDiscoverPeripheral

The centralManager didDiscoverPeripheral method executes every time a new service has been discovered. It provides several bits of information about the discovered peripheral. First, the peripheral information itself, this includes its name, UUID, etc. Further information can be pulled from the advertisementData dictionary. Lastly, which is a neat attribute of BLE, you can access the RSSI of the discovered device before ever connecting.

// Report what devices have been found.
- (void)centralManager:(CBCentralManager *)central
 didDiscoverPeripheral:(CBPeripheral *)peripheral
     advertisementData:(NSDictionary *)advertisementData
                  RSSI:(NSNumber *)RSSI
{
    // Set peripheral.
    _discoveredPeripheral = peripheral;

    // Create a string for the discovered peripheral.
    NSString * uuid = [[peripheral identifier] UUIDString];

    if (uuid) //Make sure we got the UUID.
    {
        //This sets the devices object.peripheral = uuid
        [self.devices setObject:peripheral forKey:uuid];
    }

    //Refresh data in the table.
    [self.tableView reloadData];

}

9: Our code set an instance variable _discoveredPeripheral to the most recent discovered peripheral.

12: Creates a string variable and sets it to the discovered peripheral's UUID.

1 4: Checks to see if we got a proper UUID string in the uuid variable.

17: Here we are calling the setter method for the devices NSMutableDictionary . We are setting the object service information from the discovered peripheral and the key is the discovered peripheral's UUID. This is going to allow us to recall at least 6 discovered services.

- (NSMutableDictionary *)devices Sett Method

We are going to store the last six peripherals discovered.

- (NSMutableDictionary *)devices
{
    // Make sure the device dictionary is empty.
    if (_devices == nil)
    {
        // Let's get the top 6 devices.
        _devices = [NSMutableDictionary dictionaryWithCapacity:6];
    }
    // Return a dictionary of devices.
    return _devices;
}

4: We check to see if we've initialized the dictionary. 7: If we haven't then we setup the dictionary with a six device slots, then, we set a slot to the last discovered device.

10: When we are done, we return the devices dictionary.

The devices method will be called many times throughout our program. Eventually, we will use the dictionary to populate a table of discovered devices.

centralManager didConnect

The centralManager didConnect method executes whenever your app connects to a specific BLE device.

// Run this whenever we have connected to a device.
- (void)centralManager:(CBCentralManager *)central didConnectPeripheral:(CBPeripheral *)peripheral {

    // Set the peripheral delegate.
    peripheral.delegate = self;
    // Set the peripheral method's discoverServices to nil,
    // this searches for all services, its slower but inclusive.
    [peripheral discoverServices:nil];
}

5: Once we've connected we activate the peripheral delegate methods.

8: After we have connected to a particular peripheral, we call the peripheral discoverServices method. Again, by setting the discoverServices to nil we search for all services on our newly connected peripheral.

2. CBPeripheralDelegate

peripheral didDiscoverServices

Here, we enumerate through all the services on the connected peripheral. This is a slow way to discover services, but it's inclusive and easy. And since the HM-10 only has two services, and only one service active at a time, we don't lose any time.

- (void)peripheral:(CBPeripheral *)peripheral didDiscoverServices:(NSError *)error
{
    // Enumerate through all services on the connected peripheral.
    for (CBService * service in [peripheral services])
    {
        // Discover all characteristics for this service.
        [_selectedPeripheral discoverCharacteristics:nil forService:service];
    }
}

4: This is a fancy for-loop called enumeration. It goes through all the services listed in the (CBPeripheral *)peripheral , which is a small list on the HM-10. If it is in the peripheral role, which is default, it only has one service.

7: Here we call discoverCharacteristics method on each service on our connected device. Again, passing the nil argument means we want to discover all characteristics, as oppossed to a specific. Slow, but inclusive.

peripheral didDiscoverCharacteristicsForService

For each service, we enumerate each of its characteristics.

- (void)peripheral:(CBPeripheral *)peripheral
didDiscoverCharacteristicsForService:(CBService *)service
             error:(NSError *)error
{
    // Enumerate through all services on the connected peripheral.
    for (CBCharacteristic * character in [service characteristics])
    {
        // Discover all descriptors for each characteristic.
        [_selectedPeripheral discoverDescriptorsForCharacteristic:character];
    }
}

4: We go through each characteristic of each service on the connected peripheral.

7: We call the discoverDescriptorsForCharacteristic method on each discovered characteristics.

peripheral didDiscoverDescriptorsForCharacteristic

We are accomplishing two things in this method. First, we are getting the character version of the hex values FFE0

6: The firs thing we do is convert the HM-10's characteristics from FFE1 to character values, 255 and 225.

8: Next, we check to see if we got two characters, and they are 255 and 225

12-23 : We do a quick enumeration through the services and characteristics. For each characteristic, for each service, we call the selectedPeripheral setter method. We pass the setNotifyValue argument to true . This automatically receives serial data. Each time serial data is received the method

-(void)peripheral:(CBPeripheral *)peripheral didUpdateValueForCharacteristic:(CBCharacteristic *)characteristic error:(NSError *)error

{

    //Put RX data collection here.

}

We'll write our RX method when we get to UI, since we'll set our rxDataLabel to automatically update with incoming data.

Also, the we are setting up an automatic RX notification method. But, another way to do this is by setting the setNotifyValue to false. Then, each time you want to get RX data you can call the didUpdateValueForCharacteristic method manually.

- (void)peripheral:(CBPeripheral *)peripheral
didDiscoverDescriptorsForCharacteristic:(CBCharacteristic *)characteristic
             error:(NSError *)error
{
    //Store data from the UUID in byte format, save in the bytes variable.
    const char * bytes =[(NSData*)[[characteristic UUID] data] bytes];
    //Check to see if it is two bytes long, and they are both FF and E1.
    if (bytes && strlen(bytes) == 2 && bytes[0] == (char)255 && bytes[1] == (char)225)
    {
        // We set the connected peripheral data to the instance peripheral data.
        _selectedPeripheral = peripheral;
        for (CBService * service in [_selectedPeripheral services])
        {

            for (CBCharacteristic * characteristic in [service characteristics])
            {
                // For every characteristic on every service, on the connected peripheral
                // set the setNotifyValue to true.
                [_selectedPeripheral setNotifyValue:true forCharacteristic:characteristic];
            }
        }
    }
}

sendValue

This method is called whenever we want to send information to the peripheral. It has data passing argument str , but we wont be using it. The app we are writing automatically assemblies a data string and send it to the peripheral each time it is called. To send our data we simply must insure it is in the appropriate variable.

This app takes the values of two slider with a range of -255 to 255. We then do a little data manipulation. On the iOS device a byte takes 8 bits. Same for an unsigned character. But I found if you assign a value greater than 127 then ARC will automatically generate two-bytes for a single unsigned value. To get around this and hang on to full resolution of the Arduino, we convert the slider ranges from 255 to 125-0 or 125-1. The one is a bit set in a switch-array, controlByte . Then, when the Arduino receives the data it converts it back to full range, 255.

Regarding the direction, using the same switch array, controlByte , we set a bit low or high depending on whether the slider indicates 0 to -255 or 0 to 255 . Again, when this makes it to the Arduino it is converted into direction of the motors.

Ok! Let's step through the code.

- (void)sendValue:(NSString *) str
{
    for (CBService * service in [_selectedPeripheral services])
    {
        for (CBCharacteristic * characteristic in [service characteristics])
        {
            // Round the float.
            steeringValue = lroundf(self.steerSlider.value);
            accelerationValue = lroundf(self.accelerationSlider.value);

            // SEND STRING
            //  DIR-MA    DIR-MB    PWM-MA  PWMA-MB EOTC
            //  CON Byte  CON Byte   0-255   0-255    :
            NSMutableData *myData = [NSMutableData data];

            // CONTROL BYTE
            //  BIT: 7=CAN'T BE USED
            //  BIT: 6=
            //  BIT: 5=Breaklights ON
            //  BIT: 4=Headlights ON
            //  BIT: 3=127+ MOTOR B
            //  BIT: 2=127+ MOTOR A
            //  BIT: 1=MOTOR B DIR
            //  BIT: 0=MOTOR A DIR
            NSUInteger controlByte = 0;


            //Steer value is negative number.
            if(steeringValue < 0)
            {
                // Set the reverse bit.
                controlByte |= 1 << 0;
                steeringValue = (steeringValue * -1);
            }

            // Acceleration value is a negative number.
            if(accelerationValue < 0)
            {
                // Set the reverse bit.
                controlByte |= 1 << 1;
                accelerationValue = (accelerationValue * -1);
            }

            // If steer motor is greater than 127.
            if (steeringValue > 127) {
                // Set the bit indicating 128-255.
                controlByte |= 1 << 2;
                // Remove excess from text.label
                steeringValue -= 128;
            }

            // If steer motor is greater than 127.
            if (accelerationValue > 127) {
                // Set the bit indicating 128-255.
                controlByte |= 1 << 3;
                // Remove excess from text.label
                accelerationValue -= 128;
            }

            //NSLog(@"After: %i", controlByte);
            // Breaklights
            //controlByte |= 1 << 5;
            // Headlights
            //controlByte |= 1 << 4;

            // Load all the data into myData.
            [myData appendBytes:&controlByte length:sizeof(unsigned char)];
            [myData appendBytes:&steeringValue length:sizeof(unsigned char)];
            [myData appendBytes:&accelerationValue length:sizeof(unsigned char)];

            // Create a string with all the data, formatted in ASCII.
            NSString * strData = [[NSString alloc] initWithData:myData encoding:NSASCIIStringEncoding];
            // Add the end-of-transmission character to allow the
            // Arduino to parse the string
            str = [NSString stringWithFormat:@"%@:", strData];

            // Write the str variable with all our movement data.
            [_selectedPeripheral writeValue:[str dataUsingEncoding:NSUTF8StringEncoding]
            forCharacteristic:characteristic type:CBCharacteristicWriteWithoutResponse];
                self.rxData = @" ";
        }
    }
}

3-6: Like before, we are enumerating through all services and characteristics on our connected peripheral.

8-9 : We get the slider values, round them into an integer and load them into appropriate integer variables steeringValue and accelerationValue .

14: Setup a data variable to hold our send string.

25: We create a byte variable to act as our switch-array.

29-42: Determine direction the motors should go based on the sign of the sliders.

45-58: Decide whether we need to divide the range.

67-69: Load the processed data into data variable.

72: Create a string using the data we've processed, then, convert it to ASCII to be sent to the Arduino.

75: Add the ":" character, which will act as our end-of-transmission character.

78: Finally, we send the completed data string to the peripheral.

Voila!

Full source code for this projects can be found here:

Here's the Arduino sketch that goes with it: