Ladvien's Lab

Latest Posts

Shaping and Combining HMIS Data from ETO

Continuing to explore R and SQL's usefulness when it comes to HMIS data I decided to start posting HMIS problems and R and SQL solutions.

Problem:  Our HMIS implementation has had three shelters entering data into one partition.  This has been a lot like mixing three different colors of sand into one bucket--much easier to put in then sort out.  It is also a problem since HUD requires Emergency Solution Grant (ESG) recipients to provide an annual standardized report, known as the CAPER, on data defined by the HMIS Data Dictionary . These data elements are referred to as Universal Data Elements.  With this mixed bucket data error responsibility becomes a big issue.  The CAPER only allows up to 25% missing data, which makes data quality important.  As for data repair, this should be completed by the agency which created the error.  This makes communicating data issues imperative.

Unfortunately, when data from several agencies is mixed ,creating an error report is problematic—at least, for the HMIS software our continuum of care utilizes.  The data quality reports our HMIS office produces lumps all errors together.  This leads to social loafing between the agencies, in turn, few data repairs.

Solution:  The solution seems to sort the data back out, re-assigning it to the respective agency's data.  This would allow data quality reports to assign responsibility of repair.  Currently, our COC uses Social Solutions ETO software for manage our HMIS.  The process of the moving the data consists of the following steps:

  1. Determine all data which needs to be migrated.  For us, this is Demographic, HUD Assessment, and Bed Stay data.
  2. Export these data sets.
  3. Sort the data sets to respective agencies.
  4. Import the data using a predefined template.

This article focuses on the third step.  The data has been exported, but how to sort it?

Below is a script written to take a flat file of HUD Assessments and

  1. Filter to to the respective program
  2. Filter HUD Assessments to just Protect Entry
  3. Repair the COC code (e.g., "tx601" -> "TX-601")
  4. Re-assign the data to the proper Site (agency's data) and Program.
  5. Chop data into sets of no more than 500 rows, making the import process easier
  6. Write the data out to files.

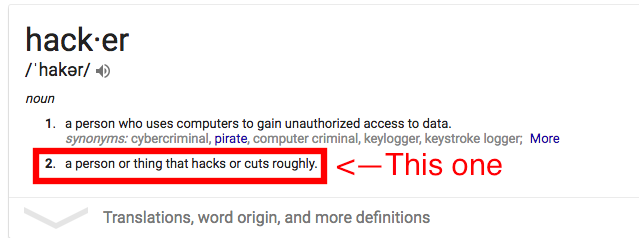
It's pretty hackish, but it worked.

library("sqldf")
library("readxl")

# Script Settings --------------------------------------------------------

# Name of output file, not including CSV extension.
outputFileName <- paste("HUD Assessments to Upload - v01 -")

# Paths to input files.
inputFileNameforHUDAssessments <- paste("TCES HUD Assesment Batch Report of Active Participants on 12-31-2016 - v09.xlsx")
inputFileNameforKeysToMatch <- paste("PEIDs of TCES Active Participants.xlsx")

# Names of target Site and Program
siteName <- "The Salvation Army Mabee Center"
programName <- "TSA Emergency Shelter Check In"

# ----------------------------------------

# Function to split files.
splitDataAndWriteFiles <- function(df, chunkSize, filename) {
  success <- FALSE
  count <- 0
  while (!success) {
    # If you want 20 samples, put any range of 20 values within the range of number of rows
    s <- paste(((count*chunkSize)+1), "  ", ((count+1)*chunkSize))
    print(s)
    chunk <- subset(df[((count*chunkSize)+1):((count+1)*chunkSize),])
    #chunk <- sample(df[5:20,])
    ## this would contain first 20 rows
    fileName <- paste(outputFileName, "_", as.character(count), ".csv")
    # Write out all the Active HUD Assessments.
    write.csv(chunk, file = fileName, na = "", row.names = FALSE)
    count <- count + 1
    success <- (count * chunkSize) > nrow(df)
  }
  return(success)
}

# Load all HUD Data
hudAssRaw <- read_excel(inputFileNameforHUDAssessments, na = "")

hudAssRaw <- subset(hudAssRaw, slect = -NA)

# Re-title columns for easier handling.
colnames(hudAssRaw)[1] <- "peid"
colnames(hudAssRaw)[11] <- "Relation_to_HH"
colnames(hudAssRaw)[12] <- "COC_Code"

# Replaces COC code for head's of household
hudAssRaw$COC_Code[with(hudAssRaw, Relation_to_HH == "Self (head of household)")] <- "TX-601"

hudAssRaw <- subset(hudAssRaw, slect = -NA)

# Subset Project Entry data.
hudAssRaw <- sqldf("SELECT * FROM hudAssRaw WHERE hudAssRaw.'At what point is this data being collected?_2270' = 'Project Entry'")

# Replaces COC code for head's of household
hudAssRaw$'Program Name' <- programName
hudAssRaw$'Site Name' <- siteName
colnames(hudAssRaw)[13] <- "A-3 What is the client's relationship t_2272"
colnames(hudAssRaw)[14] <- "A-5 HUD-assigned CoC code for the clien_2273"

# Set the dates back to YYYY-MM-DD
#hudAssRaw$`Response Date` <- as.Date(hudAssRaw$`Response Date`, "%Y%m%d")
#hudAssRaw$`DOB` <- as.Date(hudAssRaw$`DOB`, "%Y%m%d")
#hudAssRaw$`A-57 Approximate date homelessness star_6115` <- as.Date(hudAssRaw$`A-57 Approximate date homelessness star_6115`, "%Y%m%d")
#hudAssRaw$`A-58 Approximate date homelessness star_6116` <- as.Date(hudAssRaw$`A-58 Approximate date homelessness star_6116`, "%Y%m%d")

hudAssRaw <- subset(hudAssRaw, slect = -NA)

# Get target site Participant IDs
targetSiteParticipantIDs <- read_excel("TSA ESCI Target PSID.xlsx")

assessmentsWithTargetPID <- sqldf("SELECT * FROM targetSiteParticipantIDs
                                  INNER JOIN hudAssRaw   
                                  ON hudAssRaw.'Case Number'=targetSiteParticipantIDs.'Case Number'")

# Free up space.
rm(hudAssRaw)
rm(targetSiteParticipantIDs)

assessmentsWithTargetPID <- subset(assessmentsWithTargetPID, slect = -NA)

colnames(assessmentsWithTargetPID)[1] <- "pid"
colnames(assessmentsWithTargetPID)[12] <- "rid"

# INNER JOIN on self to get -only- the first HUD Assessment
# Thanks SO! http://stackoverflow.com/questions/7745609/sql-select-only-rows-with-max-value-on-a-column
assessmentsWithTargetPID <- sqldf("SELECT *
              FROM assessmentsWithTargetPID a
               INNER JOIN (
                  SELECT pid, MIN(rid) rid
                  FROM assessmentsWithTargetPID
                  GROUP BY pid
                ) b ON a.pid = b.pid AND a.rid = b.rid
              ")

# Remove PEID
assessmentsWithTargetPID <- subset(assessmentsWithTargetPID, select = -c(peid,peid.1))

write.csv(assessmentsWithTargetPID, file = "First HUD Entry Assessments for ESCI.csv", na = "", row.names = FALSE)

# Split the data into chunks and write to files.
splitDataAndWriteFiles(activeEntryAssessments, 500)
Attachment III, aka, The Zombie

Continuing to explore R and SQL's usefulness when it comes to HMIS data I decided to start posting HMIS problems and R and SQL solutions.

Problem: One of our Emergency Solutions Grant (ESG) funders requires the subrecipients to produce a report of all the participants which receive services from the shelter.  This requirement was written into the contract the ESG funders have with the subrecipient.  This worked somewhat in 2011 when it was implemented, however, it is 2016 and the data which is queried against to produce the report is well over 1.3 million entries.  These data are generated every time a participant checki in a shelter for meal, bed, or to sit.  It is unlikely this data set will ever get smaller.  In short, the data have grown beyond the report server currently provided by our software vendor.  Since the query is handled server-side it has resulted in the subrecipients being unable to reliably meet the requirement.

Solution:
In attempt to circumvent the server-side query, I've written a R and SQL script which takes two data files:

  1. Point of Service (PoS)
  2. Demographic and HUD Assessment data (enrolledInTCES)

These data were pulled using the software report services, but without any query.  This seems to allow bypassing the server-side bottle-neck.  The script then merges the data, formats it, and aggregates it for the final report.

The report should be something which could be run using a batch file, so I hope to deploy it to the subrecipients.  Then, with a little training, it should allow them to continue to produce the report for the funders.

nameOfMonth <- readline("Provide the month for which the data was pulled: \n")
nameOfAgency <- readline("Provide the name of your agency: \n")

library("sqldf")
library("readxl")

# Load data
enrolledInTCES <- read_excel("Attachment III Date for Oct and Dec 2016 -- DRC Program.xlsx")
PoS <- read_excel("DRC PoS Check In for November 2016.xlsx")
colnames(enrolledInTCES)[1] <- "peid"
colnames(PoS)[1] <- "peid"

# Check for duplicates
PoS <- sqldf("SELECT DISTINCT peid FROM PoS")

# Join allPos and enrolledInTCES
attachmentIIIClientData <- merge(PoS, enrolledInTCES, by="peid")

# Make the disability column easier to work with.
colnames(attachmentIIIClientData)[8] <- "ethnicity"
colnames(attachmentIIIClientData)[9] <- "tmi"
colnames(attachmentIIIClientData)[10] <- "race"
colnames(attachmentIIIClientData)[11] <- "disability"
colnames(attachmentIIIClientData)[12] <- "FSI"
colnames(attachmentIIIClientData)[13] <- "gender"
colnames(attachmentIIIClientData)[14] <- "HHSize"

# Replaces all NAs with 0
attachmentIIIClientData[is.na(attachmentIIIClientData)] <- 0
# Create annual income column
attachmentIIIClientData$annualIncome <- attachmentIIIClientData$tmi * 12
# Remove decimals.
attachmentIIIClientData$annualIncome <- as.integer(attachmentIIIClientData$annualIncome)

# AMI Matrix
# N = Number of People in a Household
#  <30%AMI    30%-50% AMI    51-80% AMI  >80% AMI
# 1<$14600    1<$24300     1<$38850   1>$38850
# 2<$16650    2<$27800     2<$44400   2>$44400
# 3<$18750    3<$31250     3<$49950   3>$49950
# 4<$20800    4<$34700     4<$55500   4>$55500
# 5<$22500    5<$37500     5<$59950   5>$59950
# 6<$24150    6<$40300     6<$64400   6>$64400
# 7<$25800    7<$43050     7<$68850   7>$68850
# 8<$27500    8<$45850     8<$73300     8>$73300

ami <- sqldf("SELECT 

              (
              SUM (CASE WHEN annualIncome < 14600 AND HHSize == 1 THEN 1 ELSE 0 END) +
              SUM (CASE WHEN annualIncome < 16650 AND HHSize == 2 THEN 1 ELSE 0 END) +
              SUM (CASE WHEN annualIncome < 18750 AND HHSize == 3 THEN 1 ELSE 0 END) +
              SUM (CASE WHEN annualIncome < 20800 AND HHSize == 4 THEN 1 ELSE 0 END) +
              SUM (CASE WHEN annualIncome < 22500 AND HHSize == 5 THEN 1 ELSE 0 END) +
              SUM (CASE WHEN annualIncome < 24150 AND HHSize == 6 THEN 1 ELSE 0 END) +
              SUM (CASE WHEN annualIncome < 25800 AND HHSize == 7 THEN 1 ELSE 0 END) +
              SUM (CASE WHEN annualIncome < 27500 AND HHSize > 7 THEN 1 ELSE 0 END)) as '<30% AMI',

              (
              SUM(CASE WHEN annualIncome < 24300 AND HHSize == 1 THEN 1 ELSE 0 END) +
              SUM(CASE WHEN annualIncome < 27800 AND HHSize == 2 THEN 1 ELSE 0 END) +
              SUM(CASE WHEN annualIncome < 31250 AND HHSize == 3 THEN 1 ELSE 0 END) +
              SUM(CASE WHEN annualIncome < 34700 AND HHSize == 4 THEN 1 ELSE 0 END) +
              SUM(CASE WHEN annualIncome < 37500 AND HHSize == 5 THEN 1 ELSE 0 END) +
              SUM(CASE WHEN annualIncome < 40300 AND HHSize == 6 THEN 1 ELSE 0 END) +
              SUM(CASE WHEN annualIncome < 43050 AND HHSize == 7 THEN 1 ELSE 0 END) +
              SUM(CASE WHEN annualIncome < 45850 AND HHSize > 7 THEN 1 ELSE 0 END)) as '30-50% AMI',

              (
              SUM(CASE WHEN annualIncome < 38850 AND HHSize == 1 THEN 1 ELSE 0 END) +
              SUM(CASE WHEN annualIncome < 44400 AND HHSize == 2 THEN 1 ELSE 0 END) +
              SUM(CASE WHEN annualIncome < 49950 AND HHSize == 3 THEN 1 ELSE 0 END) +
              SUM(CASE WHEN annualIncome < 55500 AND HHSize == 4 THEN 1 ELSE 0 END) +
              SUM(CASE WHEN annualIncome < 59950 AND HHSize == 5 THEN 1 ELSE 0 END) +
              SUM(CASE WHEN annualIncome < 64400 AND HHSize == 6 THEN 1 ELSE 0 END) +
              SUM(CASE WHEN annualIncome < 68850 AND HHSize == 7 THEN 1 ELSE 0 END) +
              SUM(CASE WHEN annualIncome < 73300 AND HHSize > 7 THEN 1 ELSE 0 END)) as '51-80% AMI',

              (
              SUM(CASE WHEN annualIncome > 38850 AND HHSize == 1 THEN 1 ELSE 0 END) +
              SUM(CASE WHEN annualIncome > 44400 AND HHSize == 2 THEN 1 ELSE 0 END) +
              SUM(CASE WHEN annualIncome > 49950 AND HHSize == 3 THEN 1 ELSE 0 END) +
              SUM(CASE WHEN annualIncome > 55500 AND HHSize == 4 THEN 1 ELSE 0 END) +
              SUM(CASE WHEN annualIncome > 59950 AND HHSize == 5 THEN 1 ELSE 0 END) +
              SUM(CASE WHEN annualIncome > 64400 AND HHSize == 6 THEN 1 ELSE 0 END) +
              SUM(CASE WHEN annualIncome > 68850 AND HHSize == 7 THEN 1 ELSE 0 END) +
              SUM(CASE WHEN annualIncome > 73300 AND HHSize > 7 THEN 1 ELSE 0 END)) as '>80% AMI'

              FROM attachmentIIIClientData")

# Remove duplicate counts.
ami$'30-50% AMI' <- (ami$'30-50% AMI' - ami$'<30% AMI')
ami$'51-80% AMI' <- (ami$'51-80% AMI' - ami$'<30% AMI' - ami$'30-50% AMI')

# Aggregates data for Attachment III.
attachmentIIIAggregate <- sqldf("SELECT 

                 COUNT(peid) as 'Total Participants',
                 SUM(CASE WHEN disability = 'Yes' THEN 1 ELSE 0 END) as DisabledCount,

                 SUM(CASE WHEN age < 5 THEN 1 ELSE 0 END) as 'Under 5',
                 SUM(CASE WHEN age > 4 AND age < 13 THEN 1 ELSE 0 END) as '5 to 12',
                 SUM(CASE WHEN age > 12 AND age < 18 THEN 1 ELSE 0 END) as '13 to 17',
                 SUM(CASE WHEN age > 17 AND age < 25 THEN 1 ELSE 0 END) as '18 to 24',
                 SUM(CASE WHEN age > 24 AND age < 35 THEN 1 ELSE 0 END) as '25 to 34',
                 SUM(CASE WHEN age > 34 AND age < 45 THEN 1 ELSE 0 END) as '35 to 44',
                 SUM(CASE WHEN age > 44 AND age < 55 THEN 1 ELSE 0 END) as '45 to 54',
                 SUM(CASE WHEN age > 54 AND age < 62 THEN 1 ELSE 0 END) as '55 to 61',
                 SUM(CASE WHEN age > 61 THEN 1 ELSE 0 END) as '60+',

                 SUM(CASE WHEN race  = 'Black or African American' THEN 1 ELSE 0 END) as 'Black or African American',
                 SUM(CASE WHEN race  = 'White' THEN 1 ELSE 0 END) as 'White',
                 SUM(CASE WHEN race  = 'American Indian or Alaska Native' THEN 1 ELSE 0 END) as 'American Indian or Alaska Native',
                 SUM(CASE WHEN race  = 'Asian' THEN 1 ELSE 0 END) as 'Asian',
                 SUM(CASE WHEN race  = 'Native Hawaiian or Other Pacific Islander' THEN 1 ELSE 0 END) as 'Native Hawaiian or Other Pacific Islander',
                 SUM(CASE WHEN race = 'Black or African American' OR
                 race = 'White' OR
                 race = 'American Indian or Alaska Native' OR
                 race = 'Asian' OR
                 race = 'Native Hawaiian or Other Pacific Islander'
                 THEN 0 ELSE 1 END) as 'Other',

                 SUM(CASE WHEN ethnicity  = 'Non-Hispanic/Non-Latino' THEN 1 ELSE 0 END) as 'Non-Hispanic/Non-Latino',
                 SUM(CASE WHEN ethnicity  = 'Hispanic/Latino' THEN 1 ELSE 0 END) as 'Hispanic/Latino',

                 SUM(CASE WHEN gender = 'Male' THEN 1 ELSE 0 END) as 'Male',
                 SUM(CASE WHEN gender = 'Female' THEN 1 ELSE 0 END) as 'Female'
                 FROM attachmentIIIClientData")

attachmentIIIAggregate <- sqldf("SELECT * FROM attachmentIIIAggregate LEFT JOIN ami ")

aggregateFileNameString <- paste(nameOfMonth, "_", nameOfAgency, "_attachment_III_aggregate.csv")
write.csv(attachmentIIIAggregate, file = aggregateFileNameString)

clientDataFileNameString <- paste(nameOfMonth,"_", nameOfAgency, "_attachment_III_client_data.csv")
write.csv(attachmentIIIClientData, file = clientDataFileNameString)
HMIS, R, and SQL -- Basics

Hacker Introduction

I'm a hacker .  If you find errors, please leave comments below.  If you have an opinion I'll hear it, but I'm often not likely to agree without some argument.

Joins (Merging Data)

Probably the best part of R and SQL is their ability to quickly combine data around a key.  For example, in HMIS CSVs the Client.csv contains a lot of demographic information and the Enrollment.csv contains a lot of assessment information.  This makes it difficult when needing a count of the total participants who are veterans and disabled, since the veteran information is in Client.csv and disability information is in the Enrollment.csv.  However, both R and SQL contain the join functions.

Joins are a hughely expansive topic; I'm not going to try to cover all their quirks, but here's some videos I found helpful:

The two useful joins for HMIS data are LEFT JOIN and INNER JOIN.  The left join keeps all the data in the left table and data matching from the right table and the inner join keeps only data which matches.

Here's an example in the context of the Client.csv and Enrollment.csv:

Client.csv

PersonalID FirstName VeteranStatus
12345 Jane Yes
54321 Joe No

Enrollment.csv

PersonalID FirstName DisablingCondition
12345 Jane Yes
54321 Joe No
45321 Sven Yes

Here are the two join statements and their results for the data above

SELECT * 
   FROM client a 
   LEFT JOIN enrollment b ON a.Personal=b.PersonalID

This join should result in the following:

PersonalID FirstName VeteranStatus DisablingCondition
12345 Jane Yes Yes
54321 Joe No No
45321 Sven NULL Yes

Notice Sven was kept, even though he had no entry the Client.csv.  After the join, since he had no
And the inner join would look like this:

SELECT * 
       FROM client a 
       INNER JOIN enrollment b ON a.Personal=b.PersonalID

This join should result in the following:

PersonalID FirstName VeteranStatus DisablingCondition
12345 Jane Yes Yes
54321 Joe No No

Counts

PersonalID <- sqldf("SELECT DISTINCT PersonalID FROM client")

Method above creates a vector of all the PersonalIDs in the client data-frame, which came from the Client.csv.  The DISTINCT command takes only one ID if there are more than two which are identical.  In short, it create a de-duplicaed list of participants.

For example,

PersonalID OtherData
12345 xxxxxxxxx
56839 xxxxxxxxx
12345 xxxxxxxxx
32453 xxxxxxxxx

Should result in the following,

PersonalID
12345
56839
32453

This is useful in creating a key vector, given other CSVs have a one-to-many relationship for the PersonalID.  For example,

The Enrollment.csv looks something like this

PersonalID ProjectEntryID EntryDate
12345 34523 2016-12-01
56839 24523 2015-09-23
12345 23443 2014-01-10
32453 32454 2015-12-30

This reflects a client (i.e., 12345) entering a project twice, once on 2014-01-10 and the other 2016-12-01.

Count of Total Participants:

SELECT COUNT(PersonalID) as 'Total Participants' FROM client

This query should give a on row output, counting the number of clients in the data-frame.

Total Participants
1 1609

However, if there are duplicate PersonalIDs it'll count each entry as an ID.  To get a count of unique clients in a data-frame add the DISTINCT command.

SELECT COUNT(DISTINCT(PersonalID)) as 'Unique Total Participants' FROM client

Conditional Data

Often in HMIS data it is necessary to find a collection of participants which meet a specific requirement.  For example, "How many people in this data-set are disabled?"  This is where the WHERE statement helps a lot.

SELECT PersonlID FROM clientAndEnrollment WHERE disability = 'Yes'

This statement will return a vector of all the PersonalID's of participants who stated they were disabled.  The total participant query could be used, but there is an alternative method.

SELECT SUM(CASE WHEN 
               disability = 'Yes' THEN 1 ELSE 0 
           END) as DisabledCount

The above statement uses the CASE WHEN END statement, which I understand as SQL's version of the IF statement.  Here's C equivalent:

for(int i = 0; i < total_participants; i++)
    if(disability == true){
       disabilityCounter++;
    }
}

BOOL!

Boolean operaters can be used to get more complex conditional data:

SELECT PersonalID FROM clientAndEnrollment 
       WHERE disability = 'Yes' 
       AND gender = 'Female'

This statement will provide a vector of all the PersonalID's for clients who are disabled and female.

Ok, good stopping point for now.

HMIS, R, and SQL -- Introduction

"I love our software, I love our software."

I'm a HMIS Database Manager for a living.  It's a dream job--all the nerdy stuff, plus, there is a possibility I'm helping people.  Currently, one area our software really lacks is quickly generating complex reports. It has the ability, but the servers are laggy, it crashes often, and a project which should take 20 minutes will take 50 minutes to 40 hours depending on the "report weather."  These issues are probably caused by the reporting platform being web-based and calculations done server-side.  Regardless, given the amount of time the staff are eating on report projects I've decided to explore alternative systems for generating some of our needed reports.

Luckily, HUD has dictated a HMIS data format.  This is often known as the "CSV version."  The specification of these data sets are outlined in HUD's document:

These data standards are currently on version 5.1, however, HUD issues tweaks to these standards every October 1st.  Point is, if the data is standardized it should make it easy to manipulate using local tools.

Here are a few pros to explore local reporting tools:

  • Software vendor ambivalent
  • No bottleneck due to routing issues
  • Greater flexibility of reporting
  • No outage concerns
  • More control on optimization of queries

And the cons:

  • Somewhat more difficult to deploy to end-users (integration would probably be through batch files or Excel-VB)

Before jumping in to the alternatives it is important to point out HUD requires all HMIS software vendors have the ability to export a set of CSV files which contain all the HUD manadated data elements (also known as universal data elements).  This export process is reliable, fast, and predictable--at least, from my experience.  As the alternative tools are explored the data sets being used will most often be these HMIS CSVs, however, there will probably be other data our COC reports locally which will be joined to these CSVs using each participant's unique ID.

Ok! Let's take a look.

R

R gets me excited.  It is programming language for data miners.  It is primarily C under the hood, which potentially makes it blazingly fast. R is meant to be a command-line interface, but I'm using RStudio as convenient overaly.  R studio has a few limitations, for example only 15 columns may be view inside the IDE, but nothing show stopping.

This entry is not meant to be a course in R, however, I'll add some of my favorite links:

  1. Coursera's R Courses
  2. John Hopkins -- R Programming

Here's the toolchains:

  1. Mirror List for R Download (the CLI)
  2. RStudio (the R IDE used)

Alright, now we've got R going!

Ok, let's dig into some code.

First it is important to be able to read in CSV and Excel files.  The ability to read in CSVs is built into R.  To start loading Excel documents the read_excel package will need to be installed. R has a package manager, allowing method libraries to be easily added.  Pretty much any package can be installed from the CLI using install.package("name_of_package").  For example:

    # Installs the readxl package, which allows Excel files to be
    # read in as data-frames
    install.package("readxl")

A package only needs to be installed once, however, every R session will need to refer to the library before making calls to its methods.  For example,

    # Adds the readxl methods to this session.
    library("readxl")

After this package has been installed and added to the session, then we should be able to import all sorts of data into R using the following:

    # Load data
    read.csv( <- read_excel("DRC PoS Check In for October 2016.xlsx")
    csvData <- read.csv("My_CSV_file.csv")

This creates two data-frames.  One thing action I found to be necessary for later functions the ability to rename column headers.  This can be done using the following:

    # Make the disability column easier to work with.
    colnames(data_frame)[col_number_to_rename] <- "new_name"

    # For example, renames the header of column 8 to "ethnicity"
    colnames(client)[8] <- "ethnicity"

This is important later when SQL functions are used inside of R, as speciali characters SQLite doesn't like and workarounds make the SQL code verbose.

The most important thing which can be done by data people is merging datasets.  I've only started on this journey, but it looks to be an art which requires mastery to be effective.  But to get us going, here's how to perform a left join in R.

    # Join data_frame_2 to data_frame_1 where the "key" column matches.
    # Do not keep any data which doesn't match the keys in data_frame_1
    combined_data_frames <- merge(data_frame_1, data_frame_2, by="key")

    # Here's a real example, using HUD HMIS CSVs
    client <- read.csv("Client.csv")
    enrollments <- read.csv("Enrollments.csv")
    client_and_hud_assessments <- merge(client, enrollments, by="PersonalID")

If you're pretty sharp--or a data scientist--you might notice the flaw in the in the merger above.  The HMIS Client.csv should only have one record per participant, but the relationship from Client.csv to Enrollments.csv is one-to-many.  Meaning, each client could have mutiple project enrollments.  This makes the above code somewhat unpredictable--and I've no time to explore the results.  Instead, I've focused on taking the most recent entry from Enrollments.csv.  This can be done using some SQL code.

The SQL to R

Professional data folk may wonder why I've chosen to mix R and SQL.  Well, it may not be the best reason or explanation, but here goes.  R is a powerful tool, but often, the syntax is boggish.  It is hard to read and figure out what's going on.  SQL on the other hand, it's pretty intuitive.  For me, I'm looking to solve problems as quickly as possible and I've found by mixing the two I get to solutions much more quickly.  Often, it is a trade off, if a SQL query is running too slow, I look for an R solution.  And if I've re-read an R statement twenty times without being able to spot a bug, then I find a SQL solution.  For me, it's about getting to the result as quickly as possible

A second reason to mix SQL is about respect and marketability.  R seems to be gaining ground in a lot of data sciences, and seems to be the tool when it comes to economics and statistics, however, most data exchanges have SQL at their heart.  Therefore, when I can use my work as an excuse to develop a marketable skill, I'm going to do it.

If someone still has problems with those assertions, feel free to hate away in the comments below.

Alright, how does one mix SQL into R?  It centers around the package sqldf .  This package can be installed and added to a session with the following:

    # Install SQLdf package (run once)
    install.package("sqldf")

    # Adds sqldf to the current R session
    library("sqldf")

Underneath the hood of sqldf is SQLite , this important to note when it comes to debugging SQL queries in R--as we will see in a moment.

But, to get us kicked off, let's look at how sqldf works in R.

    result_df <- sqldf("YOUR SQL QUERY HERE")

This is a sample of how sqldf works.  Basically, the sqldf() makes a SQLite query call and returns the results.  Here, all of the vector for PersonalIDs was taken from the Client.csv and put into a dataframe called personalIDs.  And that's pretty much it.

Here's an example in the context of HMIS CSV data.

    # Add the SQLdf library
    library("sqldf)
    # Load Client CSV data
    client <- read.csv("Client.csv")
    # Get a vector of the client IDs from the Client.csv
    personalIDs <- sqldf("SELECT DISTINCT PersonalID FROM client")

Alright, from here on in I'm going to outline SQL queries seperately, just know, the SQL query will need to be insert into the sqldf("") call.

    SELECT DISTINCT PersonalID FROM client

Ok -- I'm going to stop this article here, since it seems to have gotten us going.  However, I'll continue adding to this series as I write useful queries for HMIS data.

ETO REST API in Swift -- Enterprise, Site, and Program Select

  1. Unwrap SSOAuthToken.  Else, handle error.
  2. Create request from webservice and SSOAuthToken.
  3. Make a GET request.
  4. Async-wait for response
  5. Unwrap response data.
  6. If GET request returned 200-299, request was success. If failed, handle.
  7. When successful, convert the return JSON data.  If failed, handle.
  8. Get Enterprise Names and enterpriseGUUID string from JSON data.
  9. Add the enterpriseGUUID string to a Dictionary using the Enterprise Names as the Key
  10. Call completion callback meothd with parameter "Success"
public func getListOfEnterprisesAvailable(currentSessionInfo: SessionInfo, completion: @escaping (_ response: ReturnInfoWithDictionary) -> Void){

    let SSOAuthToken = currentSessionInfo.SSOAuthToken!

    var returnInfo = ReturnInfoWithDictionary()
    var enterpriseDictionary = Dictionary<String, String>()

    let GetSSOEnterprisesService = "https://services.etosoftware.com/API/Security.svc/GetSSOEnterprises/\(SSOAuthToken)"

    let request = Alamofire.request(GetSSOEnterprisesService, method: .get, parameters: nil, encoding: URLEncoding.default).validate().responseJSON { response in

        switch(response.result){
            case .success:
                if let jsonData = response.data {
                    let enterprisesList = JSON(data: jsonData)
                    for i in 0..<enterprisesList.count {
                        let key = enterprisesList[i]["Key"].string!
                        let value = enterprisesList[i]["Value"].string!
                        enterpriseDictionary.updateValue(key, forKey: value)
                    }
                    returnInfo.dictionary = enterpriseDictionary
                    returnInfo.callback = self.prepareResponse(targetResponse: .Success)
                    completion(returnInfo)
                } else {
                    returnInfo.callback = self.prepareResponse(targetResponse: .FailedToGetEnterpriseList)
                    completion(returnInfo)
                }
                break;
            case .failure:
                returnInfo.callback = self.prepareResponse(targetResponse: .HTTPRequestFail)
                completion(returnInfo)
                break;
        }
    }
    if(DebugMode){
        debugPrint(request)
    }
}

public func setEnterprise(currentSessionInfo: SessionInfo, selectedEnterprise: String){
    let etoUserDefaults = ETOUserDefaults()
    etoUserDefaults.setUserDefault(key: .enterpriseID, value: selectedEnterprise)
    currentSessionInfo.setEnterprise(chosenEnterprise: selectedEnterprise)
}
  1. Unwrap SSOAuthToken.  Else, handle error.
  2. Unwrap selectedEnterpriseGuuid.  Else, handle error.
  3. Create request from  webservice URL, SSOAuthToken, Enterprise GUUID.
  4. Make a GET request.
  5. Async-wait for response
  6. Unwrap response data.
  7. If GET request returned 200-299, request was success. If failed, handle.
  8. When successful, convert the return JSON data.  If failed, handle.
  9. Get Site Name and Site Number from JSON data.
  10. Add the Site Number to a Dictionary using the Site Name as the Key
  11. Call completion callback meothd with parameter "Success"
public func getListOfSites(currentSessionInfo: SessionInfo, completion: @escaping (_ response: ReturnInfoWithDictionary) -> Void){

    var returnInfo = ReturnInfoWithDictionary()

    let SSOAuthToken = currentSessionInfo.SSOAuthToken ?? ""
    let selectedEnterpriseGuuid = currentSessionInfo.selectedEnterprise()

    if "" == SSOAuthToken {
        returnInfo.callback = prepareResponse(targetResponse: .NoSSOAuthToken)
        completion(returnInfo)
    } else if "" == selectedEnterpriseGuuid {
        returnInfo.callback = prepareResponse(targetResponse: .NoEnterpriseIDSelected)
        completion(returnInfo)
    } else {

        let GetSSOSitesService = "https://services.etosoftware.com/API/Security.svc/GetSSOSites/\(SSOAuthToken)/\(selectedEnterpriseGuuid)"

        let request = Alamofire.request(GetSSOSitesService, method: .get, parameters: nil, encoding: URLEncoding.default).validate().responseJSON { response in

            switch(response.result){
            case .success:
                if let jsonData = response.data {
                    let siteList = JSON(data: jsonData)
                    for i in 0..<siteList.count {
                        let keyInt = siteList[i]["Key"].int!
                        let key = String(keyInt)
                        let value = siteList[i]["Value"].string!
                        returnInfo.dictionary.updateValue(key, forKey: value)
                    }
                    returnInfo.callback = self.prepareResponse(targetResponse: .Success)
                    completion(returnInfo)
                } else {
                    returnInfo.callback = self.prepareResponse(targetResponse: .FailedToGetSiteList)
                    completion(returnInfo)
                }
                break;
            case .failure:
                returnInfo.callback = self.prepareResponse(targetResponse: .HTTPRequestFail)
                completion(returnInfo)
                break;
            }
        }
        if(DebugMode){
            debugPrint(request)
        }
    }       
}
  1. Unwrap SSOAuthToken.  Else, handle error.
  2. Unwrap selectedEnterpriseGuuid.  Else, handle error.
  3. Create request from webservice, SSOAuthToken, and Enterprise GUUID.
  4. Make a GET request.
  5. Async-wait for response
  6. Unwrap response data.
  7. If GET request returned 200-299, request was success. If failed, handle.
  8. When successful, convert the returned JSON data.  If failed, handle.
  9. Assign the Site sessionSecurityToken from the token in JSON data.
  10. Call completion callback method with parameter "Success"
public func setSelectedSite(currentSessionInfo: SessionInfo, completion: @escaping (_ response: ReturnInfoWithString)-> Void){

  let etoUserDefault = ETOUserDefaults()
  var returnInfo = ReturnInfoWithString()

  let SSOAuthToken = currentSessionInfo.SSOAuthToken ?? ""
  let selectedEnterpriseGuuid = currentSessionInfo.selectedEnterprise()
  let selectedSite = currentSessionInfo.selectedSite()

  etoUserDefault.setUserDefault(key: .siteID, value: selectedSite)

  var secondsFromGMT: Int { return NSTimeZone.local.secondsFromGMT() }
  let utcOffsetInHours = String(secondsFromGMT / 60)

  if "" == SSOAuthToken {
      returnInfo.callback = prepareResponse(targetResponse: .NoSSOAuthToken)
      completion(returnInfo)
  } else if "" == selectedEnterpriseGuuid {
      returnInfo.callback = prepareResponse(targetResponse: .NoEnterpriseIDSelected)
      completion(returnInfo)
  } else if "" == utcOffsetInHours {
      returnInfo.callback = prepareResponse(targetResponse: .InvalidUTC)
      completion(returnInfo)
  } else {
      let body = "https://services.etosoftware.com/API/Security.svc/SSOSiteLogin/\(selectedSite)/\(selectedEnterpriseGuuid)/\(SSOAuthToken)/"
          + utcOffsetInHours
      let request = Alamofire.request(body, method: .get, encoding: URLEncoding.default).validate().responseJSON { response in

          switch(response.result){
          case .success:
              if let jsonData = response.data {
                  let sessionSecurityToken = JSON(data: jsonData)
                  currentSessionInfo.sessionSecurityToken = sessionSecurityToken.string!
                  returnInfo.value = sessionSecurityToken.string!
                  returnInfo.callback = self.prepareResponse(targetResponse: .Success)
                  completion(returnInfo)
              } else {
                  returnInfo.callback = self.prepareResponse(targetResponse: .FailedToGetSiteList)
                  completion(returnInfo)
              }
              break;
          case .failure:
              returnInfo.callback = self.prepareResponse(targetResponse: .HTTPRequestFail)
              completion(returnInfo)
              break;
          }
      }
      if(DebugMode){
          debugPrint(request)
      }
  }
}
  1. Unwrap selectedEnterpriseGuuid.  Else, handle error.
  2. Create request from webservice URL, sessionSecurityToken, and EnterpriseGUUID
  3. Make a GET request.
  4. Async-wait for response
  5. Unwrap response data.
  6. If GET request returned 200-299, request was success. If failed, handle.
  7. When successful, convert the return JSON data.  If failed, handle.
  8. Get Program Name and Program Number from JSON data.
  9. Add the Program Number to a Dictionary using the Program Name as the Key
  10. Call completion callback meothd with parameter "Success"
public func getListOfPrograms(currentSessionInfo: SessionInfo, completion: @escaping (_ response: ReturnInfoWithDictionary)  -> Void){

     var returnInfo = ReturnInfoWithDictionary()

     let headers = headersWithEnterpriseIDAndSecurityToken(currentSessionInfo: sessionInfo)

     let selectedSite = currentSessionInfo.selectedSite()

     if "" == currentSessionInfo.SSOAuthToken {
         returnInfo.callback = prepareResponse(targetResponse: .NoSSOAuthToken)
         completion(returnInfo)
     } else if "" == currentSessionInfo.selectedEnterprise() {
         returnInfo.callback = prepareResponse(targetResponse: .NoEnterpriseIDSelected)
         completion(returnInfo)
     } else if "" == selectedSite {
         returnInfo.callback = prepareResponse(targetResponse: .NoSiteIDSelected)
         completion(returnInfo)
     } else {
         let body = "https://services.etosoftware.com/API/Form.svc/Forms/Program/GetPrograms/" + selectedSite

         let request = Alamofire.request(body, method: .get, encoding: URLEncoding.default, headers: headers).validate().responseJSON { response in

             switch(response.result){
             case .success:
                 if let jsonData = response.data {
                     let programList = JSON(data: jsonData).arrayValue
                     for i in 0..<programList.count {
                         let programIDInt = programList[i]["ID"].int
                         let disabled = programList[i]["Disabled"].boolValue //TODO: Make an option.
                         if !disabled {
                             if let programIDInt = programIDInt {
                                 returnInfo.dictionary.updateValue(String(programIDInt), forKey: programList[i]["Name"].string!)
                             }
                         }
                     }
                     currentSessionInfo.programsDictionary = returnInfo.dictionary
                     returnInfo.callback = self.prepareResponse(targetResponse: .Success)
                     completion(returnInfo)
                 } else {
                     returnInfo.callback = self.prepareResponse(targetResponse: .FailedToGetSiteList)
                 }
                 break;
             case .failure:
                 returnInfo.callback = self.prepareResponse(targetResponse: .HTTPRequestFail)
                 completion(returnInfo)
                 break;
             }
         }
         if(DebugMode){
             debugPrint(request)
         }
     }
}
  1. Unwrap selectedProgram.  Else, handle error.
  2. Unwrap selectedEnterpriseGuuid.  Else, handle error.
  3. Create request from webservice, selectedProgram, SSOAuthToken, and Enterprise GUUID.
  4. Make a GET request.
  5. Async-wait for response
  6. Unwrap response data.
  7. If GET request returned 200-299, request was success. If failed, handle.
  8. When successful, convert the returned JSON data.  If failed, handle.

  9. Call completion callback method with parameter "Success"

public func setSelectedProgram(currentSessionInfo: SessionInfo, setToProgramID: String,completion: @escaping (_ response: ReturnInfoWithJSON) -> Void){

  var etoUserDefaults = ETOUserDefaults()
  var returnInfo: ReturnInfoWithJSON = ReturnInfoWithJSON()

  etoUserDefaults.setUserDefault(key: .programID, value: setToProgramID)

  if "" == currentSessionInfo.SSOAuthToken {
      returnInfo.callback = prepareResponse(targetResponse: .NoSSOAuthToken)
      completion(returnInfo)
  } else if "" == currentSessionInfo.selectedEnterprise() {
      returnInfo.callback = prepareResponse(targetResponse: .NoEnterpriseIDSelected)
      completion(returnInfo)
  } else if "" == setToProgramID {
      returnInfo.callback = prepareResponse(targetResponse: .NoProgramIDSelected)
      completion(returnInfo)
  } else {
      let parameters: Parameters = [
          "ProgramID": setToProgramID
      ];

      let headers = headersWithEnterpriseIDAndSecurityToken(currentSessionInfo: currentSessionInfo)

      let body = "https://services.etosoftware.com/API/Security.svc/UpdateCurrentProgram/"

      let request = Alamofire.request(body, method: .post, parameters: parameters, encoding: JSONEncoding.default, headers: headers).validate().responseJSON { response in

          switch(response.result){
          case .success:
              if let responseData = response.data {
                  let jsonData = JSON(data: responseData)
                  currentSessionInfo.selectedProgramInfo = jsonData
                  currentSessionInfo.setProgram(chosenProgram: setToProgramID)
                  returnInfo.json = jsonData
                  returnInfo.callback = self.prepareResponse(targetResponse: .Success)
                  completion(returnInfo)
              } else {
                  returnInfo.callback = self.prepareResponse(targetResponse: .FailedToGetSiteList)
              }
              break;
          case .failure:
              returnInfo.callback = self.prepareResponse(targetResponse: .HTTPRequestFail)
              completion(returnInfo)
              break;
          }
      }
      if(DebugMode){
          debugPrint(request)
      }
  }
}
public func headersWithEnterpriseIDAndSecurityToken(currentSessionInfo: SessionInfo) -> HTTPHeaders{
    let selectedEnterpriseGuuid = currentSessionInfo.selectedEnterprise()
    let sessionSecurityToken = currentSessionInfo.sessionSecurityToken

    let headers: HTTPHeaders = [
        "Content-Type": "application/json",
        "Accept": "application/json",
        "enterpriseGuid": selectedEnterpriseGuuid,
        "securityToken": sessionSecurityToken,
        ]

    return headers
}

public func sortDictionary(dictionaryToSort: Dictionary<String, String>) -> Dictionary<String, String>{
    var dictionaryToReturn = Dictionary<String, String>()

    let sortedKeys = Array(dictionaryToSort.keys).sorted()

    for key in sortedKeys {
        if let valueForThisKey = dictionaryToSort[key] {
            dictionaryToReturn.updateValue(valueForThisKey, forKey: key)
        }
    }

    return dictionaryToReturn
}

private func prepareResponse(targetResponse: AuthenticationServiceResponseTypes) -> AuthenticationServiceResponse {
    var candidateResponse: AuthenticationServiceResponse = AuthenticationServiceResponse()
    candidateResponse.responseType = targetResponse
    candidateResponse.responseMessage = AuthenticationServiceResponseMessages[targetResponse]!
    return candidateResponse
}

public struct AuthenticationServiceResponse {
  var responseType: AuthenticationServiceResponseTypes
  var responseMessage: String

  init(){
      self.responseType = .UnknownFailure
      self.responseMessage = AuthenticationServiceResponseMessages[.UnknownFailure]!
  }
}
public struct ReturnInfoWithString {
    var value: String
    var callback: AuthenticationServiceResponse

    init(){
        self.value = ""
        self.callback = AuthenticationServiceResponse()
    }
}

public struct ReturnInfoWithDictionary {
    var dictionary: Dictionary<String, String> = Dictionary<String, String>()
    var callback: AuthenticationServiceResponse

    init(){
        self.dictionary = Dictionary<String, String>()
        self.callback = AuthenticationServiceResponse()
    }
}

public struct ReturnInfoWithJSON {
    var json: JSON?
    var callback: AuthenticationServiceResponse

    init(){
        self.json = JSON(["":""])
        self.callback = AuthenticationServiceResponse()
    }
}

public enum AuthenticationServiceResponseTypes {
    case
    Success,
    NoSSOAuthToken,
    HTTPRequestFail,
    FailedToGetEnterpriseList,
    FailedToGetSiteList,
    InvalidUTC,
    NoEnterpriseIDSelected,
    UnknownFailure,
    NoSiteIDSelected,
    NoProgramIDSelected,
    failedToConnectToServer

    init(){
        self = .UnknownFailure
    }
}

public let AuthenticationServiceResponseMessages: Dictionary<AuthenticationServiceResponseTypes, String> = [
    .Success : "Success",
    .NoSSOAuthToken : "Authorization denied.",
    .HTTPRequestFail : "Failed to get information from server.",
    .FailedToGetEnterpriseList : "Failed to get enterprise list.",
    .FailedToGetSiteList : "Failed to get site list.",
    .InvalidUTC : "UTC Offset invalid.",
    .NoEnterpriseIDSelected : "No enterprise selected.",
    .UnknownFailure : "An unknown failure has occurred.",
    .NoSiteIDSelected: "No site selected.",
    .NoProgramIDSelected: "No program selected.",
    .failedToConnectToServer : "Failled to connect to server."
]
ETO REST API in Swift

Logging in to ETO

This code base has become a bit of a pet project.  It uses Alamofire to create GET and POST requests against Efforts to Outcomes REST API. This enables native applications to interact with our Homeless Management Information System ( HMIS ) database.  I've been coding it to practice the craft.  Also, there are a few operations in our continuum of care which could be improved by creating native applications, as opposed to using webapplications.  For example, street outreach teams are often without their computer, given the bulk.  But rarely is a street outreach specialist without a mobile device.  This would allow the outreach specialist to access all data regardless of physical settings.

Identified benefits from native applications:

  • Self check in at shelters
  • Using TouchPoint responses instead of Points-of-Service for data activities, such as shelter check-in.
  • Street outreach
  • Leveraging existing hardware (most staff have smartphones)
  • User friendly UIs
  • Data aggregation through automated queries
  • Point-in-Time Count mobile-device survey
  • Collecting GPS coordinates of street outreach and point-and-time activities

This will be a documentation journal, given the project will most likely evolve to be bigger than my organic memory could manage.

Login()

Setting up a session which is authorized to request information from an ETO databse has several steps.  The first, being the user has an actual account with the database

  1. Take username, password, and webservice URL and make POST request.
  2. Async-wait for response
  3. Unwrap response data.
  4. If POST request returned 200-299, request was success. If failed, handle.
  5. When successful, convert the return JSON data.  If failed, handle.
  6. Pull SSOAuthToken from JSON data.
  7. If it was found in JSON data, call GetListOfEntperises() passing SSOAuthToken
  8. Async-wait returned list of Enterprises.
  9. Call completion callback meothd with parameter "Success"
//
//  ETOWebServiceLogin.swift
//  ETO-TouchPoint-Test
//
//  Created by Thomas Ladvien on 10/13/16.
//  Copyright © 2016 Honeysuckle Hardware. All rights reserved.
//

import Foundation
import Alamofire
import SwiftyJSON

public func login(currentSessionInfo: SessionInfo, username: String, password: String, completion: @escaping (_ response: ReturnInfoWithString) -> Void){

        // ETO Authentication Web Service.
        let SSOAuthenticateService = "https://services.etosoftware.com/API/Security.svc/SSOAuthenticate/"

        let parameters: Parameters = [
            "security": [
                "Email": username,
                "Password": password,
            ]
        ];

        var returnInfo = ReturnInfoWithString()

        // TODO: Check for HTTP response code.
        let request = Alamofire.request(SSOAuthenticateService, method: .post, parameters: parameters, encoding: JSONEncoding.default).validate().responseData { response in
            if let data = response.data {

                switch response.result {
                case .success:
                    let json = JSON(data: data)
                    returnInfo.value = json["SSOAuthenticateResult"]["SSOAuthToken"].stringValue
                    if ("00000000-0000-0000-0000-000000000000" != returnInfo.value) {
                        returnInfo.callback = self.prepareResponse(targetResponse: .Success)
                        currentSessionInfo.SSOAuthToken = returnInfo.value
                        completion(returnInfo)
                    } else {
                        returnInfo.callback = self.prepareResponse(targetResponse: .NoSSOAuthToken)
                        completion(returnInfo)
                    }
                case .failure:
                    returnInfo.callback = self.prepareResponse(targetResponse: .HTTPRequestFail)
                    completion(returnInfo)
                }

            } else {
                returnInfo.callback = self.prepareResponse(targetResponse: .UnknownFailure)
                completion(returnInfo)
            }
        }
        if(DebugMode){
            debugPrint(request)
        }
    }

Ok, let me break down steps in this function.

  1. Take username, password, and webservice URL and make POST request.
  2. Async-wait for response
  3. Unwrap response data.
  4. If POST request returned 200-299, request was success. If failed, handle.
  5. When successful, convert the return JSON data.  If failed, handle.
  6. Pull SSOAuthToken from JSON data.
  7. If it was found in JSON data, call GetListOfEntperises() passing SSOAuthToken
  8. Async-wait returned list of Enterprises.
  9. Call completion callback meothd with parameter "Success"
How to Build a Robotics Digital-Hackerspace

Some HTML

Why the Hell?

LeavingLMR.jpg

Wow, it's been awhile since I've actually written anything in Drupal based text editor.  Feels like home.

Honestly, I'm not going to go into the "Why" of building this site.  Maybe I'll do that later.  Let's just say, there was an impetus to recreate the home we were forced to leave.

How the Blink?

Spinning Up a Server:

The first thing was deciding on a server.  I didn't have much (um, any) experiencing in spinning up a server.  But after a bit of reading, checking the bank account, and finding what would work for Drupal site, I chose Linode .

Definitely happy so far.  Their business model seems to be no frills Linux servers which are fast to spin up--if you know what you are doing.  Of course, I didn't.  Still, they had a lot of fairly up to date walkthroughs.

Here are the walkthroughs I used (in order) to spin up this server:

  1. Getting Started
  2. Securing your Server
  3. Hosting a Website
  4. Installing Drupal 7

This almost all the information needed to create this site's based.  A couple of caveats:

sudo apt-get install php5 php-pear sudo apt-get install php5-mysql

Needs to be replaced with:

sudo apt-get install php php-pear sudo apt-get install php-mysql

This will install the latest version of PHP, for me, that was PHP7.

Also, the install directory is different for PHP7.  This is important, since the php.ini file needs to be edited.  In 7 it may be found:

/etc/php/7.0/cli

The last thing to do was relocate the Drupal 7 files to the directory where Apache can serve them up.

cd /var/www/html sudo wget https://ftp.drupal.org/files/projects/drupal-7.50.zip

If all the script-blogs are followed correctly, then when entering the web IP of the site in the browser you should see the following:

Drupal_On_Linode.png

Design Goals:

Goals.  It's good to have them.  Thinking through what I'd like out of a new robot-home here are some of the concepts which seemed critical and important:

  1. An open place for anyone to express ideas, with minimum viable censorship.
  2. Responsive.  Not just mobile friendly, but optimized for quick viewing of information.
  3. Shoutbox.  Gots to have one.
  4. WYSIWYG and rich content editors:
    • Iframes
    • Image boxes
    • Image storage system
    • Code-highlighting including our favorite languages (and Ada for Mr. Bdk6)
  5. The primary features of our old home:
    • Collect
    • Chill-out Zone
    • Forums
    • Shoutbox, oh wait, already stated that.
  6. New features requested by members:
    • Content rating
    • Member points
    • Wiki
    • Anything we could dream of

Theme:

There are three layers to the theme:

  1. AdaptiveThemes was selected as the main
  2. Corolla over it
  3. FooTheme went over it.

In the /var/www/html/sites/all/themes/corolla/ directory there is a file called corolla.info inside a referenced was added for css/corolla_overrides.css.
Screenshot 2016-10-10 18.59.30.png
Then, in the /var/www/html/sites/all/themes/corolla/css directory the corolla_override.css file was made which includes several hackish css snippets:

    /* The title was originally set to -5px (weird) */
    #site-name a {
      letter-spacing: 0px;
    }

    .wrap-code {
      overflow-x: scroll;
    }

    /* These hide some uncessary shoutbox labels. */
    .shoutbox-interval-msg {
      visibility: hidden;
      display: none;
    }
    #edit-nick{
      visibility: hidden;
      display:none;
    }

Regarding the color scheme.  The palettee can be edited in the Footheme "Color" section.  This requires th Color (Drupal Core) module be enabled.  The palettee was selected by using Pictaculous taking an image of Russian revolutionary art.  This was meant to capture the feeling palette selected by an artist with a better understanding of color-emotion connections.

Fonts
Logo selection

Modules:

Admin Tools:

"Admin Tools is an addon module for the Admin module, which provides a sidebar navigation for selected roles. The Admin Tools module adds functionality and quick access for clearing caches, running cron and updates much like Admin Menu ."

I hate cache errors.  Mother-blinking cache!

Administration Menu :

Admin tools sped up development a lot.  It basically simplifies the admin menu so 4th level items are exposed to one click.

Blog (core)

Allows the Drupal site act like a good old blog--for us, this allows multi-authoring content and management.

Block (core)

Allows a block design of the UI.

Chaos Tools

This is a dependency for other modules (a lot of others).

CKEditor Screenshot 2016-09-24 20.49.03.png

The CKEditor is the core of the Drupal blogging package.  It is the editor used to create this post.  However, it put up the most fight when trying to install.  Actually, that's not fair.  It wasn't the CKEditor it was the code highlighting which was such a pain.  The code highlighting allows this:

    for(int i = 0; i < marioTouchesRobots; i++){
        aHackerSpiritDies();
    }

I'm going to list out the steps used to setup the CKEditor used for this article, but then discuss some of the pitfalls, which ended up costing a lot of development time.

Steps to Setup CKEditor with CodeSnippets and HighlightingJS:

  1. Download the CKEditor - WYSIWYG HTML editor module.
  2. Enable the CKEditor module.
  3. Go to Configuration-->CKEditor-->Edit CKEditor Global Profile
  4. Set the "Path to CKEditor" to //cdn.ckeditor.com/4.5.4/full-all. This will use the content delivery network to serve up the CKEditor JavaScript.  It also lets you access a lot of plugins without having to manage them.  The other option is to pull a copy on the local server--it's a lot more hassle managing.
  5. Go to Configuration-->CKEditor-->Profile X-->Edit (note, X = Text Editing profiles users will be able to select when blogging.  These can be managed under content Content Authoring --> Text Formats).
  6. Go to Basic Setup.  Here, add all the Text Formats this particular CKEditor profile should affect. Screenshot 2016-10-02 10.43.11.png
  7. Under Security make sure "Always run security filters for CKEditor" is Enabled (should default).
  8. Under Editor Appearance go straight to the check-box title "Plugin for inserting Code Snippets" and enable it.
  9. Also, enable what other CKEditor Plugins needed.  Note, there are more plugins then this, but these are the ones provided through the Content Delivery Network.
  10. Scroll to the end and hit Save.  Now, go back to Configuration-->CKEditor-->Profile X-->Edit.  Go straight to Editor Appearance.  There should be a new button available
  11. Add the Code Snippet button to the "Current Toolbar"
  12. This should enable the CKEditor and provide the Code Snippet button.
  13. Download the highlight js Drupal module.  This should be installed in the modules directory
  14. Navigate to var/www/html/sites/all/libraries folder and make a directory called 'highlightjs', switch to it.
  15. The highlight js module is dependent on the actual highlightjs css libaries though.  Download a package in the /var/www/html/sites/all/libraries/highlightjs folder.
  16. Unzip highlightjs here.
  17. Issue the command 'sudo mv higlight.pack.js highlightjs'.  This is required or the highlight module can't find the libraries.
  18. And the command 'sudo chmod 666 highlightjs'.
  19. Go to the modules dashboard and enable Highlight JS Syntax. DO NOT enable Highlight JS Filtetr.
  20. Open the modules /var/www/html/sites/all/modules/ckeditor$
  21. Type sudo nano ckeditor.config.js
  22. Add each HighlightJS language you would like to show in the dropdown box in the CKEditor.  The part on the left of the colon is should match the HighlighJS language code.  The part between the ' 's will be what is displayed in the CKEditor dropdown.  When adding supported languages, here's a good reference -- Supported HighlightJS languages (but it doesn't include custom languages, like Arduino).  Don't forget to save when done.
        config.codeSnippet_languages = {
            php: 'PHP',
            python: 'Python',
            arduino: 'Arduino',
            c: 'C'
        };
  1. Overflow.png There is an issue with the HighlightJS module where the text escapes the divs.  It took a long time to find the culprit.  Apparently, the HighlightJS modules causes this whenever it renders HTML produced by CKEditor.
  2. Go to /var/www/html/sites/all/modules/highlightjs
  3. Type sudo nano highlight_js.css
  4. Enter the following style and save:
    .field-items {
        width: 100%;
    }

And that should be it.  A couple words of warning.  Make sure you don't enable the HighlightJS Filter.  This will essentially double encode the HTML entities inside the block.  This causes >, <, and & to show as ">, &lt, &" respectively.  This simple little issue took a lot of development time to solve--given the manual was lacking.

Color Comment Contextual Links Dashboard Database Logging Entity API Field Field SQL Storage Field UI File Filter Five Star Forum Help Highlighter JS Filter Highlighter JS Syntax Highlighter Image IMCE Libraries List Menu Module Filter Node (core) Number Options Overlay Path Poll RDF Search Shoutbox Shoutbox Patch Statistics Statistics Counter SysLog System (core) Taxnomy Text (core) Update Manager User Userpoints Userpoints Service Views Views Content Panes Views UI Voting API

Lumi

Update 3/29/2016

I've begun re-writing the entire program as a Windows App. Not really my choice. It seems the BluetoothLE API Microsoft has thrown together (for-real-doh, it's super bad) is most easily adopted under the Windows Universal App toolchain.

Anyway, here's the resting space of the new projects

Lumi

Lumi for Desktop

Where I come from they having a saying: "Video or it didn't happen." I've always liked that saying. It means we have to put our work where our typing is. Here is a video of the uploader I wrote to interface with the TinySafeBoot AVR two-wire (UART) bootloader.

It was written with the idea a serial connection could be directly opened from the computer using Bluetooth 4.0. Or, if we get super fancy, using WiFi. On the receiving end, connected to the AVR, would be an HM-10 or an ESP8266 respectively. This would allow direct wireless uploading of Arduino sketches (or Atmel studio hex files) to the targeted Arduino (or AVR, if you will).

It has a couple of kinks, but I'm fairly pleased with it.

For a little more information on the projects:

http://ladvien.github.io/robots/tsb/

The whole projects is named after my friend Lumi who passed away last year. Amazing man with good taste in photography subjects. :)

Source Code:

https://github.com/Ladvien/Lumi_TinySafeBoot_Uploader

Lab Controller v05-09

Revising Board

This is an extension of previous work. I had finished a LED driver for the lab, hooked it up, and found it was a fire hazard. For the amount of lumen I wanted out of them I was having to set the current resistor to .47ohm. This was pushing nearly 2amps of current through the little FQP40N06L . The LEDs were bright, but immediately the TO-220 became too hot to touch. Two choices, either redesign or use less current, resulting in dimmer LEDs. Easy choice, redesign.

The first thing I realized was I need a heat-sink. Ironically, I had gone with TO-220s, a through-hole package, because I felt they would do better handling the heat. Ended up using the BS103AL , which is in an TO-263 package. This is an SMD package that lies on its belly exposing its back for heatsink placement.

This heatsink looked beefy enough and had the correct dimensions (5CM).

The notch on the heatsink will lie against the array of TO-263s, hopefully, drawing all excessive heat. However, the contingency is to place a fan on the back of the heatsink.

There is also an ESP8266 on the board. I decided it was a better option for controlling the LEDs, since they wouldn't be used outside the house and would always be connected to mains. Of course, I've never turned on an ESP8266, so I'm hoping I strung it correctly. It does have level conversion for TX, RX, and RESET lines.

I have also added a CH340G for USB-to-UART. The CH340G SOIC chips were ordered awhile back, but before I put them into this board I threw it on an ATTiny84 breakout and tested it. I didn't hold much hope for it, but it worked like a charm. Huh.

These little chips only cost me like $.65

CH340G $5 / 10 = .50

12mhz Crystal 1.42 / 01 = .14

The last piece of interest added to this board was a DS18B20. This is a one wire temperature probe, which I plan to thermal-paste on the heatsink as an auto-shutdown measure. Or perhaps, to reduce the amount of time a fan makes noise by kicking it on-and-off.

The design files can be found,

Lab LED Controller v09

TinySafeBoot, Arduino, and Wireless Upload to ATtiny85

The Dream

I've dreamed of a PCB with everything: uC, H-bridges, PSU, Lipo charger, inductive power collector, and a wirelesss device which would allow wireless uploading to the uC. A platform I could use for robotics and wearable projectss alike. Most of these features I have solved, yet one which I believed to be ever elusive to a hacker is wireless uploading. I've had lot of failed attempts, some as painful as writing my own uploader for the LPC1114, others as "simple" as hacking away at the Arduino IDE source. However, I've found a combination which brings me a bit of hope: TinySafeBoot, Arduino IDE, and most Atmega and ATtiny Atmel chips.

TinySafeBoot

TinySafeBoot is a pretty neat GPL projects which is around 500 bytes. It is a bootloader which allows selection of any two pins as RX / TX for two-wire communication (it also has a one wire protocol). And it has a serial communication protocol.

TinySafeBoot

The feature which makes TSB such a great choice for wireless bootloading is its serial protocol. Unlike the hardware protocol Arduino uses, serial communication allows the remote device to control the bootloaders workflow without flipping any hardware pins. Contrast with the Arduino's bootloader (I think it's optiboot now?) which focuses on resetting the device repeatedly to activate the bootloader.

The hardware approach doesn't work for quick, remote hardware resets. With the serial lag, the Arduino bootloaders are often comfortably booting an existing program by the time the first byte of a new program is reaching the RX pin. Also, there is no quick (sub 400ms) way to flip pins on my focused wireless devices, the HM-1X and ESP8266. In short, either the Arduino bootloader or software would need to be hacked; neither, which I've had the time to do.

There are other chip possibilities. I spent a lot of time trying to write a wireless uploader for the LPC1114. However, I do not yet have the skill level to finish it (I've not given up on it). There is also a psychological hangup working with the LPC1114. Its documentation. It is not that the docs for the 1114 are so bad, it is the docs for Atmel (makers of the Arduino heart) are so much better. This makes solving the wireless upload dilemma much more beneficial if it were solved for Atmel chips. Well, at least for a hacker like me who does not yet have the skill to move quickly through rougher documented chips. Honestly, it's about time--I've only so much and sometimes it is about getting a projects finished rather than what I might learn (blasphemy, right?).

Of course, TSB has other features such as auto-bauding and password protection, etc. It's not perfect, but I like it for its simplicity.

Getting TSB Setup

I have tested TSB on three devices, the ATtiny85, ATmega328P, and ATtiny1634. However, the ATtiny1634 didn't work.

There are two parts to TSB,

  1. Firmware
  2. Software

We are only going to download the software which allows you to generate "custom" firmware for whatever chip you are targeting.

From here on I will be demonstrating getting TSB going on an ATtiny85.

ISP

First, we will need an AVR ISP. Long ago I bought an AVR-ISP MKII which I used in combination with Atmel Studio 7. This will allow us to burn the bootloader and set the fuses. If you do not have an official AVR-ISP you can, theoritically, use AVRdude through the Arduino IDE in combination with an Arduino as an ISP programmer.

So, either,

  1. AVR ISP MKII
  2. Atmel Studio 7

Or

  1. Arduino IDE
  2. Arduino Uno ISP

Either way, once we have our ISP setup we will connect it to the ATtiny85 like,

One note about the above breadboard. There is a momentary switch connected in series with the RESET pin,

PB5<--->Switch<--->GND

This will allow us to easily reset the ATtiny85, which is needed to put the TSB into bootloader mode.

Notice the RX / TX will. They are not part of the ISP. They will be our bootloader's TX / RX pins when the bootloader has been burnt.

Bootloader Creation

Now, to generate the bootloader.

If you haven't, download the software, extract it to a workspace, and open that workspace in the command-line. The TSB software is CLI only.

Now enter the following,

C:\TSB_workspace>tsb tn85 b3b4

TSB then should generate a hex file titled something like,

tsb_tn85_b3b4_20150826.hex

This hex file will be our bootloader customized for our particular AVR, the ATtiny85.

To breakdown the TSB command,

  • tn85 tells the TSB SW we are looking to install this firmware on an ATtiny85. If you need to look up a chip code you can find it in a file in the TSB workspace titled "devices.txt"
  • b3b4 tells the TSB SW you want to use PB3 as RX and PB4 as TX. I chose these as pins since they are not being used by the ISP. Note , having the ISP and UART connected to the same pins will cause problems.

Bootloader Burning

To burn the newly generated bootloader you will need to have your ISP connected to the ATtiny85. First, check the fuses of your chip. According to the TSB website we need to have the following fuses set,

ATtinys:

  • SELFPRGEN must be set to enable flash writes from firmware, e.g. TSB
  • BODLEVEL should be set to avoid flash corruption during unsafe device power-up.
  • LOCKBITS may be set to MODE 3 for enhanced security (i.e. serious password protection intended).

ATmegas:

  • BOOTRST activated lets the MCU jump into the Bootloader Section (rather than $0000) with every hardware Reset.
  • BODLEVEL should be set to avoid flash corruption during unsafe device power-up.
  • BOOTSZ=10 or BOOTSZ=11 to reserve 512 bytes for a Bootloader Section.
  • BLB to MODE 2 or 3 protects Bootloader Section from undesirable write access by firmware.
  • LOCKBITS may be set to Mode 3 (LB-Mode 3) in a security environment.

Using Atmel studio, go to Tools-->Device Programming select your programmer (AVR ISP MKII for me), select the ATtiny85, and hit apply. Now, go to Fuses and make sure they are set to the following for the ATtiny85.

If you need to set the fuses using an Arduino-as-ISP, well, I'm not sure I've ever done that, but here's an article that seems legit,

Once the fuses have been set it's time to burn the bootloader. Using the Atmel approach, go to Tools--Device Programming and click on Device Signature , this will allow the ISP to see if the chip is ready for uploading. Once the chip is verified, go to Memories and click on the ellipses and select your hex file,

Then hit Program . With luck, your bootloader will burn and there will be much rejoicing.

To make sure the bootloader was burned correctly connect your ATtiny85 directly to a USB-to-UART. Open a serial terminal and connect at any baud rate 9600. Hit reset on the ATtiny85 and then quickly (within 2 seconds) send the @ in the serial-terminal. If the bootloader has been burned the ATtiny85 should reply with TSB followed by device data.

Wirelessly uploading

Here's the fun part. I hooked up my ATtiny85, 2 x HM-10 modules, and an FTDI chip to a PC--like below,

To see if you everything is working, open a serial terminal program. I'm a little partial to this one: HM-1X Aid . Connect the your USB-to-UART using the serial terminal at 9600bps. Once you are connected, press the reset button on your ATtiny85 and send the character @ from your terminal several times. If everything is setup correctly the chip should reply with, TSB followed by device information. If it doesn't reply, a few things to check.

  1. Test your wireless connection. I had to make sure the Bluetooth devices had paired and the Bluetooth device connected to the ATtiny was baud setting was less than 115200.
  2. Make sure your fuses are set correctly. Especially, SELFPRGEN on the ATtiny, since it doesn't come from the factory set.

Uploading an Arduino Sketch Wirelessly

Ok, if you were able to get the bootloader to reply wirelessly it's time to test the whole setup. Open your Arduino and make sure you have install support for the ATtiny85,

Then, in your Arduino IDE select,

  • Board: ATtiny
  • Processor: ATtiny85
  • Clock: 8mhz (internal)

Add this test sketch,

void setup() {
  // put your setup code here, to run once:
  for(int i = 0; i < 9; i++){
    pinMode(i, OUTPUT);
  }
}

void loop() {
  // put your main code here, to run repeatedly:
  int pin = 0;
  for(int i = 0; i < 9; i++){
    digitalWrite(i, HIGH);
  }
  delay(500);
  for(int i = 0; i < 9; i++){
    digitalWrite(i, LOW);
  }
  delay(500);
}

Still in the Arduino IDE go to Sketch--->Export compiled Binary . Save the hex file to your TSB Workspace. Open your TSB Workspace in the command prompt and type the following, replacing the COM port # with COM port you have the USB-to-UART on and replace the file name with the name of your newly compiled hex file.

C:\TSB_Workspace\tsb com4:9600 fw name_of_sketch.hex

Hit the RESET button on your ATtiny85 and then hit enter on your PC. If all goes as planned the command line will change to "Reading" and "Writing" appropriately. When the file has been uploaded, reset your ATtiny85. After a few seconds each pin on the ATtiny85 should go HIGH for half a second and then go LOW for half a second. If you don't have an LED or MM, open your serial terminal again, connect to the COM port with your wireless setup, your serial terminal should receive the character, "0x00" every half a second.

Other baud rates work. But I found anything over 38400 to be unstable.

That's it. Let me know what questions you have.

The future

Now there is a way to upload hex files wirelessly to a large array of chips, I plan to try a few things,

  1. Write an uploader in C# which could handle controlling a PIN on the HM-1X remotely which would pull the ATtiny85's (or other chip) reset line low. This would allow me to wirelessly set the chip into bootloader mode.