Lab Controller PCB

A little lab controller PCB I’m working on.  It centers around four high-power constant current circuits meant to be driven by an Atmega328’s PWM.

hate working on anything mechanical in dim light; comes from dropping parts down under the engine when working on cars.  I’m also pretty particular about my type of light.  The ”Cool White” or CFLs really bother me. I feel like I’m a bug headed towards a bug-zapper.  

I have a few design goals,

  1. Warm white is the way to go.  I’m shooting for four 1k lumen warm-white LEDs at 12v at ~1A.
  2. I’ve a plug for an Arduino Pro Mini (APM).  It’s hard to fight the APM when it comes to small footprint and versatility, oh, and price.  They are super cheap if you buy them on eBay.
  3. I want to make a BLE serial interface using my HM-10.  This would allow me to control my LEDs using my iOS devices.  A few supporting posts,
    1. iOS to µC Using an HM-1X
    2. HM-10
    3. Advanced(ish) HM-10
  4. The A4 and A5 pins are broken out, this is meant to make the boards chainable using I2C.

The heart of the circuit is around a high-power constant current driver.  I ripped the circuit from this fellows, somewhat, excellent post:

Here is my go at adding the circuit to a controller board,

PDF

Regarding how the circuit it works….black magic.  Well, at least, that’s how I understand it.  I tried reading this excellent article but ended up deciding it was attempting to reason away what was obviously black magic.

I originally designed a minimal PCB to hold the circuit.  I was hoping a small little board would allow me to attach it wherever needed,

Here’s where it gets fun.  See that red alligator clip so neatly gripping the leg of the 5V regulator, well, just keep it in mind when looking at our next exhibit.

 Gross and note safe, right? C’est la vie, it has been working for a about a year this way.

BOM Time!

  1. 4 x 2N5088
  2. 4 x FQP40N06L
  3. 4 x 0.47 ohm resistor  or 0.75ohm.
  4. 4 x 12v, 900mA (0.47ohm) or 12v, 600mA (0.75ohm)
  5. 1 x Arduino Pro Mini
  6. 1 x Big (size TBD) Electrolytic Capacitor
  7. 5 x 2-Pin Plug-in Screw Terminal Block Connector 5mm Pitch Panel PCB Mount
  8. 2 x 4.7k ohm 0805 resistor
  9. 4 x 10k ohm 0805 resistor
  10. 1 x 470 ohm 0805 resistor
  11. 2 x 330 ohm 0805 resistor
  12. 1 x 50-50 SMD RGB LED
  13. 1 x 5V SMD linear regulator MC7805CD2TR4 D2PAK 

Anyway, the boards are at the fabricator, so I’ll report back when I’ve populated and test them.  I’ve already got ideas for iteration v2.

FTDI in C

Originally posted on www.letsmakerobots.com

Part of my C journal – Writing an LPC1114 bootloader

**

Setting Up the GCC Compiler**

I setup a C environment as basic I could. There may be easier ways to go about this, but I wanted to use GCC to compile.

To setup the environment:

1. I downloaded and setup MinGW32.

2. I then downloaded FTD2XX libraries. This included the ftd2xx.h file and ftd2xx.lib.

3. I then stole the test code from Hack-a-Day’s article on bitbanging with the FTDI.

4. I modified the code as they suggested by including, in this order, the Windows compatibility files:

#include <stdio.h>
#include <stdarg.h>
#include <stdlib.h>
#include <windows.h>
#include <windef.h>
#include <winnt.h>
#include <winbase.h>
#include <string.h>
#include <math.h>
#include <stdbool.h>
#include <stdint.h>
#include "ftd2xx.h"
#include <sys/time.h>

I used this line to build it:

$ gcc -o main main.c -L./ -lftd2xx

You must have both the ftd2xx.h and ftd2xx.lib in the same directory as you attempt to build.

As for editing, I’ve really grown to love Sublime Text 2.

If you have issues**, make sure directory containing your files is in your PATH environment variable **(I go over how to add the directory to your environment variables in this post).

D2XX – FTDI Support

The FTDI chips are highly controversial chips in the embedded world. I will not begin the debate on their efficacy. I chose this particular serializer since I felt most roboticist would have at least one, making software released using the chips reach a greater range of people on the spectrum of hobbyist to professional.

Also, the supporting tools went well with one of the design goals for this project: Simplicity. I wanted to keep the code as near to machine code as I could easily write. Bdk6 described C to me as, “A high-level assembly language.”

There are two basic interfaces for the FTDI chips

  1. Virtual COM port.
  2. FTD2XX.DLL

I will be using the DLL. This is what the “**-L./ -lftd2xx” **part of our compile command is referring. It is including the ftd2xx library found in working directory.

The D2XX library is pretty nifty. It provides a collections of C++ functions to interact with the FTDI chip, and thereby, anything speaking UART.

A full list of the commands and C code examples may be found in the,

One last caveat regarding the reason I selected using the D2XX libraries instead of using the chip as a virtual COM port. I wanted as much control over the metal of the chip is possible. Originally, I had set out to write a downloader that’d use the already existing Sparkfun FTDI breakout, meant to program the Arduino Pro Mini and LilyPad, as no-need-to-modify programmer for my LPC1114 board. To accomplish this, I needed bit level control over all of the pins of the FTDI chip, which the D2XX has, but the COM port does not. Therefore, it was the deciding factor for using the D2XX library. Plus, I didn’t know the difference when I started, so that whole explanation was baloney. But, even if I realized it post-fact, it was the reason I didn’t switch to COM port.

Setup Menu

I found the easiest way to work with the D2XX is to setup a menu.

YOUR_CODE.C

I’m writing this article as if someone were importing my FTDI_HELPER module to use in their code. A few important notes: First, the variables we will use are actually declared in YOUR_CODE.C. They are global variables. We then redeclare them as extern variables in the FTDI_HELPER.H. This tells the compiler it’s going to be using several global variables, but they were actually declared in the YOUR_CODE.C. This allows the FTDI_HELPER module to setup the FTDI device, but your code will be able to act on all the major variables, such as the RxBuffer, ftHandle, etc.

YOUR_CODE.C

FT_DEVICE_LIST_INFO_NODE *devInfo;
bool FTDI_open_flag;


uint8_t RawRxBuffer[2048];


FT_STATUS ftSvtatus;
DWORD EventDWord;
DWORD TxBytes;
DWORD BytesWritten;
DWORD RxBytes;
DWORD BytesReceived;
  • 3: A pointer variable which will store all the connected device information.
  • 4: A flag set whenever we actually connect to an FTDI device. This allows your program to detect the connection.
  • 7: An RX buffer. It will fill automatically when we receive data. You may adjust the size if needed; I think the FTDI chip only sends 20 bytes at time, but I was lazy.
  • 10: Variable to store boolean flag for whether an D2XX command was successful.
  • 12: Used to store bytes to be sent.
  • 13: BytesWritten is used to store how many bytes were actually written by the FT_Write command.
  • 14: RxBytes stores how many bytes are waiting to be read.
  • 15: BytesReceived is used by FT_Read to store how many bytes have been read out of the RX buffer.

FTDI_HELPER.H

FTDI_HELPER.H

#ifndef FTDI_HELPER
#define FTDI_HELPER

#include <stdio.h>
#include <stdarg.h>
#include <stdlib.h>
#include <windows.h>
#include <windef.h>
#include <winnt.h>
#include <winbase.h>
#include <string.h>
#include <math.h>
#include <stdbool.h>
#include <stdint.h>
#include "ftd2xx.h"
#include <sys/time.h>

extern uint8_t ParsedRxBuffer[2048];
extern uint8_t RawRxBuffer[2048];

extern FT_HANDLE handle;
extern FT_Status ftStatus;
extern DWORD EventDWord;
extern DWORD TxBytes;
extern DWORD BytesWritten;
extern DWORD RxBytes;
extern DWORD BytesReceived;

int connected_device_num;

// Lists FTDI commands.
void ftdi_menu();

void quick_connect();

// Lists FTDI devices connected.
bool get_device_list();
bool connect_device(int * local_baud_rate);
bool close_device(int * local_baud_rate);
bool reset_device(int * local_baud_rate);
bool set_baud_rate(int * local_baud_rate);
bool set_baud_rate_auto(int * local_baud_rate);

#endif /* FTDI_helper.h */

Again, the extern variables are to let the compiler know we will be using the variables of the same name found in YOUR_CODE.C.

Main Menu

FTDI_HELPER.C

void ftdi_menu()
{
	int baud_rate = 0;
	char char_choice[3];
	int int_choice = 0;

	bool got_list = false;
	bool connected_flag = false;
	bool close_device_flag = false;
	bool set_baud_flag = false;

	// FTDI Menu
	do
	{
		system("cls");
		printf("FTDI Menu: ");
		if (connected_flag == true)
		{
			printf("       Connected: %lu, N, 1     \n\n", baud_rate);
		}
		else
		{
			printf("       Not Connected:               \n\n");
		}
		printf("1. Quick Connect\n");
		printf("2. Device List\n");
		if (got_list == true) // Only display option if devices list.
		{
		printf("3. Connect Device\n");
		}
		if (connected_flag == true) // Only give display if connected.
		{
		printf("4. Close Device\n");
		}
		if (connected_flag == true) // Only give display if connected.
		{
		printf("5. Change baud-rate\n");
		}

		printf("9. Main Menu\n");

		// If connected, display the connected device info.
		if (connected_flag == true)
		{
			printf("\n");
			printf("Connected Device: %d:\n", connected_device_num);
			printf(" 	Flags:         0x%02X\n",devInfo[connected_device_num].Flags);
			printf(" 	Type:          0x%02X\n",devInfo[connected_device_num].Type);
			printf(" 	ID:            0x%02X\n",devInfo[connected_device_num].ID);
			printf(" 	Local ID:      0x%02X\n",devInfo[connected_device_num].LocId);
			printf(" 	Serial Number: %s\n",devInfo[connected_device_num].SerialNumber);
			printf(" 	Description:   %s\n",devInfo[connected_device_num].Description);
			printf(" 	ftHandle =     0x%02X\n",devInfo[connected_device_num].ftHandle);
		}

		// Get user choice.
		scanf("%s", char_choice);

		// Convert string to int for switch statement.
		int_choice = atoi(char_choice);

		switch (int_choice)
		{
			case 1:
				quick_connect();
				baud_rate = 115200;
				connected_flag = true;
			case 2:
				got_list = get_device_list();
				break;
			case 3:
				if (got_list == true) // Only display option if devices listed.
				{
					connected_flag = connect_device(&baud_rate);
				}
				break;
			case 4:
				if (connected_flag == true) // Only give display if connected.
				{
					close_device_flag = close_device();
					if(close_device_flag == true){connected_flag = false;}
					close_device_flag = false;
			    }
			    break;
			case 5:
				if (connected_flag == true) // Only give display if connected.
				{
					set_baud_flag = set_baud_rate(&baud_rate);
					// set_baud_flag is not used, yet.

}
			    break;
			case 9:
				main_menu();
			    break;
			default:printf("""Bad choice. Hot glue!""");
			    break;
		}
	}while(int_choice !=99);
}

I found the easiest way to setup a FTDI device in C is using a menu. I’ve provided five options: (1) Quick Connect, (2) Device List, (3) Connect Device, (4) Close Device, (5) and Set Baud Rate. Several options require running the other options first. For example, before “Connect Device” is displayed you must run “Device List.” Let’s walk through the code,

  • 5-7: Variables for the scanf and switch-statement deriving the menu.
  • 9-12: Boolean flags for controlling the flow of the menu.
  • 15: We want a menu which is persistent, therefore, we use the do-while loop.
  • 19-22: Let’s display the connection information, but only if we have a device connected.
  • 27-42: We print the rest of the menu. Some items only print if boolean flags are set to true.
  • 44-56: Prints out the device details, if connected.
  • 58-64: Gets a users input, converts it to an int, store it, then selects a switch-case based upon input.
  • 67: The quick_connect() function creates an FTDI connection based upon default attributes.
  • 68: Sets the local baud_rate variable to the quick_connect() baud rate.
  • 71: We get run the get_list() function, which lists all FTDI devices currently connected to the USB ports.
  • 74: We check to see if get_list() has already been run, before we allow the user to connect to a device.
  • 76: Connect_device() takes a pointer to the holding the value of the baud-rate the user has selected. It then attempts to connect to the device. If successful, the function returns true.
  • 80: Only allow a device to be closed, if one is connected.
  • 82: Close_device() attempts to shut-down the currently connected FTDI device. If it is successful, it returns true.
  • 83-84: If the close_device() function was a success, the connected_flag is set to false, to show there is no device connected. Then, the close_device flag is reset to false to prepare for the next close_device() call.
  • 90: The set_baud() takes a pointer to a value for the desired baud rate. The function attempts to set the baud rate and returns true if successful.

Quick Connect

This function is meant for the lazy user. He or she does not want to select the device, or the baud rate, they’ll simply take whatever your program gives you. In my case, I wrote my quick connect to open device ‘0’ and set the baud rate to 115,200.

FTDI_HELPER.C

void quick_connect()
{
	int local_baud_rate = 115200;
	// Create the device information list
	ftStatus = FT_CreateDeviceInfoList(&numDevs);
	// get the device information list
	ftStatus = FT_GetDeviceInfoList(devInfo,&numDevs);
	// Open user's selection.
	// Allocate storage for list based on numDevs.
	devInfo =
	(FT_DEVICE_LIST_INFO_NODE*)malloc(sizeof(FT_DEVICE_LIST_INFO_NODE)*numDevs);
	FT_Open(0, &devInfo[0].ftHandle);
	FT_SetBaudRate(devInfo[0].ftHandle, local_baud_rate);
}
  • 5: Place the baud rate into a variable to be set.
  • 7: We create a list of devices, placing them in our global InfoList variable.
  • 9: We get the device info on the created device list.
  • 12-13: We allocate enough space for info on each device enumerated.
  • 14: Opens the device at ‘0’ in the device list.
  • 15: Sets the baud rate to 115,200.

Device List

The get_device_list() function is for the more cautious user. First, a list of FTDI devices is generated. After, enough space is allocated in an array for each device’s info. Lastly, the device details gathered are placed in this list. If the process of generating and storing the device details was successful the function returns true.

FTDI_HELPER.C

bool get_device_list()
{
	// Create the device information list.
	ftStatus = FT_CreateDeviceInfoList(&numDevs);

	if (ftStatus == FT_OK) {
		printf("Number of devices is %d\n",numDevs);
	}
	else {
		printf("Failed to get FTDI device list.\n");
	}

	if (numDevs > 0) {

		// Allocate storage for list based on numDevs.
		devInfo =
		(FT_DEVICE_LIST_INFO_NODE*)malloc(sizeof(FT_DEVICE_LIST_INFO_NODE)*numDevs);

		// Get the device information list.
		ftStatus = FT_GetDeviceInfoList(devInfo,&numDevs);
		if (ftStatus == FT_OK) {
				printf("Got Devices\n");
			}
		else
			{
				printf("Failed to get device list.\n");
				Sleep(3000);
			}
			// Set flag if we got at least on device.
			return true;
		}
	return false;
}
  • 6: Creates a device list.
  • 8-13: If the attempt to create a device list fails, we tell the user. Otherwise, we list the number of FTDI devices currently connected.
  • 15: If at least one device was detected, we proceed with listing the devices.
  • 18-19: We allocate enough memory space to store the device info of each connected device.
  • 22: We read each device, get the info, and put the info in the list respectively.
  • 23-30: If we got the device info, we tell the user, “We got devices.” Otherwise, we tell the user we failed. Failed, failed, failed!
  • 32: Since we gathered some device info, the function returns true.
  • 34: If no device info was gathered, the function returns false.

Connect Device from List

Once the get_device_list() function is run, then we are free to connect to one of the listed devices. The connect_device() function takes a pointer to the desired baud-rate value for the connection. This function requires the user enter a number 0-8, which is correlated to the devices gathered from the get_device_list() function. The connect_device() function then connects to the respective FTDI device at the baud-rate passed to it.

FTDI_HELPER.C

bool connect_device(int * local_baud_rate)
{

	char char_choice[3];
	int int_choice = 0;

	bool connected_flag = false;

	system("cls");
	printf("Which device # (0-8)?\n\n");
	printf("9. Return\n");

	printf("\n\nConnected FTDI:");
	for (int i = 0; i < numDevs && i < 8; i++) {
		printf("\nDevice: %d:\n",i);
		printf(" 	Flags:         0x%02X\n",devInfo[i].Flags);
		printf(" 	Type:          0x%02X\n",devInfo[i].Type);
		printf(" 	ID:            0x%02X\n",devInfo[i].ID);
		printf(" 	Local ID:      0x%02X\n",devInfo[i].LocId);
		printf(" 	Serial Number: %s\n",devInfo[i].SerialNumber);
		printf(" 	Description:   %s\n",devInfo[i].Description);
		printf(" 	ftHandle =     0x%02X\n",devInfo[i].ftHandle);
	}

	scanf("%s", char_choice);
	int_choice = atoi(char_choice);

	// Limit list to 9 devices.  Really, who has more connected at once?
	if (int_choice == 9)
	{
		return false;
	}
	else if (int_choice > -1 && int_choice < 9 && int_choice <= numDevs)
	{
		// Open user's selection.
		FT_Open(int_choice, &devInfo[int_choice].ftHandle);

		// Set default baud rate.
		*local_baud_rate = 115200;

		FT_SetBaudRate(devInfo[connected_device_num].ftHandle, *local_baud_rate);

		if (FT_status != FT_OK)
		{
			printf("Could not open FTDI device #%i.\n", int_choice);
			Sleep(3000);
		}
		else
		{
			connected_device_num = int_choice;
			return true;
		}
	}
	else
	{
		return false;
	}
	return false;
}
  • 6-28: User and device information displayed. Then, the user input is requested. The user must enter 0-8 for the selection to be valid.
  • 31: If the user selects option ‘9’, we return false, since no device was connected.
  • 35: Else if the user selects a 0-8 then the function will attempt to the respective device in the list we generated in earlier functions.
  • 38: Here we actually open the device corresponding to the user’s selection.
  • 41: We load the default baud-rate into the baud-rate variable.
  • 43: We set the baud-rate to 115,200. This is the default speed.

Close Device

FTDI_HELPER.C

bool close_device()
{
	FT_Close(devInfo[connected_device_num].ftHandle);

	if (FT_status != FT_OK)
	{
		printf("Could not close FTDI device.\n");
		Sleep(3000);
		return false;
	}
	else
	{
		return true;
	}
	return false;
}

Reset Device

The reset function is pretty straightfoward. It simply resets the connected FTDI device. The baud-rate apparently has to be set again after reset.

FTDI_HELPER.C

bool reset_device(int * local_baud_rate)
{
	FT_ResetPort(devInfo[connected_device_num].ftHandle);
	Sleep(50);
	FT_SetBaudRate(devInfo[connected_device_num].ftHandle, *local_baud_rate);
	Sleep(50);

	if (FT_status != FT_OK)
	{
		printf("Could not reset FTDI device.\n");
		Sleep(3000);
		return false;
	}
	else
	{
		// Device reset a success.
		return true;
	}
	return false; // Just in case.
}
  • 5: Connected FTDI device is reset.
  • 7: The baud-rate is reapplied.

Set Baud

The set_baud() funciton sets the connected device to whatever value the user selects.

FTDI_HELPER.C

bool set_baud_rate(int * local_baud_rate)
{

	char char_choice[3];
	int int_choice = 0;

	system("cls");
	printf("Set baud: \n");
	printf("1. 9600\n");
	printf("2. 19200\n");
	printf("3. 38400\n");
	printf("4. 57600\n");
	printf("5. 115200\n");
	printf("6. 230400\n");
	printf("9. Exit\n");

	scanf("%s", char_choice);
	int_choice = atoi(char_choice);

	switch (int_choice)
	{
		case 1:
			*local_baud_rate = 9600;
			break;
		case 2:
			*local_baud_rate = 19200;
			break;
		case 3:
			*local_baud_rate = 38400;
			break;
		case 4:
			*local_baud_rate = 57600;
			break;
		case 5:
			*local_baud_rate = 115200;
			break;
		case 6:
			*local_baud_rate = 230400;
			break;
		case 9:
			return false;
			break;
		default:printf("""Bad choice. Hot glue!""");
		    break;
	}

	FT_SetBaudRate(devInfo[connected_device_num].ftHandle, *local_baud_rate);
	if (FT_OK != FT_OK)
	 {
	 	printf("Unable to change baud-rate\n");
	 	Sleep(3000);
	 	return false;
	 }
	 else
	 {
	 	return true;
	 }
	 return false;
}
  • 6-47: The menu. Each selection corresponds a predefined baud-rate value.
  • 49: The connected device’s baud-rate is changed to the user’s selected value.
  • 58: If the baud-rate was changed successfully, the funciton returns true. Otherwise, it returns false.

Auto Set Baud Rate

The set_baud_rate_auto() is meant to be used to programmatically change the baud-rate, rather than have the use define the baud-rate. The command call is the same.

FTDI_HELPER.C

bool set_baud_rate_auto(int * local_baud_rate)
{
	FT_SetBaudRate(devInfo[connected_device_num].ftHandle, *local_baud_rate);

	if (FT_OK != FT_OK)
	 {
	 	printf("Unable to change baud-rate\n");
	 	Sleep(3000);
	 	return false;
	 }
	 else
	 {
	 	return true;
	 }
	 return false;
}

We are finally passed the setup functions, we get to the functions we are really interested. This is the rx(). It is called when you want to get user from the RX buffer. There are two buffers, by the way. There is the buffer on the FTDI, which holds 20 characters (I believe). But then, there is the buffer on your PC, which is largely limited to the amount of memory you computer has.

RX Function

The We are finally passed the setup functions! Now, for the functions we are really interested in. This is the rx(). It is called when you want to user from the RX buffer. There are two RX buffers, by the way. There is the buffer on the FTDI, which holds 20 characters (I believe).

But, then there is the buffer on your PC, which is largely limited to the amount of memory your computer has. And remember, this is C. If you set your PC’s RxBuffer to be limited to 256 characters and you get character 257, it’s not going to complain. Rather, you will simply have a buffer overrun and hell trying to debug it.

Once the D2XX function FT_Read has been called, the PC buffer is cleared. Therefore, getting the data you want comes down to calling rx() at the appropriate time.

Most of our variables declared to support this module are used in the rx() and tx() functions.

  1. RxBytes holds how many bytes are waiting to be read.
  2. RawRXBuffer is the actual computer RX buffer. Again, we set this buffer for 2048 characters, but if you receive character number 2049 it will not complain. You will simply have a buffer overrun. Cue sinister music.
  3. BytesReceived is how many bytes have been received to be read.
FTDI_HELPER.C

bool rx(bool print_or_not)
{
	// We need to get the status to see if we have characters in buffer.
	FT_GetStatus(devInfo[connected_device_num].ftHandle, &RxBytes, &TxBytes, &EventDWord);
	// We turn the buffer into a string; this is for easy parsing.
	RawRxBuffer[RxBytes+1] = '\0';
	// We only want to read the FTDI if there are bytes to read.
	if (RxBytes > 0) {
		// Read the bytes.  They are stored in the RawRxBuffer, BytesReceived is how many bytes we got
		// instead of how many bytes we should get.
		FT_status = FT_Read(devInfo[connected_device_num].ftHandle,RawRxBuffer,RxBytes,&BytesReceived);
		if (FT_status == FT_OK) {
			if(print_or_not)
			{
				printf("%s\n", RawRxBuffer);
			}
			// Put code here to copy string out of function.
			return true;
		}
		else {
			printf("RX FAILED \n");
			return false;
		}
	}
	return false;
}
  • 3: The rx() function has a print to screen option. Meaning, if we get data and call the rx() function by passing it a true, then it will print the data received to the screen.
  • 6: We get the status of the devices. This will tell us how many bytes are waiting to be read (RxBytes).
  • 8: At is a simple way to convert our received data into a string, for easy parsing.
  • 10: If we actually got some bytes, lets do something with them.
  • 13: Actually loads the received data into our **RawRxBuffer. **It also gets how many bytes have been read since the last FT_GetStatus call.
  • 15: If we got some bytes and we wanted to print, well, then let’s print them.
  • 19: This is an important spot. Here is where you want to put code to copy the data from the RawRxBuffer, to a more permanent home.
  • 20: If we got some data, then return true.
  • 27: If we didn’t get any data, return false.

You’d call the rx() function like so,

rx(true);

This would print out whatever data is in the rx buffer to the screen.

TX Function

We saved the best function for last: tx().

This function takes two primary variables. A pointer to a character array and an integer indicating how many characters are found in the data array. Also, it wants a boolean value representing whether you want the function to echo the data sent to the screen.

In the heart of a function is a loop, which writes a character at a time to the FTDI device. The loop continues until the count is equal to the integer past to the function indicating how many characters are found in the array. Then, if all characters have been written, then it returns true. Otherwise, it returns false.

FTDI_HELPER.C

bool tx(char data[], int tx_data_size, bool print_or_not)
{
	uint8_t FTWrite_Check;
	int char_tx_count = 0;

	while(char_tx_count != tx_data_size)
	{
		//This should print just data (ie, no Start Code, Byte Count, Address, Record type, or Checksum).
		FTWrite_Check = FT_Write(devInfo[connected_device_num].ftHandle, &data[char_tx_count], (DWORD)sizeof(data[char_tx_count]), &BytesWritten);
		if (FTWrite_Check != FT_OK)
		{
			printf("Bad write!\n");
		}
		if(print_or_not)
		{
			printf("%C", data[char_tx_count]);
		}
		char_tx_count++;
	}

	if (char_tx_count == tx_data_size)
	{
		return true;
	}
	return false;
}
  • 11: Actually writes the data to the FTDI device.

You can call this function from your code like so,

char data[] = "ALABTU!"

tx(data, sizeof(data), true);

This will cause the FTDI to write “ALABTU!” It will also be displayed on the screen.

Command Line Menu in C

Originally posted on www.letsmakerobots.com

Nostalgia

I wanted to post this simply because it working on it brought my a dry nostalgic joy. When I was young, 8-9, my parents got a old computer. All I remember was its screen was orange and black; having a Hercules graphics card. I quickly learned to get around from the command prompt. But I was always thrilled to run into menu driven program. It was like going to a fancy restaurant of abstractness. Anyway, when I wanted my code to slow down a bit and branch directions based upon user input, a command menu was a natural choice.

A Break from the LPC1114 Uploader

I thought I’d take some time away from coding my LPC1114 Uploader and verbally process a few things I’ve learned. As always, feel free to critique any of it; it’ll only serve to make my code more robust in the end.

This post will be a series of post leading up to the large post I’ll make on writing the uploader. All posts will rely on the GCC compiler.

Setting Up the GCC Compiler

I setup a C environment as basic I could. There may be easier ways to go about this, but I wanted to use GCC to compile.

To setup the environment:

1. I downloaded and setup MinGW32.

2. I added these includes to make the code go.

#include <stdio.h>
#include <stdarg.h>
#include <stdlib.h>
#include <windows.h>
#include <windef.h>
#include <winnt.h>
#include <winbase.h>
#include <string.h>
#include <math.h>
#include <stdbool.h>
#include <stdint.h>
#include <sys/time.h>

I used this line to build it:

$ gcc -o main main.c

As for editing, I’ve really grown to love Sublime Text 2.

If you have issues, make sure directory containing your files is in your PATH environment variable (I go over how to add the directory to your environment variables in this post).

How to Write a Command Line Menu

There really isn’t much to the code here. Basically, it it prints out the options you want your user to know. Then, it starts a do-while loop until the user selects an appropriate number.

Hmm. Not really much to it, not sure it deserves its own post. But what the hell.

void main_menu()
{
	char char_choice[3];
	int int_choice = 0;

	do
	{
		system("cls");
		startScreen();
		printf("\n");
		printf("Vorpal Hoff -- Main Menu: \n\n");
		printf("1. Quick Connect\n");
		printf("2. FTDI Menu\n");
		printf("3. Open HM-1X Menu\n");
		printf("4. Connect LPC\n");
		printf("5. Program Chip\n");
		printf("6. Erase LPC\n");
		printf("7. Decode UUE debug file\n");
		printf("8. Parse hex-file and write to debug.hex\n");
		printf("9. Exit\n");

		scanf("%s", char_choice);
		int_choice = atoi(char_choice);

		switch (int_choice)
		{
			case 1:
				quick_connect();
				break;
			case 2:
				ftdi_menu();
				break;
			case 3:
                                HM_1X_main_menu();
				break;
			case 4:
				// Not yet used.
				break;
			case 5:
				program_chip(file_name);
			        break;
			case 6:
				// Not yet used.
			       break;
			case 8:
				debug_hex_file(file_name);
			        break;
			case 9:
				shut_down();
			        break;
			default:printf("Wrong choice. Enter Again");
			        break;
		}
	}while(int_choice !=99);
}

6 and 54: This is the beginning and the end of the do-while loop. Basically, the do-while is a fancy loop which says to do everything in the brackets over and over, until the boolean variable is met (line 54).

The do-while loop if the equivalent in effect to the follow code,

while (true) {
   do_work();
   if (!condition) break;
}
  • 8: Clears the screen. This removes the command prompt; giving a clean slate to paint our menu.
  • 9: I put a function in to paint my menu header. This allows me easily change the header for a menu. It also makes the menu code easier to read.
  • 12-20: We print the menu options for the user.
  • 22: scanf is a tricky command. It pauses and waits for the user to input followed by ‘n’. It takes a variable respective to the data type you want to get from the user. Here, we are hoping the user enters one or two numbers. These are put into the string provided.
  • 23: We use the atoi function to take a string and turn it into an integer. This value we store in the integer int_choice.
  • 25: The beginning of the switch-statement which does the real work for us. It test the int_choice value you against predefined values (1-9 here). If the one of the values is equal, it executes the code found there before breaking from the switch-statement.
  • 51: If a number besides 1-9 is entered the default will be true. Let’s gripe at the user for selecting a bad number.

And that’s it. You simply put the functions you want to be called in the appropriate values in the switch-statement. Because of the do-while loop, once a selection has been made and executed, the menu will be displayed again.

You can also make limit a selection to showing by doing something like the following,

bool connected_flag = false;
	do
	{
		system("cls");
		printf("FTDI Menu: ");
		printf("1. Quick Connect\n");
		printf("2. Device List\n");
		if (got_list == true) // Only display option if devices list.
		{
		printf("3. Connect Device\n");
		}

		printf("9. Main Menu\n");


		// Get user choice.
		scanf("%s", char_choice);

		// Convert string to int for switch statement.
		int_choice = atoi(char_choice);

		switch (int_choice)
		{
			case 1:
				quick_connect();
				baud_rate = 115200;
				connected_flag = true;
			case 2:
				got_list = get_device_list();
				break;
			case 3:
				if (got_list == true) // Only display option if devices listed.
				{
					connected_flag = connect_device(&baud_rate);
				}
				break;
			case 9:
				main_menu();
			    break;
			default:printf("""Bad choice. Hot glue!""");
			    break;
		}
	}while(int_choice !=99);
}

Here, option “3. Connect Device” doesn’t show until option “2. Device List” is run. On line 34 the connect_device() function sets the connected_flag variable to true if the function was successful. Then, after the break is hit and the menu is repainted the option “3. Connect Device” will show. Also, ‘3’ will become a valid user selection.

A Submenu

One last note. If you want to make a sub-menu, you simply use the same code as above, just take the do-while loop out. This states you only want the sub-menu to run once, the return to the main menu.

UUEncode in C

Originally posted on www.letsmakerobots.com

I want to take a moment to thank Bdk6. The man is a walking Stack Overflow, with more patience for stupid. I doubt I’d understand any of this without his guidance.

I thought I’d take some time away from coding my LPC1114 Uploader and verbally process a few things I’ve learned. As always, feel free to critique any of it; it’ll only serve to make my code more robust in the end.

This post will be a series of post leading up to the large post I’ll make on writing the uploader. All posts will rely on the GCC compiler.

Setting Up the GCC Compiler

I setup a C environment as basic I could. There may be easier ways to go about this, but I wanted to use GCC to compile.

To setup the environment:

1. I downloaded and setup MinGW32.

2. I added these includes to make the code go.

#include <stdio.h>
#include <stdarg.h>
#include <stdlib.h>
#include <windows.h>
#include <windef.h>
#include <winnt.h>
#include <winbase.h>
#include <string.h>
#include <math.h>
#include <stdbool.h>
#include <stdint.h>
#include <sys/time.h>

I used this line to build it:

$ gcc -o main main.c

As for editing, I’ve really grown to love Sublime Text 2.

If you have issues**, make sure directory containing your files is in your PATH environment variable **(I go over how to add the directory to your environment variables in this post).

How to Convert Hex Data to UUE

“What is ‘UUEncoding’?”

Unix-to-Unix encoding (UUE) is the process where binary data is converted to a form which can be represented using ASCII character values from space (32) to underscore (95). These 64 characters allow us to express any binary stream of data.

I will not spend a lot of time explaining UUEncoding since the Wikipedia article is excellent.

“Why UUEncode?”

Have you written a program to look for a particular value? Like this,

int i;
char tCollection[32];
char c;``

if( c == 'T')
{
    Serial.print("I found a T!");
    tCollection[i] = c;
else if (c == '\r')
{
    exit();
}

You begin running your program and everything seems fine. It is inspecting data looking for the letter T (0x54), but then, all of a sudden your program exits without reason. You’re upset, because the sensor sending you the data didn’t send the exit code, which is a carriage return (‘\r’, or 0x13), but still, your program ended like it did.

Really, we know the reason, your program came across a random 0x13, which it interpreted as an exit command. Maybe a different special character?

But you realize, if you are dealing with a 8-bit data stream any ASCII character might be found in the incoming stream. So, how can the communicating devices know when it is getting data, versus, when it is receiving a command?

This is where UUE comes in. As I stated earlier, UUE is a way to represent the same 8-bit data using only hex values 0x32 through 0x95 (the two middle columns in the ASCII chart above). This means characters 0x00 through 0x1F and 0x60 through 0x7F are free to be used for command functions.

Returning to the above example, this means we could now us the CR value to signal the end-of-transmission, since CR is 0x13.

Ok, I hope I’ve sold you on UUE’s utility, let me attempt to explain the basics of how hexadecimal data is converted into a form which may be represented with only 64 values.

UUE conversion works with three bytes of data at a time and follows this algorithm.

  1. The individual bits of 3 HEX bytes are put into a series.
  2. The 24-bit series is then divided into four bytes of 6-bits.
  3. Then, 32 is added to the decimal value representing each of the 6-bit bytes.
  4. The resulting four values are UUEncoded bytes.

Confused as hell? I was too. Pictures are good. Let’s follow the Wiki example and use: Cat

The first step is to take the binary values for each ASCII character.

  • ‘C’ = 01000011
  • ‘a’ = 01100001
  • ‘t’ = 01110100

This means the resulting 24-bit binary series is,

24-bit: 010000110110000101110100

This is then divided into four 6-bit bytes,

  • 6-bit Byte: 1 2 3 4
  • Binary: 010000 110110 000101 110100

The new decimal values are,

  • 6-bit Byte: 1 2 3 4
  • Decimal: 16 54 5 52

At this point the 6-bit (senary) byte gave me a little trouble. I didn’t understand how 6-bits were treated by the 8-bit variable I was putting them in. For example, how could I get an int variable to take only 6 bits, not 8? The trick is understanding the 8-bit variable is only the width of the allotted space provided in a register, it has no influence on what you put in it. It finally dawned on me, I didn’t need to worry about the empty bits in a register.

Examples are good:

010000 = 16 in Decimal

00010000 = 16 in Decimal

010000 = 00010000

Anyway, this is how I finally made sense of it. As long as when I did my bit manipulations I kept unused bits of the register towards the “left” side, the my 6-bit values could be put into a 8-bit register and there value would remain the same.

Alright, back to our example.

Our next step is to add 32 to each of the decimal value of our new four bytes.

  • 6-bit Byte: 1 2 3 4
  • Decimal: 16 54 5 52
  • Add 32 +32 +32 +32 +32
  • New Dec. 48 86 37 84
  • UUE char: 0 V % T

And…that’s it. Your data is now UUEncoded. When it is sent through whatever transmission medium it wont be bothered with special character protocals. For our Cat, we have transformed it into: 0V%T

Let’s hope for the Cat’s sake, there is decoding algorithm.

Those sharper than myself may have already noticed a couple of problems. For instance, what if our data doesn’t come in increments of threes? For example, how do we send Cats?

The answer? We make nothing up. In the instance of Cats, we simply pad the end of the character series with two nulls on the end. For example,

  • ‘C’ = 01000011
  • ‘a’ = 01100001
  • ‘t’ = 01110100
  • ’s’ = 01110011
  • NUL = 00000000
  • NUL = 00000000

48-bit: 010000110110000101110100011100110000000000000000

  • 6-bit Byte: 1 2 3 4 5 6 7 8
  • Binary: 010000 110110 000101 110100 011100 110000 000000 000000

The new decimal values are,

  • 6-bit Byte: 1 2 3 4 5 6 7 8
  • Decimal: 16 54 5 52 28 48 0 0

  • 6-bit Byte: 1 2 3 4 5 6 7 8
  • Decimal: 16 54 5 52 28 48 0 0
  • Add 32 +32 +32 +32 +32 +32 +32 +32 +32
  • New Dec. 48 86 37 84 60 80 32 32
  • UUE char: 0 V % T < P SPC SPC

We have turned “Cats” into “**0V%T<P **” Well, almost, we aren’t quite done here.

Uh-oh. Another problem. The whole point of UUE was to stay away from special characters like the space character (0x32). But now we have two of them in our transmission. Well, the UUE protocol addresses this. It states,

  • If the result of the 6-bit encoding process is the space character, we convert this to the grave character, **’ ` ‘. **(The grave accent character is 0x60 in hexadecimal, by the way).

Therefore, our “Cats” actually becomes.

  • Almost UUE char: 0 V % T < P SPC SPC
  • UUE char: 0 V % T < P ` `

Finally! We have encoded “Cats”

We’ve turned:

into ————-> ** 0V%T<P `` Now, that’s science folks!**

**Hmm, what else are you going to need to know? Oh, right, how the UUE data is stored.**

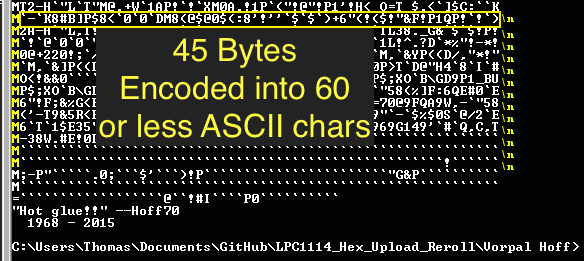
UUE stores and sends data in lines. A line of UUE data consist of a start character, which represents how many bytes have been encoded in the line (not how many UUE characters are in the line) by using a 6-bit number stored as an ASCII char. The line of UUE data ends with a new line character (i.e., ‘\n’). Lastly, a UUE line is limited to 45 bytes of data. This means, the maximum amount of data characters in on line of UUE should be no more than 60. Or, 62, if you count the start character and the end character.

Again, examples are good. For our Cats, the line would look something like this,

  • $ 0V%T<P `` \n

Let me take a moment to describe how we get the start character. Basically, we count how many bytes we are sending, in our case 4, and we add 32. This gives us the decimal representation of the ASCII character we will use as our start character. Therefore,

  • 4 + 32 = 36 as ASCII = $

Confusing? It’ll probably make more sense when we look at the code.

Speaking of which, I think I’ve covered the basics, time to jump into implementation.

Implementing UUEncoding in C

Well, here it is. My shoddy implementation of a UUEncoder in C.

The function takes several variables.

  1. UUE_data_array is a pointer to an uint8_t array where the encoded characters will be stored.
  2. hex_data_array is a pointer to an uint8_t array containing the hexadecimal values to be encoded (to learn where I get my hexadecimal data, checkout another one of this inglorious post: Intel HEX File to Array).
  3. hex_data_array size is an integer representing how many bytes of data might be found in the hex_data_array.
  4. After the function is complete, it returns how many ASCII UUE characters were created. This is meant for parsing the UUE array at a later time.
int UUEncode(uint8_t * UUE_data_array, uint8_t * hex_data_array, int hex_data_array_size)
{
	// 1. Add char for characters per line.
	// 2. Load 3 bytes into an array.
	// 3. Encode array.
	// 4. Add padding.
	// 5. Replace ' ' with '''
	// 6. Return UUE data array (implicit) and size.
	uint8_t byte_to_encode[3];
	uint8_t uue_char[4];

	int UUEncoded_array_index = 0;
	int uue_length_char_index = 45;
	int padded_index = 0;
	int bytes_left = 0;

	// 1. Add char for characters per line.
	if(hex_data_array_size < 45)
	{
		 UUE_data_array[UUEncoded_array_index] = ((hex_data_array_size & 0x3f) + ' ');
	}
	else
	{
		UUE_data_array[UUEncoded_array_index] = 'M';
	}

	UUEncoded_array_index++;

	// Encode loop.
	for (int hex_data_array_index = 0; hex_data_array_index < hex_data_array_size; hex_data_array_index)
	{
		// 2. Load 3 bytes into an array.
		for (int i = 0; i < 3; ++i)
		{
			// Load bytes into array
			if (hex_data_array_index < hex_data_array_size)
			{
				byte_to_encode[i] = hex_data_array[hex_data_array_index];
				hex_data_array_index++;
			}
			else
			{
				// 4. Add padding.
				byte_to_encode[i] = 0;
				padded_index++;
			}
			uue_length_char_index--;
		}

		// 3. Encode array.
		uue_char[0] = ((byte_to_encode[0] >> 2) & 0x3f);
		uue_char[1] = (((byte_to_encode[0] << 4) | ((byte_to_encode[1] >> 4) & 0x0f)) & 0x3f);
		uue_char[2] = (((byte_to_encode[1] << 2) | ((byte_to_encode[2] >> 6) & 0x03)) & 0x3f);
		uue_char[3] = (byte_to_encode[2] & 0x3f);

		for (int i = 0; i < 4; i++)
		{
			// 5. Replace ' ' with '''
			if (uue_char[i] == 0x00)
			{
				UUE_data_array[UUEncoded_array_index] = 0x60;
			}
			else
			{
				UUE_data_array[UUEncoded_array_index] = (uue_char[i] + ' ');
			}

			UUEncoded_array_index++;
		}

		// Data bytes left.
		bytes_left = (hex_data_array_size - hex_data_array_index);

		if (uue_length_char_index == 0 && bytes_left > 0)
		{
			// NOTE: Could be simplified to include first char
			// and additional characters, using a positive index.
			// 1. Add char for characters per line.
			UUE_data_array[UUEncoded_array_index] = '\n';
			UUEncoded_array_index++;

			if(bytes_left < 45)
			{
				// Find how many characters are left.
				UUE_data_array[UUEncoded_array_index] = ((bytes_left & 0x3f) + ' ');
			}
			else
			{
				UUE_data_array[UUEncoded_array_index] = 'M';
			}
			UUEncoded_array_index++;
			uue_length_char_index = 45;
		}

	} // End UUE loop
	UUE_data_array[UUEncoded_array_index] = '\n';

	// 6. Return UUE data array (implicit) and size.
	return UUEncoded_array_index;
}

int check_sum(uint8_t * hex_data_array, int hex_data_array_size)
{
	int check_sum = 0;
	int char_index = 0;

	while(char_index < hex_data_array_size)
	{
		check_sum += hex_data_array[char_index];
		char_index++;
	}
	return check_sum;
}
  • 3-8: Here, I outline in pseudo-code what I wanted to get done in this function.
  • 17-25: I deal with the start character of the first line. I do this by checking if hex data we were handed is more than the UUE line limit, 45 bytes. If it is, I place an M as the start character (45 + 32 = 77 = ASCII M). If the data we’ve been handed is less than 45 bytes, let’s calculate the start character. We take 65 bits of the 8-bit number representing how many bytes are here, then add 32, this will give us our start character.
  • 30-96: This is the main loop where the work is done. We loop through all the hexadecimal data provided us, encoding as we go.
  • 33-48: The loop here deals with 3 bytes of data at a time. It also checks to see if we have less than 3 bytes left, if so, it pads the remaining space with 0 (null).
  • 47: This index is used in combination with the if statement found one lines 82-90. It is in essence repeating the beginning if statement where we determined what the start character for this line will be.
  • 51-54: This is where the magic happens. Here, we are turning the 3 bytes of 8 bits, into 4 bytes of 6 bits. We store the resulting bits in an 8-bit variable. But remember, we can put 6 bit data in a 8 bit jar, as long as we remember to be careful how we place the bits.
  • 56-69: The resulting 6-bit characters are checked to see if they are a space character (0x20), if they are, we turn them into a grave ‘ ‘ ‘ character (0x60). If they are not a space, we add 32 to the decimal value (‘ ‘ = 32 in decimal), this completes the encoding process.
  • 72: We calculate how many data bytes are left, in preparation for calculating the next line’s start character.
  • 74-96: This loop serves two purposes. One, to place a new-line character (‘\n’) at the end of our last encoded line. Two, to calculate and load the next line’s start character.
  • 96: When we’ve reached the end of our data, we place a new-line character to mark the end.
  • 112: We return the number of ASCII characters used to represent our encoded data.

And there you go. UUE!

Here are some additional resources I found helpful,

  1. Wikipedia’s article on UUEncoding
  2. NXP’s Application Note on UUEncoded for their uCs
  3. Bdk6