This article is part of a series.
View all 5 parts
- Part 1 – Arduino to RPi -- Galvanically Isolated I2C
- Part 2 – This Article
- Part 3 – Pi Power -- How I Made a Battery Powered USB Hub
- Part 4 – OpenCV on a Raspberry Pi
- Part 5 – Setup Headless WiFi on Re4son's Kali Pi
Originally posted on www.letsmakerobots.com
This article is specific: How I personally would setup my Raspberry Pi to act as robot base. But, I'll be clear, this is one of nth possible setups. A chessboard has 64 squares but those working the board allow for innumerable possibilities.
That aside, here we go:
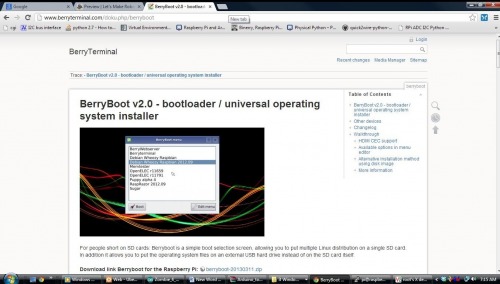
1. Get Berryboot. Berryboot will allow you to download several Raspberry Pi images.
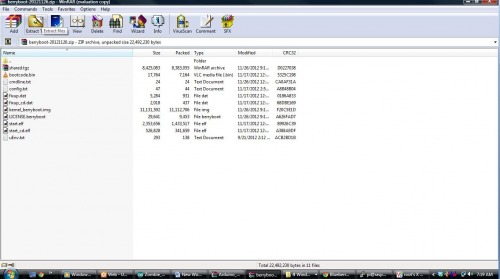
Now extract the zip files to a blank SD card.
Put the BerryBoot SD card in your Pi and boot it up.
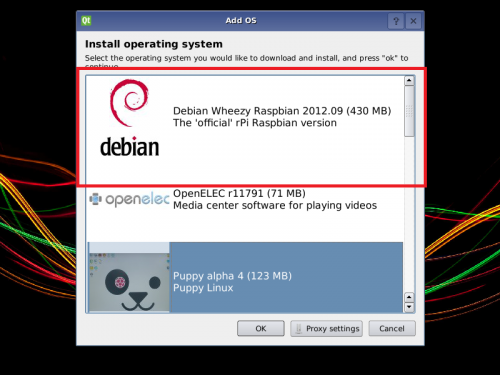
2. Setup RPi with Raspbian Wheezy (first option).
3. Setup your WiFi dongle. I believe BerryBoot will now setup your WiFi dongle on initial boot, which it did for me (even gave me the option to download the image via WiFi). But, I had trouble getting my WiFi dongle pulled up after booting Raspbian Wheezy.
If you have difficulty with manual WiFi dongle setup, you might try this video .
Lastly, if you are looking for a WiFi dongle for cheap, with good range, and uses very little mAhs (the Pi can only feed about 700mAhs through the USB port). You might try this one , $6.17.
4. Setup PuTTY on your Desktop Computer. Follow this video. This will allow you to begin SSHing into the Pi. That way you don't have to look at a little RCA screen like me. For those who aren't familiar with SSH (like I was before this video), the video will explain it. At risk of oversimplification, it allows you to access your Raspberry Pi command line through your desktop.
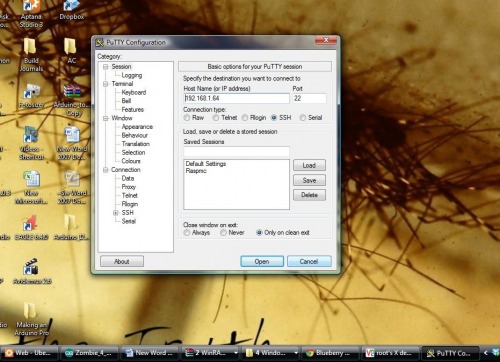
You have to plug in your Pi's network number. You can find this by pulling up your wireless hub's configuration page. You should see what address your Pi is listed at. For some strange reason, if it doesn't list the device name, just view the page while the Pi is up, then unplug your Pi and refresh the wireless hub configuration page. The device that disappeared is your Pi. I've never had to change the port number, but beware you might need to depending on your setup.**
If you want to know whether your have the correct information, try login' in and if you get a screen like this, your good.
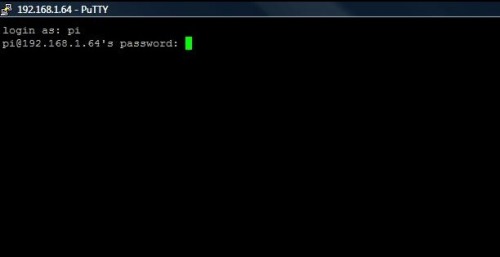
Your username and password are by default: pi, raspberry
Remember! In the case of a Raspberry Pi, always share your password, 'cause everyone has it anyway :)
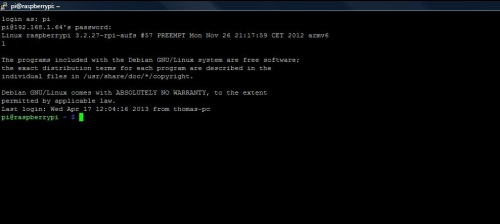
Once you have PuTTY setup, you should be able to bring up your Pi command line, something like this:
5. Setup VNCServer on your Raspberry Pi. Follow this video. (Or this walkthrough ). Putty will let you access your Pi's command line, but setting up a VNC will actually allow you to access your Pi's Desktop GUI from your PC, in the same manner as Putty.
6. Setup a VNC Client on your Desktop Computer. Real VNC. There are many different programs, I happened to end up using Real VNC.
Once you have VNC setup on both machines, PuTTY into your Pi and start the VNC server.
$sudo vncserver

Two notes here, if you did better with the video instructions than I did, your vncserver will start automatically on boot. Unfortunately, I have to type it each time (I'm too lazy to figure out the boot part of it). As a result, you'll have problems running certain Python scripts through VNC if you don't use $ sudo vncserver
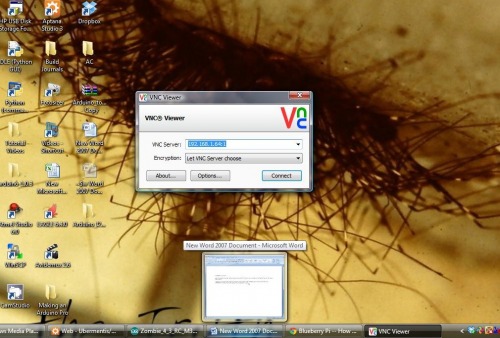
You'll enter your Pi address, but port should be 1 (if I remember the video instructions correctly).
You should end up with at a windowed version of your Raspberry Pi desktop. One more note, somewhere in the video it gets you to setup the "geometry" of the VNC desktop. The limitations you put there will be reflected in the quality of the desktop you see in the window. In essence, if you put in 640x480, that's the resolution this desktop will end up. So, please, take advantage of the Pi's GPU :)
Use something like this, "-geometry 1024x728 -depth 24"
7. Resize your SD card to use all its space. (Note, this should already be done by BerryBoot. But other diskimages will limit your SD card to 2GB, regardless of its actual size).
8. Git manager will allow you to pull code from git hubs (again, this should already be installed, but just in case).
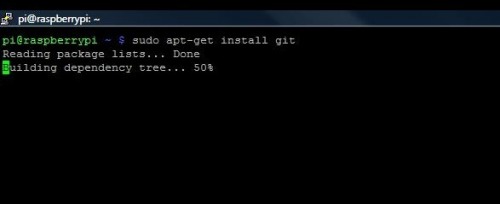
I **nstall the git manager: **
At Raspberry Pi prompt: $sudo apt-get install git
The way to use it is like so,
At Raspberry Pi prompt: $sudo git clone https://github.com/adafruit/Adafruit-Raspberry-Pi-Python-Code.git
9. Install SMBus. This is specifically for my setup, since I'll be using the I2C bus to communicate between the Pi and the Arduino.
At Raspberry Pi prompt: $sudo apt-get install python-smbus
10. Any other Python modules you might fancy.
Useful for keystroke, GUI, and other interfacing needs:
Pygame (should come with Raspbian) . (sudo apt-get install pygame)
Lady Ada's Python codes for an array of I2C sensors:
Adafruit I2C library (git)
Access your Raspberry Pi from iDevice web based GUI:
PiUi (git)
Control serial devices:
pySerial (sudo apt-get install python3-pyserial)
(I'll add other resources as fellow LMRs leave them in the comments).
11. (optional) Install Arduino IDE on Raspberry Pi. This will allow you to program the Arduino directly from your Pi-- and if you follow my design, you'll be able to do so without ever leaving your desktop computer. You can do this by opening the VNC Server, opening the Arduino IDE on the remote desktop, selecting the sketch you want to upload, and as long as your Arduino is connecting by way of USB, you can then upload your sketch from where you sit. This allows for quick changes to Arduino code without switching wires around. Also, I think Kariloy is looking for a way to upload sketches by way of GPIO pins. This would make a cleaner design.
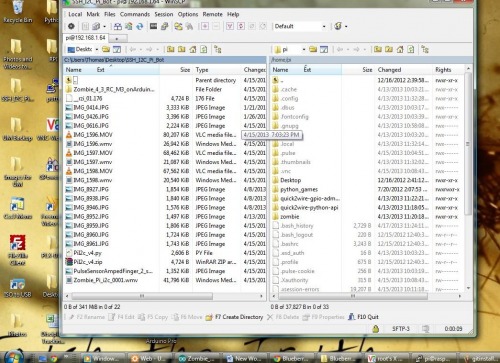
12. Install WinSCP . This will allow you to transfer files between your desktop and the Pi. I find this helps with programming management. I'm a messy filer. If I file at all.
13. Take a deep breath.
14. Follow these instructions for making my I2C optoisolator board.
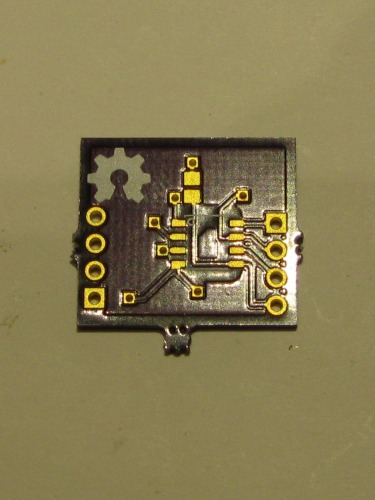
Again, there are many commercial boards that will serve the same function. Also, you can do the same with a USB cable , serial pins to GPIO , or RF connection--basically any way that lets the Arduino and Pi talk at a reasonable speed. The speed restraint will of course depend on your need. I doubt many methods will be apt for running a responsive quadrocopter. But in my case, my Pi is the central nervous system and the Arduino is the autonomous nervous system. The Pi will send directives, but it's up to the Arduino to manifest them through responsive actuators. And I chose this optoisolator because I didn't want an voltage restraint on my actuators or fear of frying my Pi.
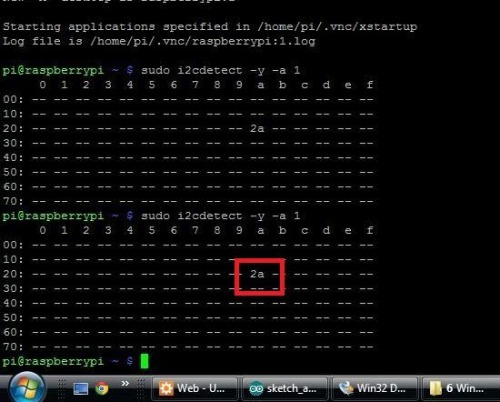
Once you have the board setup, you can run:
$sudo i2cdetect -y -a 1
This should bring up a list of active I2C registers. You should find your Arduino at whatever address you set in your Arduino code.
Now, I've read this fellow's article on how Raspberry Pi I2C pins are actually 5v tolerant. (Note, this is only for I2C pins, due to their pull-up resistors.)
So in theory, you can skip the optoisolator all together. But that's you , I'll stick with my optoisolation.
15. Download my code --or someone cooler's.
Note, my code is really just the base for a robot. Right now, my it is nothing more than a very, very complex radio controller for a RC car. But someday, I'll make a real robot :)
**16. Tweak and gut the code as you see fit. **
17. Ask questions: Pretty much everyone on this site is smarter than me, they'll know the answer.
To other LMRians. Please feel free to tell me how to change, add, or retract from this article. As tired as I am right now, I plan to revise when I'm less muddled.