This article is part of a series.
View all 6 parts
- Part 1 – This Article
- Part 2 – Using Python, NodeJS, Angular, and MongoDB to Create a Machine Learning System
- Part 3 – Distributing Machine Learning Jobs
- Part 4 – Training a Toxic Comment Detector
- Part 5 – Preparing a Small Server for a Neural Network Webservice
- Part 6 – Creating a Neural Network Webservice
This article logs a weekend of efforts to create a deep-learning environment which meets the following criteria
- GPU Enabled
- On Arch Linux
- Uses Keras with Tensorflow as a backend
- Main IDE being RStudio
It was a tough one.
UPDATE: 2019-01-19
It seems the Anaconda
conda
install tool now takes care of the gpu setup.
The following steps:
- Install NVIDIA
- Downgrade CUDA to match CDNN
Can now be replaced by installing
tensorflow-gpu
after installing Anaconda.
Run the following once
conda
is setup:
conda install -vv tensorflow-gpu
TL;DR
There was error I had a hell of a time debugging. Installing the toolchain is fairly straightforward, except CUDA. At the time of writing this article (2018-04-29), there is a version mismatch between CUDA and CUDNN in the Arch Linux repositories.
This results in an the following error every time I tried to import tensorflow in Python.
ImportError: libcublas.so.9.0: cannot open shared object file: No such file or directory
The Arch Linux package CUDA was pulling the latest version 9.1.1 (at writing) and the Arch Linux package CUDNN was looking for version 9.0. That little mismatch cost me 10 hours.
0. Other Arch Linux Deep-Learning Articles
There are a couple other Arch Linux deep-learning setup walkthroughs. Definitely need to give these guys credit, they are smarter than me. However, neither walkthrough had everything I was looking for.
This article was alright. But it focused a lot on preparing Arch Linux from the bare metal, which is usually the right idea with Arch, if you are on a resource budget. For example, running on a server or Raspberry Pi. But the extra few bytes of RAM saved doesn't really justify the time spent on meticulous tunning when we will be talking in megabytes and not bytes. And let my immolation begin.
Also, this article doesn't include information on GPU support. Whaawhaa.
This one was a bit closer to what I need. In fact, I did use the middle part. However, the mismatch was not mentioned. Of course, it's not the author's fault. At the time he wrote it I'm guessing the repositories matched.
Alright, on to my attempt.
1. Install Antergos (Arch Linux)
I love me some Arch Linux. It's lightweight and avoids the long-term issues of other flavors. Plus, it is meant to be headless, so it's great for embedded projects. Given how many embedded projects I take on it made me accustomed to using daily, eventually, I made it my main desktop flavor. It should sound too Linux-snobby, though, I dual-boot it on my Mac Book Pro. The one issue with Arch Linux is it can be a little unfriendly to new users--or those with limited time and cannot be bothered with the nuances of setup. Enter Antergos.
Antergos is essentially Arch Linux with a desktop environment and a GUI installer. A perfect choice for my deep-learning endeavors. Really, you should check it out. Go now.
We're going to use it for this project.
Download the
iso
file
You'll need a little jumpdrive, 4gb should work.
I use Etcher as it makes it painless to create boot media.
After Etcher does its thing, insert the jumpdrive, open Etcher, and then select the Antergos iso file. Here's the usual warning, if you have anything on your jumpdrive it's about to get deleted forever.
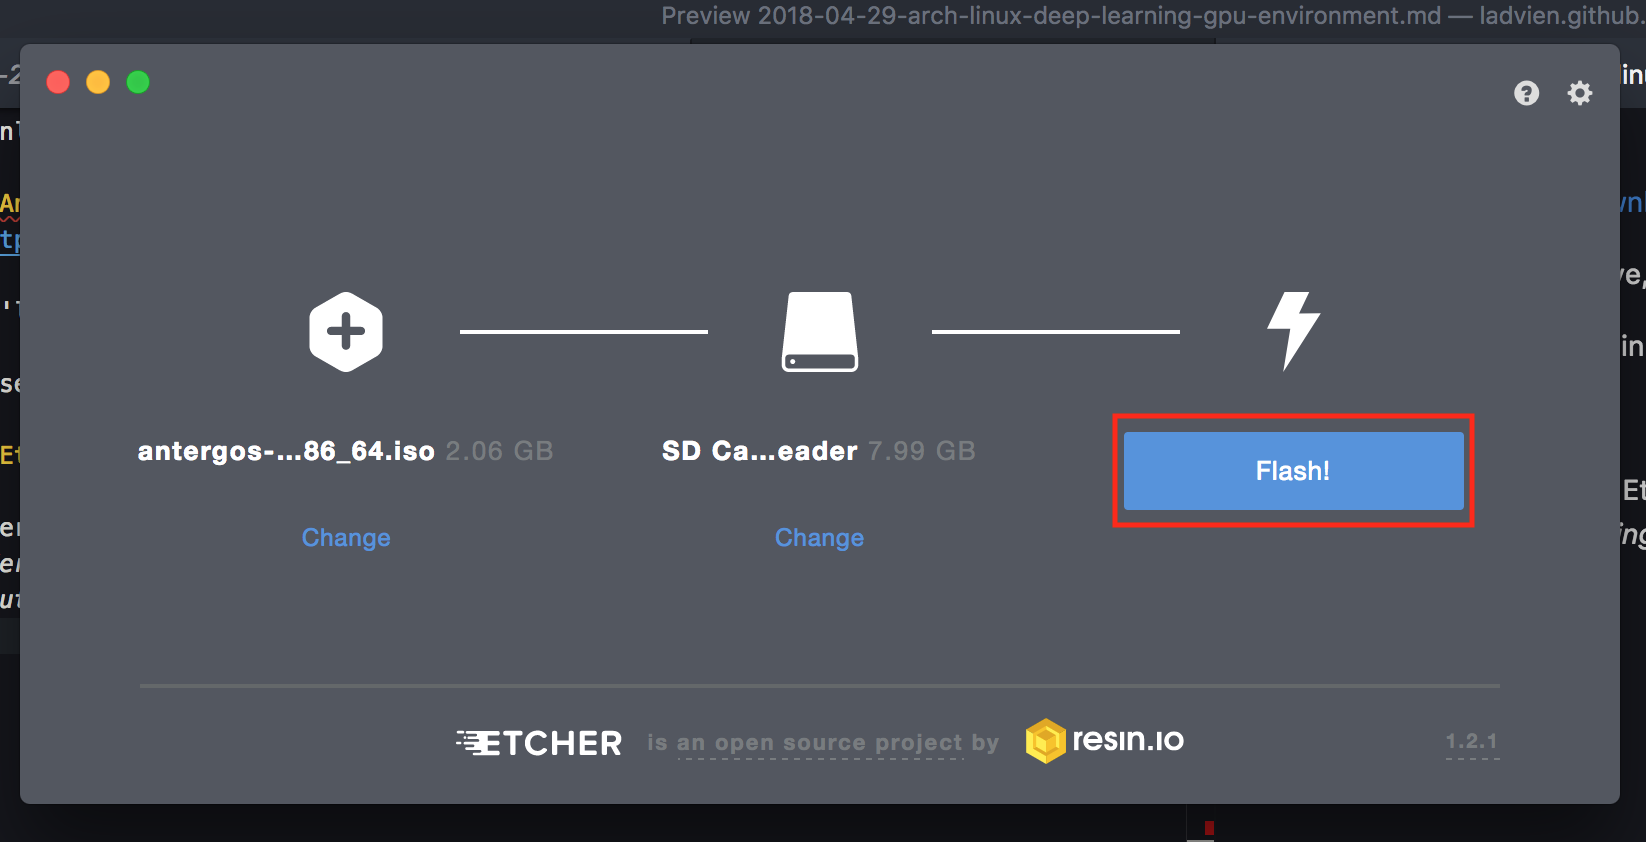
Insert the media into the machine you want to install Arch on and boot from the jumpdrive.
Windows
You will need to hit a special key during the boot sequence to enter the BIOS' boot menu
Mac
While booting hold down the
Option
key.
If all goes well you should see a menu which says
Welcome to GRUB!
And then shows an Antergos boot menu. Select boot Antergos Live.
Once the boot sequence is finished you should see the Antergos desktop environment start and shortly after
cnchi
, which is Antergos' GUI installer
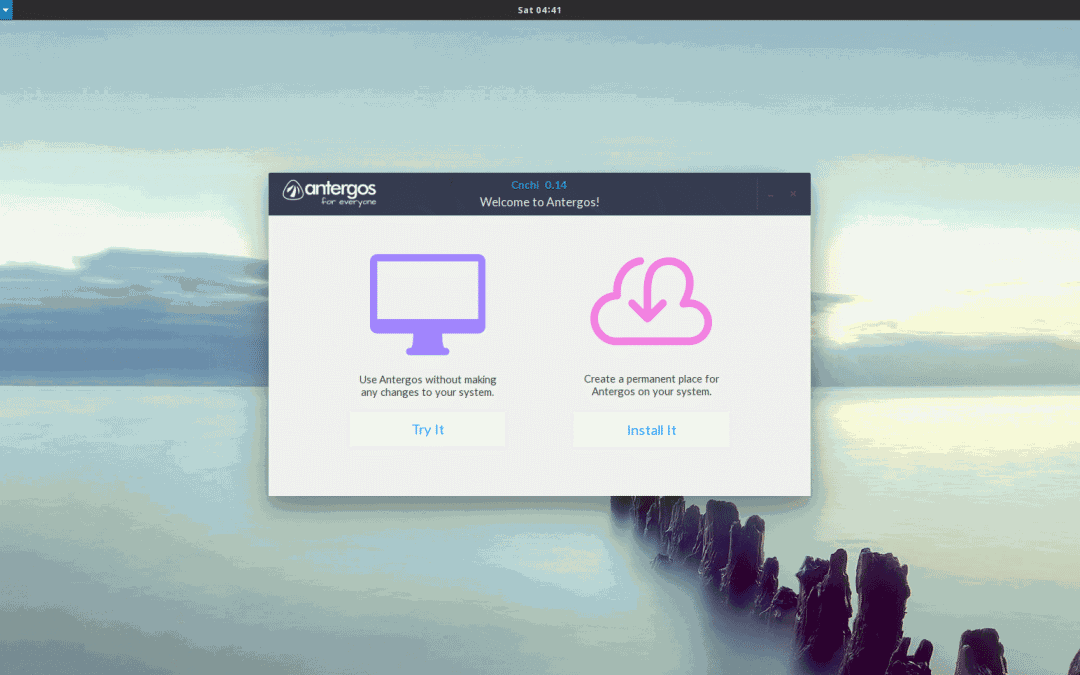
Select
Install It
. The installer is fairly self explantory. But, if you run in to any issues, please feel free to ask me questions in the comments. I'm glad to help.
Once the installer is complete you will be prompted to restart the computer. It's go time.
2. Install NVIDIA
When you boot up the installed Antergos open the terminal.
We will start with installing the base NVIDIA packages. As part of it, we are going to get the wrong version of CUDA. But, I found downloading the NVIDIA as whole packages and then replacing CUDA with an earlier version, much eaiser than trying to pull everything together myself.
Ok, here we go.
sudo pacman -S nvidia nvidia-utils cuda cudnn
That might take awhile.
...
So, how you been? Oh--wait, it's done.
Ok, to initialize the changes reboot.
sudo reboot now
3. Downgrade CUDA to match CDNN
That should have gotten everything at once. Now, let's downgrade CUDA from 9.1 to 9.0 .
wget https://archive.archlinux.org/packages/c/cuda/cuda-9.0.176-4-x86_64.pkg.tar.xz
This downloads a
pkg
file for CUDA 9.0, which is what the most recent version of Tensorflow is expecting (at this time, 1.8). I found the easiest way to replace CUDA 9.1 with 9.0 to simply double click on the file we downloaded from the GUI file browser. This opens it in Antergos' answer to a GUI based package manager. It will warn you this package will downgrade your CUDA version and ask you to
Commit
to the changes. Hit the commit button.
Wait for the file to be replaced before moving on.
4. Anaconda
Anaconda is a great package manager for data (mad) scientist tools. It is Python centric, but also supports R and other stuff I don't know how to use yet.
We will be using it to prepare our system to support deep-learning projects.
Download the Linux version suited for your computer.
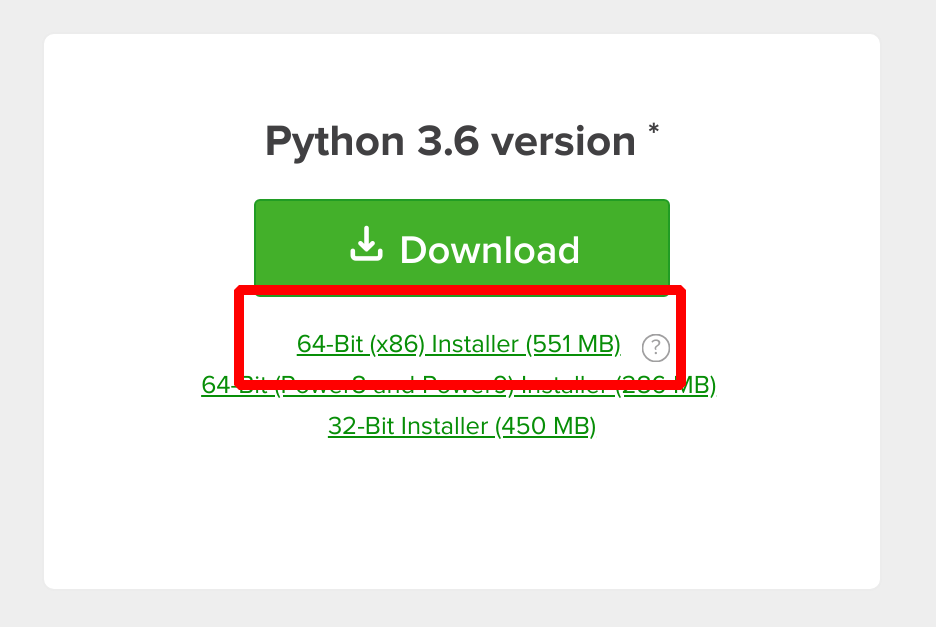
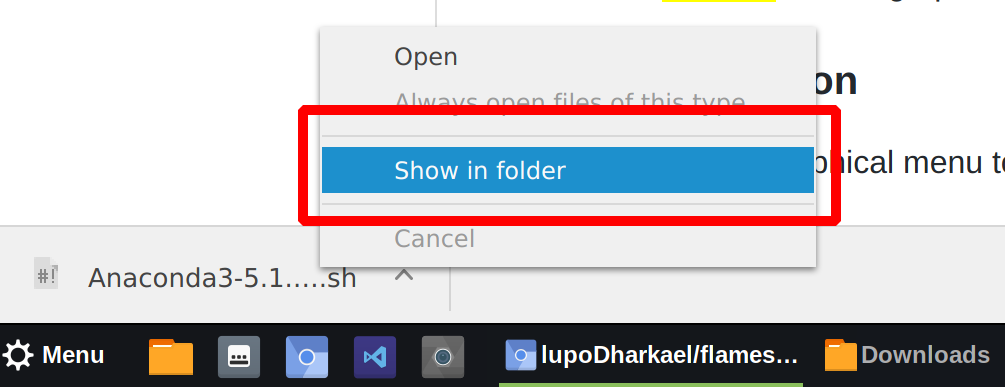
Once the file is downloaded right click on the file and select
Show In Folder
. Once there, right-click in the open space and select
Open in Terminal
.
Make Anaconda executable and then run it.
chmod +x Anaconda3-5.1.0-Linux-x86_64.sh
./Anaconda3-5.1.0-Linux-x86_64.sh
The Anaconda installtion is off and running. It will ask you to agree to a form. After, it will ask whether you want to install Anaconda in its default directory. We do.
Now, it will install every data scientist package known to existance. Mwhahaa. Erm.
When it asks
Do you wish the installer to prepend the Anaconda3 install location
to PATH in your /home/ladvien/.bashrc ? [yes|no]
Type
yes
. This will make Anaconda accessible throughout your system.
Of course, this new path variable will not be loaded until you start your user session again (log off and back on). But we can force it to load by typing.
cd ~
source ./bash_profile
Double check we are using the Anaconda version of Python.
[ladvien@ladvien ~]$ which python
/home/ladvien/anaconda3/bin/python
If it doesn't refer to
anaconda
somewhere in this path, then we need to fix that. Let me know in the comments below and I'll walk you through correcting it.
If it does, then let's move forward!
6. Tensorflow and Keras
Alright, almost done.
Let's go back to the command prompt and type:
sudo pacman -S python-pip
This will download Python's module download manager
pip
. This is usually packaged with Python, but isn't included on Arch.
How'd we get Python? Anaconda installed it.
Let's download Tensorflow with GPU support.
sudo pip install tensorflow-gpu --upgrade --ignore-installed
Let's test and see if it's worked. At command prompt type
python
And in Python
import tensorflow as tf
sess = tf.Session(config=tf.ConfigProto(log_device_placement=True))
You should a response similar to
2018-05-01 05:25:25.929575: I tensorflow/core/common_runtime/gpu/gpu_device.cc:1356] Found device 0 with properties:
name: GeForce GTX 1060 6GB major: 6 minor: 1 memoryClockRate(GHz): 1.7715
pciBusID: 0000:01:00.0
totalMemory: 5.93GiB freeMemory: 5.66GiB
2018-05-01 05:25:25.929619: I tensorflow/core/common_runtime/gpu/gpu_device.cc:1435] Adding visible gpu devices: 0
2018-05-01 05:25:26.333292: I tensorflow/core/common_runtime/gpu/gpu_device.cc:923] Device interconnect StreamExecutor with strength 1 edge matrix:
2018-05-01 05:25:26.333346: I tensorflow/core/common_runtime/gpu/gpu_device.cc:929]      0
2018-05-01 05:25:26.333356: I tensorflow/core/common_runtime/gpu/gpu_device.cc:942] 0:   N
2018-05-01 05:25:26.333580: I tensorflow/core/common_runtime/gpu/gpu_device.cc:1053] Created TensorFlow device (/job:localhost/replica:0/task:0/device:GPU:0 with 5442 MB memory) -> physical GPU (device: 0, name: GeForce GTX 1060 6GB, pci bus id: 0000:01:00.0, compute capability: 6.1)
Device mapping:
/job:localhost/replica:0/task:0/device:GPU:0 -> device: 0, name: GeForce GTX 1060 6GB, pci bus id: 0000:01:00.0, compute capability: 6.1
2018-05-01 05:25:26.455082: I tensorflow/core/common_runtime/direct_session.cc:284] Device mapping:
/job:localhost/replica:0/task:0/device:GPU:0 -> device: 0, name: GeForce GTX 1060 6GB, pci bus id: 0000:01:00.0, compute capability: 6.1
Which means you are good to go! At this point, Python is setup to do accelerated deep-learning. Most deep-learning peeps stop here, as Python is the deep-learning language. However, like a pirate I'm an R sort of guy.
7. Installing R and RStudio
To setup a GPU accelerated deep-learning environment in R there isn't a lot of additional setup. There are
keras
and
tensorflow
R packages, which connect the R code to a Python backend.
To get R in Arch Linux open the terminal and type:
sudo pacman -S r
And what's R without RStudio? Actually, it's still R, which is bad-ass unto itself--but anyway, let's not argue. Time to download RStudio...because you insist.
In terminal
cd ~
git clone https://aur.archlinux.org/rstudio-desktop-bin.git
cd rstudio-desktop-bin
makepkg -i
After, you should find RStudio in the Antergos Menu.
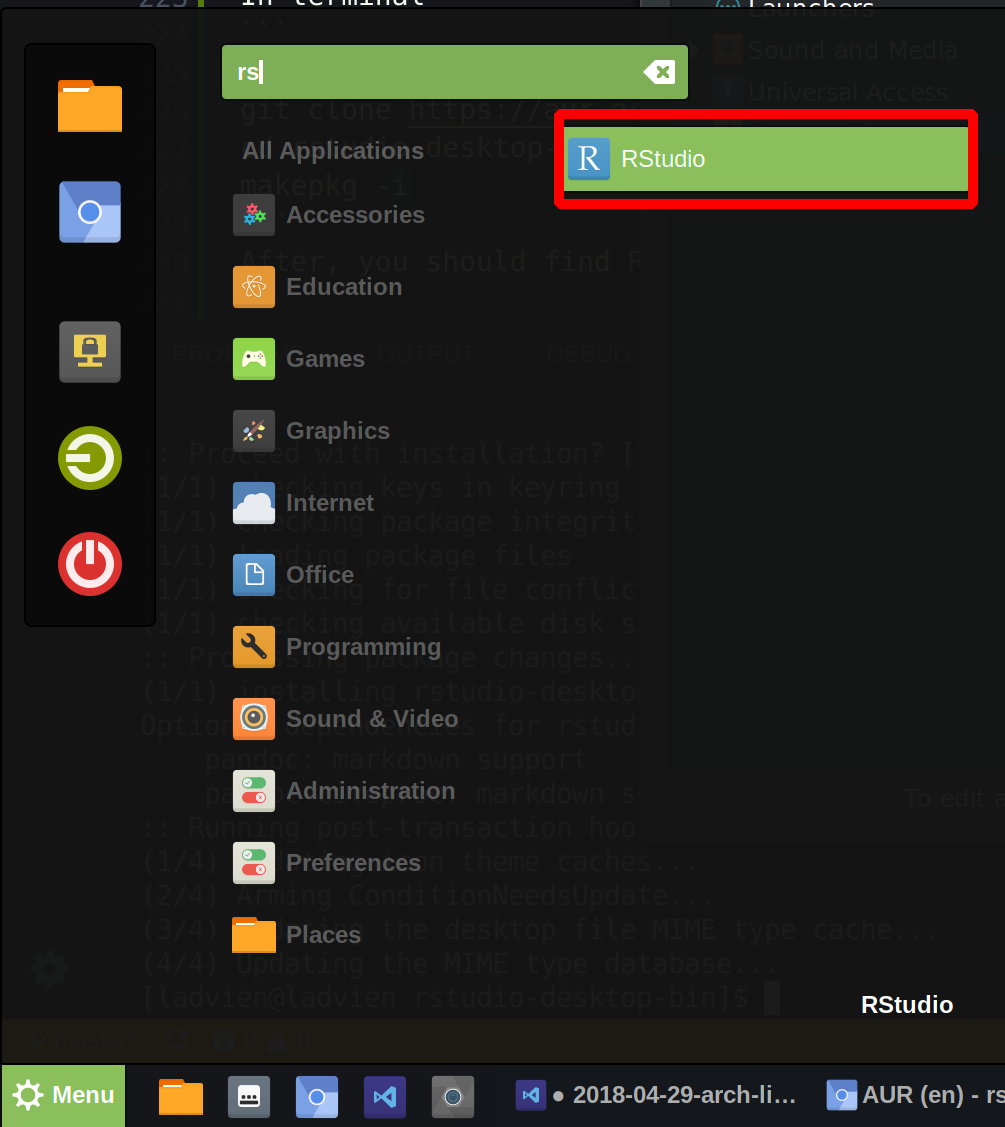
You can right click on the icon and click
Add to Panel
to make a shortcut.
Open up RStudio and lets finish this up.
8. R Packages for Deep Learning
Inside RStudio's code console type
install.packages("tensorflow")
This will install the package which will help the R environment find the Tensorflow Python modules.
Then,
install.packages("keras")
Keras is the boss package, it's going to connect all the Python modules needed to Tensorflow for us to focus on just the high-level deep-learning tuning. It's awesome.
Once the
keras
package is installed, we need to load it and connect it to the unerlying infrastructure we setup.
library(keras)
install_keras(method = "conda", tensorflow = "gpu")
This will install the underlying Keras packages using the Anaconda ecosystem and Tensorflow Python modules using CUDA and CUDDN. Note, a lot of this we setup manually, so it should report the needed modules are already there. However, this step is still needed to awaken R to the fact those modules exist.
Alright, moment of truth. Let's run this code in R.
library(tensorflow)

with(tf$device("/gpu:0"), {
  const <- tf$constant(42)
})

sess <- tf$Session()
sess$run(const)
If all went well, it should provide you with a familiar output
> library(tensorflow)
>
> with(tf$device("/gpu:0"), {
+   const <- tf$constant(42)
+ })
/home/dl/.virtualenvs/r-tensorflow/lib/python3.6/site-packages/h5py/__init__.py:36: FutureWarning: Conversion of the second argument of issubdtype from `float` to `np.floating` is deprecated. In future, it will be treated as `np.float64 == np.dtype(float).type`.
  from ._conv import register_converters as _register_converters
>
> sess <- tf$Session()
2018-05-01 05:55:07.412011: I tensorflow/core/common_runtime/gpu/gpu_device.cc:1356] Found device 0 with properties:
name: GeForce GTX 1060 6GB major: 6 minor: 1 memoryClockRate(GHz): 1.7715
pciBusID: 0000:01:00.0
totalMemory: 5.93GiB freeMemory: 5.38GiB
2018-05-01 05:55:07.412057: I tensorflow/core/common_runtime/gpu/gpu_device.cc:1435] Adding visible gpu devices: 0
2018-05-01 05:55:07.805042: I tensorflow/core/common_runtime/gpu/gpu_device.cc:923] Device interconnect StreamExecutor with strength 1 edge matrix:
2018-05-01 05:55:07.805090: I tensorflow/core/common_runtime/gpu/gpu_device.cc:929]      0
2018-05-01 05:55:07.805115: I tensorflow/core/common_runtime/gpu/gpu_device.cc:942] 0:   N
2018-05-01 05:55:07.805348: I tensorflow/core/common_runtime/gpu/gpu_device.cc:1053] Created TensorFlow device (/job:localhost/replica:0/task:0/device:GPU:0 with 5150 MB memory) -> physical GPU (device: 0, name: GeForce GTX 1060 6GB, pci bus id: 0000:01:00.0, compute capability: 6.1)
> sess$run(const)
[1] 42
9. Scream Hello World
And the payoff?
Using the prepared Deep Dream script from the Keras documentation
Voila!
