This article is part of a series.
View all 6 parts
- Part 1 – This Article
- Part 2 – Secure Remote Postgres with Cloudflare Tunnel + Access
- Part 3 – Securely Expose Your Raspberry Pi 5 with Cloudflare Tunnel
- Part 4 – Nginx Reverse Proxy on Raspberry Pi (Ubuntu Server)
- Part 5 – Add HTTPS to Your Raspberry Pi with Nginx and Cloudflare
- Part 6 – Switch from Cloudflare Origin Certificates to Let’s Encrypt on Raspberry Pi with Cloudflare Tunnel
As a data engineer and solutions architect I'm often playing with data at home. Lately, I've been gathering image data for training some machine learning algorithms on no-reference automatic image quality assessment (no reference IQA). This problem seems to have been worked on by the group behind the LAION-Aesthetics dataset.
This dataset is massive (at least, to me). The full set is 1.2 billion images. And! I want every one of them. 😂
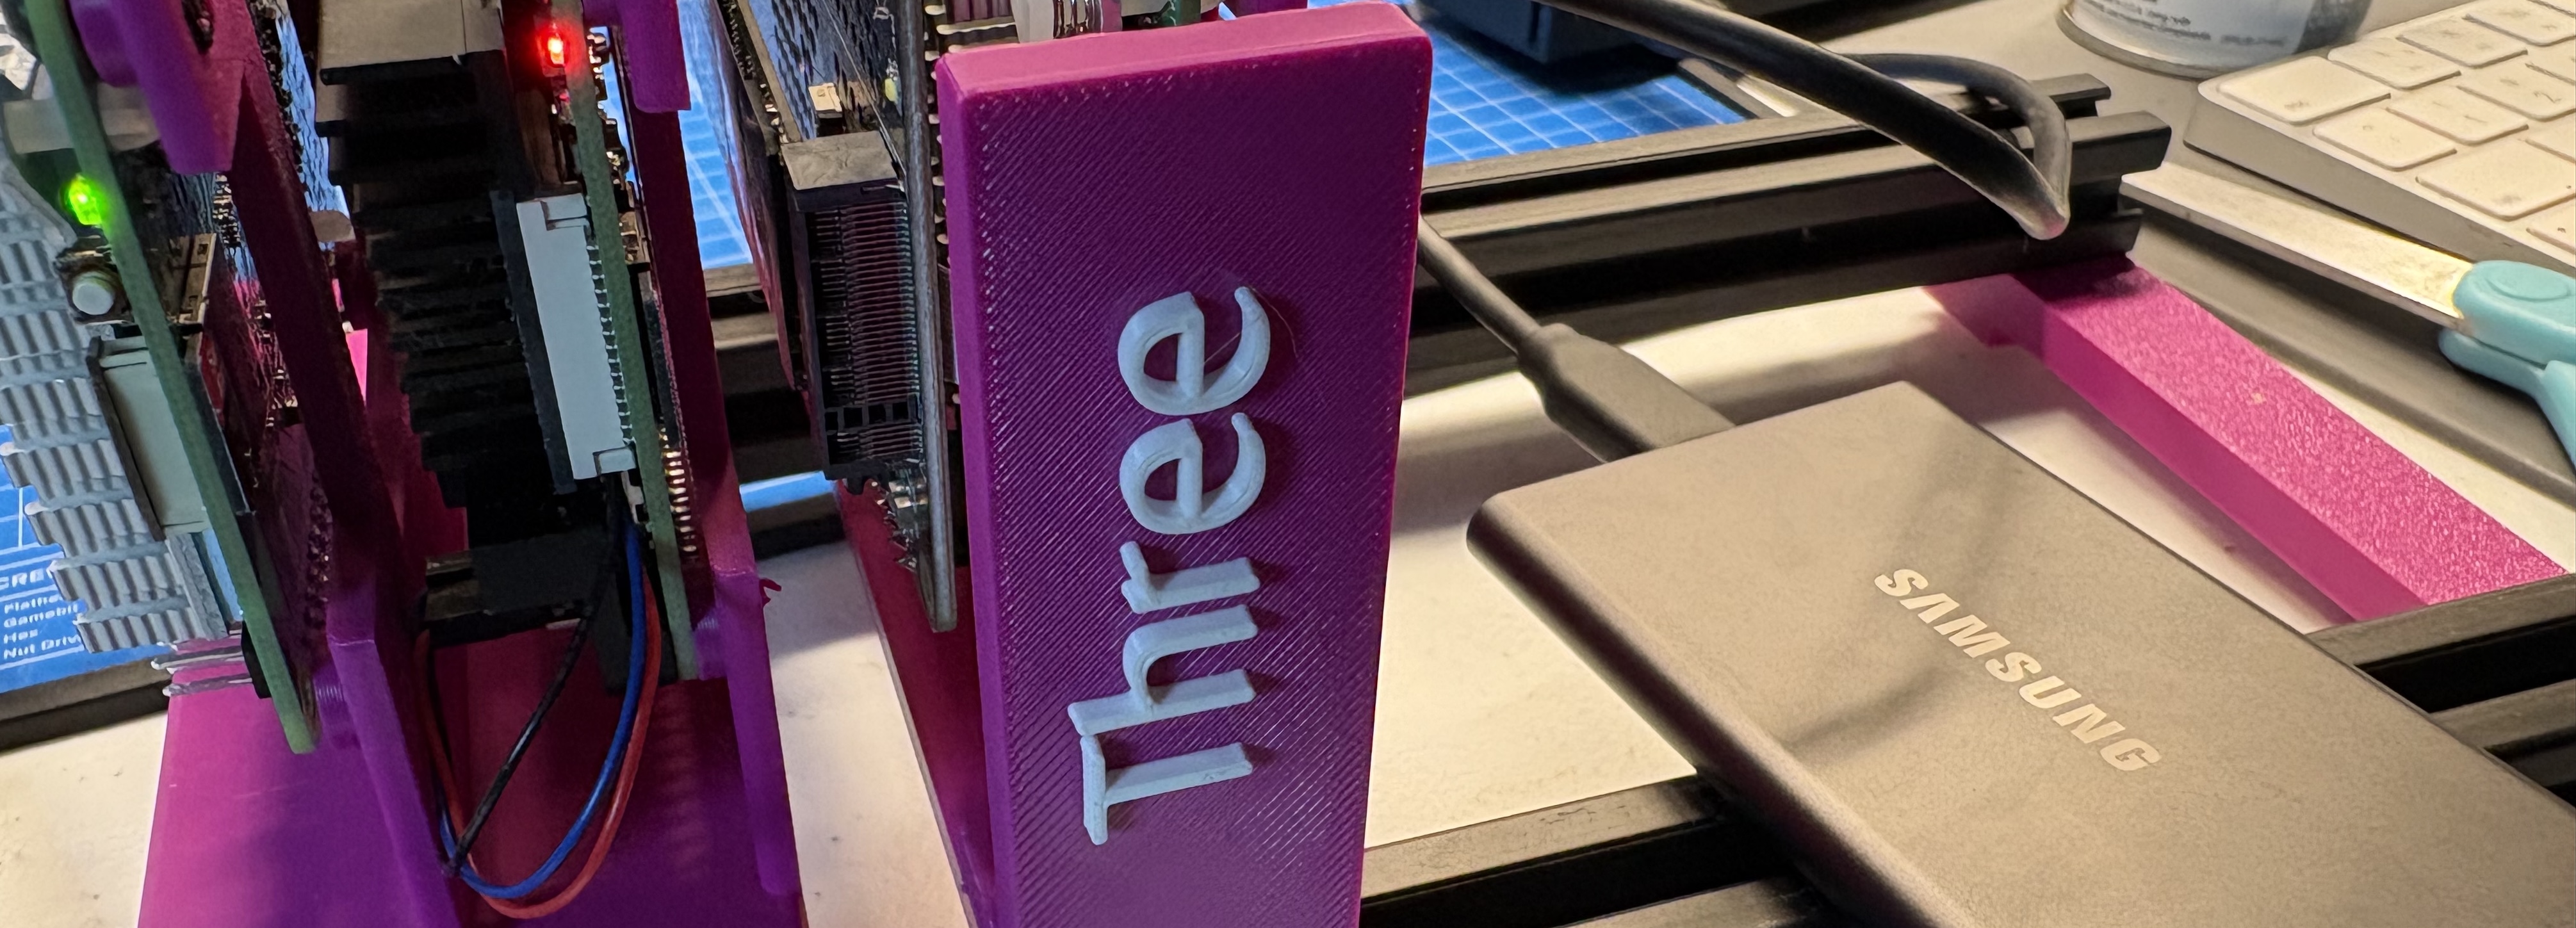
As a data engineer, I’m more familiar with ETL/ELT pipelines than managing raw filesystems. Let alone managing such a huge file based dataset. After some scoping out S3 bucket costs, I've decided I really needed a cheap home network attached storage device (NAS). This led me to repurposing "Three" on my Raspberry Pi server rack.
Prerequisites
I'm using:
- Raspberry Pi 5 with 16 GB RAM
- 128 GB SD Card
- Official Raspberry Pi Power Supply
- SAMSUNG T7 Portable SSD, 2TB External Solid State Drive

Here's an ASCII diagram of the planned setup:
                          +--------------------+
                          |    Internet / ISP  |
                          +---------+----------+
                                    |
                          +---------v----------+
                          |   Home Router      |
                          |  (192.168.1.1)     ──────────────────────┐
                          +---│-------------│--+                     │
                              │             │                        │
          ┌───────────────────┘             └───┐                    │
          │                                     │                    │
+---------▼---------+                 +---------▼---------+          │
| Raspberry Pi NAS  |                 |   Windows Laptop  |          │
| Host: three       |                 | \\192.168.1.103\  |          │
| IP: 192.168.1.103 |                 +--------------------+         │
| /mnt/storage via  |                                                │
|   Samba (SMB)     |                                                │
+---------│---------+                                                │
          │                                                          │
          │                                                          │
    +-----▼------+                    +--------------------+         │
    | 2TB SSD    |                    |    MacBook Pro     |         │
    | /dev/sda1  |                    | /Volumes/Shared    |◄────────┘
    +------------+                    +--------------------+
Setup Ubuntu Server
Download and install the Raspberry Pi Imager application:
After installation, open the application and insert your SD card.

-
Select
Choose Device-->Raspberry Pi 5(or your Pi type) -
Click on
Choose OS-->Other general-purpose OS-->Ubuntu-->Ubuntu Server xx.xx (64-bit)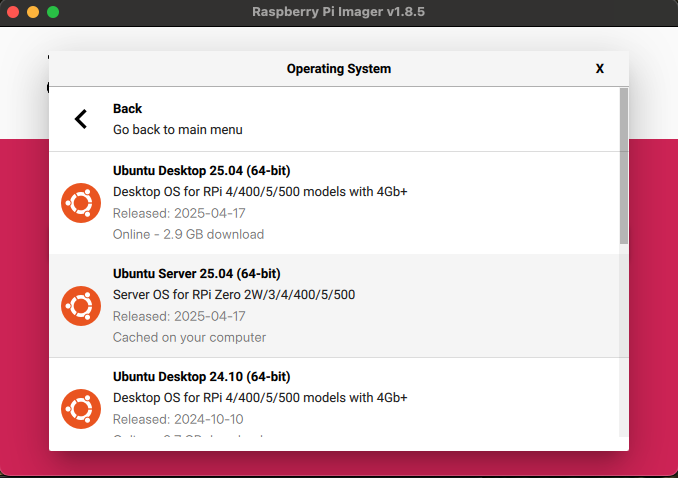
-
Then select
Choose Storageand select your SD card.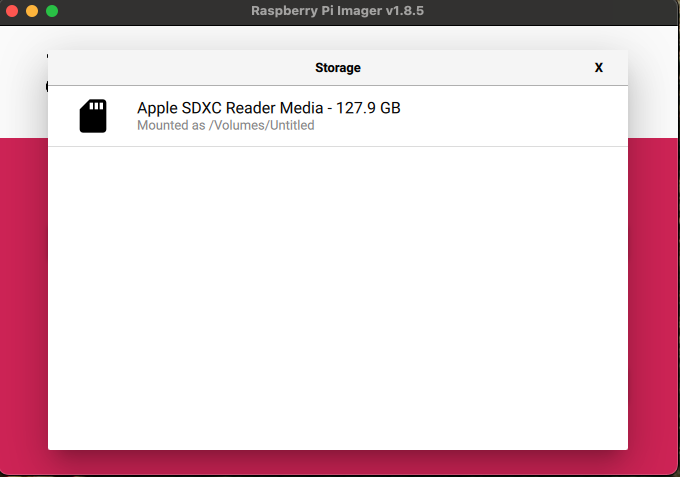
-
Select
Next -
You should be prompted to set
OS customisationand clickEdit Settings.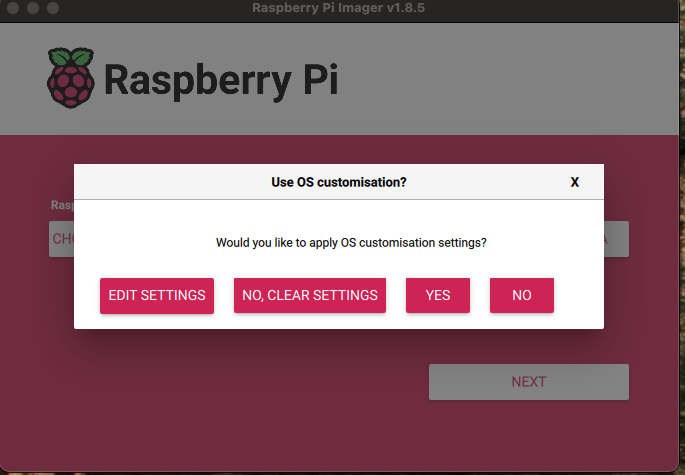
-
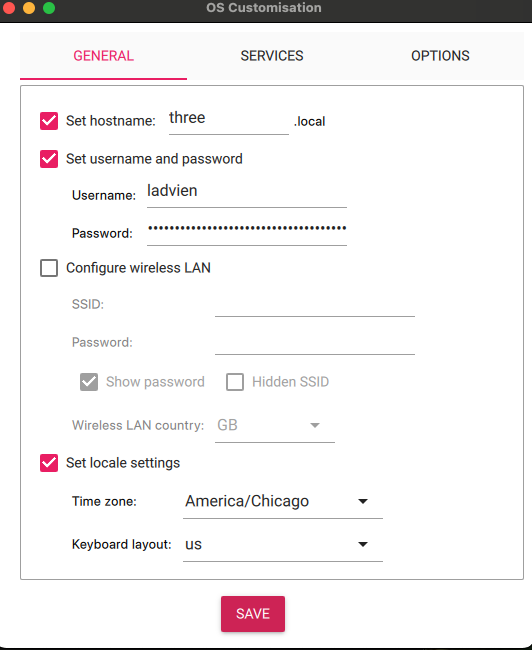
Under the
Generalsettings of customization fill in the following:-
Set hostname— personally, I set this a a nickname for this host machine. It shows up in my router device listing. I'm naming minethreeas it will be at IP subnet.103. Later, I'll make sure this matches my Mac and Linux machines~/.ssh/configentry later -
Set the
UsernameandPassword-- this will allow you to login as soon as you boot up
-
-
On the "Services" tab:
- Tick on "Enable SSH" -- this is required to finish the setup
- Set radio selector to "Allow public-key authentication only"
- Paste in your public key
If you need information on creating a ssh key, see:
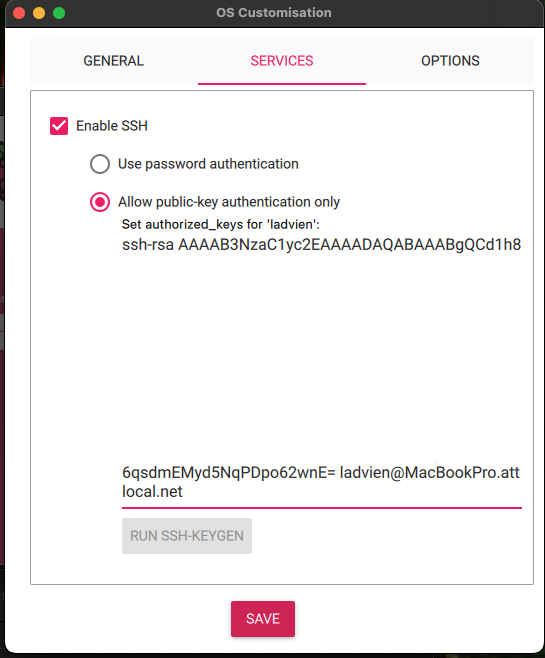
-
After saving your customization settings, click "Yes" to continue the installation.


Requirements
The following can be used to prepare your disk drive.
- Before plugging in the disk you plan to use for your NAS, from the Raspberry Pi terminal run:
lsblk
It should provide output similar to:
ladvien@three:~$ lsblk
NAME        MAJ:MIN RM   SIZE RO TYPE MOUNTPOINTS
loop0         7:0    0  38.7M  1 loop /snap/snapd/23772
loop1         7:1    0  44.3M  1 loop /snap/snapd/24509
mmcblk0     179:0    0 119.1G  0 disk
├─mmcblk0p1 179:1    0   512M  0 part /boot/firmware
└─mmcblk0p2 179:2    0 118.6G  0 part /
nvme0n1     259:0    0 476.9G  0 disk
└─nvme0n1p1 259:1    0 476.9G  0 part
Take note of these results, as we will compare it against this command run again after connecting your the new disk drive.
- Connect your new disk to the Raspberry Pi.
-
At the Raspberry Pi terminal run
lsblkagain.
ladvien@three:~$ lsblk
NAME        MAJ:MIN RM   SIZE RO TYPE MOUNTPOINTS
loop0         7:0    0  38.7M  1 loop /snap/snapd/23772
loop1         7:1    0  44.3M  1 loop /snap/snapd/24509
sda           8:0    0   1.8T  0 disk
└─sda1        8:1    0   1.8T  0 part
mmcblk0     179:0    0 119.1G  0 disk
├─mmcblk0p1 179:1    0   512M  0 part /boot/firmware
└─mmcblk0p2 179:2    0 118.6G  0 part /
nvme0n1     259:0    0 476.9G  0 disk
└─nvme0n1p1 259:1    0 476.9G  0 part
Note the new
sda1
drive. This is the disk we will target.
- Format the storage device
Before continuing we need to ensure the disk is setup with the correct filesystem format. We are going to use
ext4
. This format allows for extremely fast read and write access, but is limited to a Linux based system. To be clear, one will still be able to access the drive remotely from Windows or Mac, but if it is an external drive, you will not be able to disconnect it from your Pi and connect it to a Windows or Mac computer directly.
One last note before proceeding:
Warning! The following command will reformat the drive as
ext4. All existing data will be lost. This will also make the drive unreadable by Windows and MacOS.
If you'd like to continue, run the following from the Raspberry Pi with the drive connected:
sudo mkfs.ext4 /dev/sda1 -L external_ssd
You can identify your external drive using lsblk before and after plugging it in to make sure /dev/sda1 is correct.
Prepare Raspberry Pi
- Setup Raspberry Pi image using Raspberry Pi Imager
-
On your desktop add
sshkey to~/.ssh/config. This will allow you to login in withssh three. Please note, this will only work on Unix systems (Linux and MacOS)
Host three
HostName 192.168.1.xxx
User ladvien
IdentityFile ~/.ssh/local_id
PreferredAuthentications publickey
Setup
-
Update the server
sh sudo apt update -y && sudo apt upgrade -y -
Create a mount point and set permissions:
sh sudo mkdir -p /mnt/storage sudo chmod 0775 /mnt/storage -
Mount the drive manually to test it
sudo mount /dev/sda1 /mnt/storage

Persistent Mounting
- Find the disk UUID by running:
sudo blkid
Look for the UUID= value next to
/dev/sda1
.
For example:
/dev/sda1: UUID=e2a1-1234-5678-90ab ...
You can use quoted or unquoted string UUID in your
/etc/fstab
entry.
- At the terminal type:
sudo nano /etc/fstab
And update the file to include a line like:
UUID=xxxx-xxxx /mnt/storage ext4 defaults,noatime 0 2
Where the
xxxx-xxxx
is the UUID for your corresponding drive when you ran
blkid

| Option | Meaning |
|---|---|
defaults
|
Enables standard options: read/write, auto mount, exec, etc. |
noatime
|
Prevents updating file access times, improving performance |
0
|
Skip dump (used by legacy backup utilities) |
2
|
Run
fsck
after
/
, in order (use
1
for root,
2
for others)
|
Install Samba
- At the terminal, install Samba:
sudo apt install samba -y
- Add a Samba user:
sudo groupadd sambauser  # Only if the group doesn't already exist
sudo useradd -M -s /usr/sbin/nologin -g sambauser sambauser
sudo smbpasswd -a sambauser
This creates a system-level
sambauser
account (without shell access) and adds it to the Samba password database.
- Set ownership and permissions on the shared folder:
sudo chown -R sambauser:sambauser /mnt/storage
sudo chmod -R 2775 /mnt/storage
The
2
at the beginning of
2775
sets the
setgid
bit, ensuring that
new files inherit the directory group
(
sambauser
), which is essential for consistent access by Samba.
-
(Optional)
Add your current user to the
sambausergroup to allow local access via CLI:
sudo usermod -aG sambauser $USER
This step lets you manipulate files in
/mnt/storage
directly as your Linux user.
| Command | Flags Summary |
|---|---|
sudo groupadd sambauser
|
— |
sudo useradd -M -s /usr/sbin/nologin -g sambauser sambauser
|
-M
: no home
-s
: disable shell
-g
: group
|
sudo smbpasswd -a sambauser
|
-a
: add new Samba user
|
sudo usermod -aG sambauser $USER
|
-a
: append
-G
: group
|
sudo chown -R sambauser:sambauser /mnt/storage
|
-R
: recursive
user:group
: owner/group
|
sudo chmod -R 2775 /mnt/storage
|
2
: setgid
7
: rwx
5
: r-x
|
Command Explanations:
-
groupadd sambauser-- Creates the sambauser group (skip if it already exists). -
useradd -M -s /usr/sbin/nologin -g sambauser sambauser-- Adds a system user without shell access, belonging to the sambauser group. -
smbpasswd -a sambauser-- Adds the user to Samba’s internal password database. -
usermod -aG sambauser $USER-- Adds your current user to the sambauser group (helpful for CLI access to shared files). -
chown -R sambauser:sambauser /mnt/storage-- Assigns ownership of the shared directory to the Samba user and group. -
chmod -R 2775 /mnt/storage-- Enables group inheritance (setgid) and sets read/write/execute permissions appropriately.
Note, the last command is optional. It adds your Linux user to the
sambauser
group. This should ensure your user has the ability to manipulate files when logged into the NAS Pi.
- Edit the Samba Config file
sudo nano /etc/samba/smb.conf
And add the following to the end of the file:
[Shared]
    path = /mnt/storage
    browsable = yes
    writable = yes
    guest ok = no
    valid users = sambauser
    force user = sambauser
    force group = sambauser
    create mask = 0666
    directory mask = 0777

    # Performance tuning
    read raw = yes
    write raw = yes
    min receivefile size = 16384
    socket options = TCP_NODELAY SO_RCVBUF=131072 SO_SNDBUF=131072
    use sendfile = yes
    aio read size = 1
    aio write size = 1
- Restart Samba
sudo systemctl restart smbd
-
Make NAS IP address static. Run
sudo nano /etc/netplan/50-cloud-init.yamland edit the file to look like this. Please note, change thexxxto whatever you prefer. E.g.,192.168.1.xxx/24becomes192.168.1.103/24. Replace the<YOUR_ROUTERS_IP>with the IP address of your router.
network:
  version: 2
  ethernets:
    eth0:
      dhcp4: no
      addresses:
        - 192.168.1.103/24
      routes:
        - to: default
          via: <YOUR_ROUTERS_IP>
      nameservers:
        addresses:
          - 1.1.1.1
          - 8.8.8.8
This will disconnect your session if you’ve changed the IP. Reconnect using the new address, if you've selected a different IP address than the one assigned. When ready, apply these changes with
sudo netplan apply
-
To check the log, use
sudo tail -f /var/log/samba/log.smbd
Test it Works
From the Pi terminal run:
smbclient -L localhost -U sambauser
On Linux
Update your packages and install
cifs-utils
:
sudo apt update
sudo apt install -y cifs-utils
Then create a mount point:
sudo mkdir /mnt/<your_mount_dir_name>
Add Samba credentials:
vi ~/.smbcredentials
Then add:
username=sambauser
password=<your_password>
Then secure the credentials file:
chmod 600 ~/.smbcredentials
Ensure the remote drive mounts on booting:
sudo vi /etc/fstab
Add your remote drive:
//192.168.1.103/Shared /mnt/share_3 cifs credentials=/home/<your_linux_username>/.smbcredentials,uid=1000,gid=1000,vers=3.0 0 0
Then reload the daemons and mount the NAS:
sudo systemctl daemon-reload
sudo mount -a
On Mac
From your Mac:
mkdir /Volumes/Shared
mount_smbfs //sambauser@192.168.1.103/Shared /Volumes/Shared
Automatically Connect on Mac at Login
To auto-mount the NAS share when your Mac starts:
- Open Finder and press Cmd + K or choose Go > Connect to Server...
-
Enter the address:
smb://192.168.1.103/Shared

- Click the + button to add it to your list of favorite servers.
-
Click
Connect
, then log in using
sambausercredentials. - Check "Remember this password" if prompted, and save it to your Keychain.
- Open System Settings > General > Login Items .
-
Click the
+button under Open at Login , navigate to/Volumes/Shared, and add it.

On Windows
Open File Explorer and enter:
\\192.168.1.103\Shared
Log in with the
sambauser
credentials when prompted.