
This article is part of a series.
View all 6 parts
- Part 1 – Setting up a Raspberry Pi NAS
- Part 2 – Setup Production Postgres Raspberry Pi 5 (Distro-Agnostic)
- Part 3 – Securely Expose Your Raspberry Pi 5 with Cloudflare Tunnel
- Part 4 – This Article
- Part 5 – Add HTTPS to Your Raspberry Pi with Nginx and Cloudflare
- Part 6 – Switch from Cloudflare Origin Certificates to Let’s Encrypt on Raspberry Pi with Cloudflare Tunnel
I've recently setup a home server array using Raspberry Pis I've impulsively purchased over the years.
Currently I have the following setup:
- A Pi with Postgres database
- A pi with a network attached storage device
- A Cloudflare tunnel to a Pi
It's Pi running the Cloudflare tunnel I also would like to act as a reverse proxy. This should allow the proxy to direct traffic to the correct place within the home network.
2. Prerequisites
- Raspberry Pi running Ubuntu Server (proxy Pi)
- Static IP set for the proxy Pi
- Other Pis or home servers running web apps (e.g., at 192.168.1.100:8000, etc.)
- Optional: a registered domain with DNS pointing to your home IP (or using Cloudflare Tunnel)
3. Install Nginx on the Proxy Pi
Login to your Pi and run the following, it will update your package repositories and install nginx .
sudo apt update && sudo apt install nginx -y
This should install
nginx
and enable the
nginx
background service (aka, daemon).

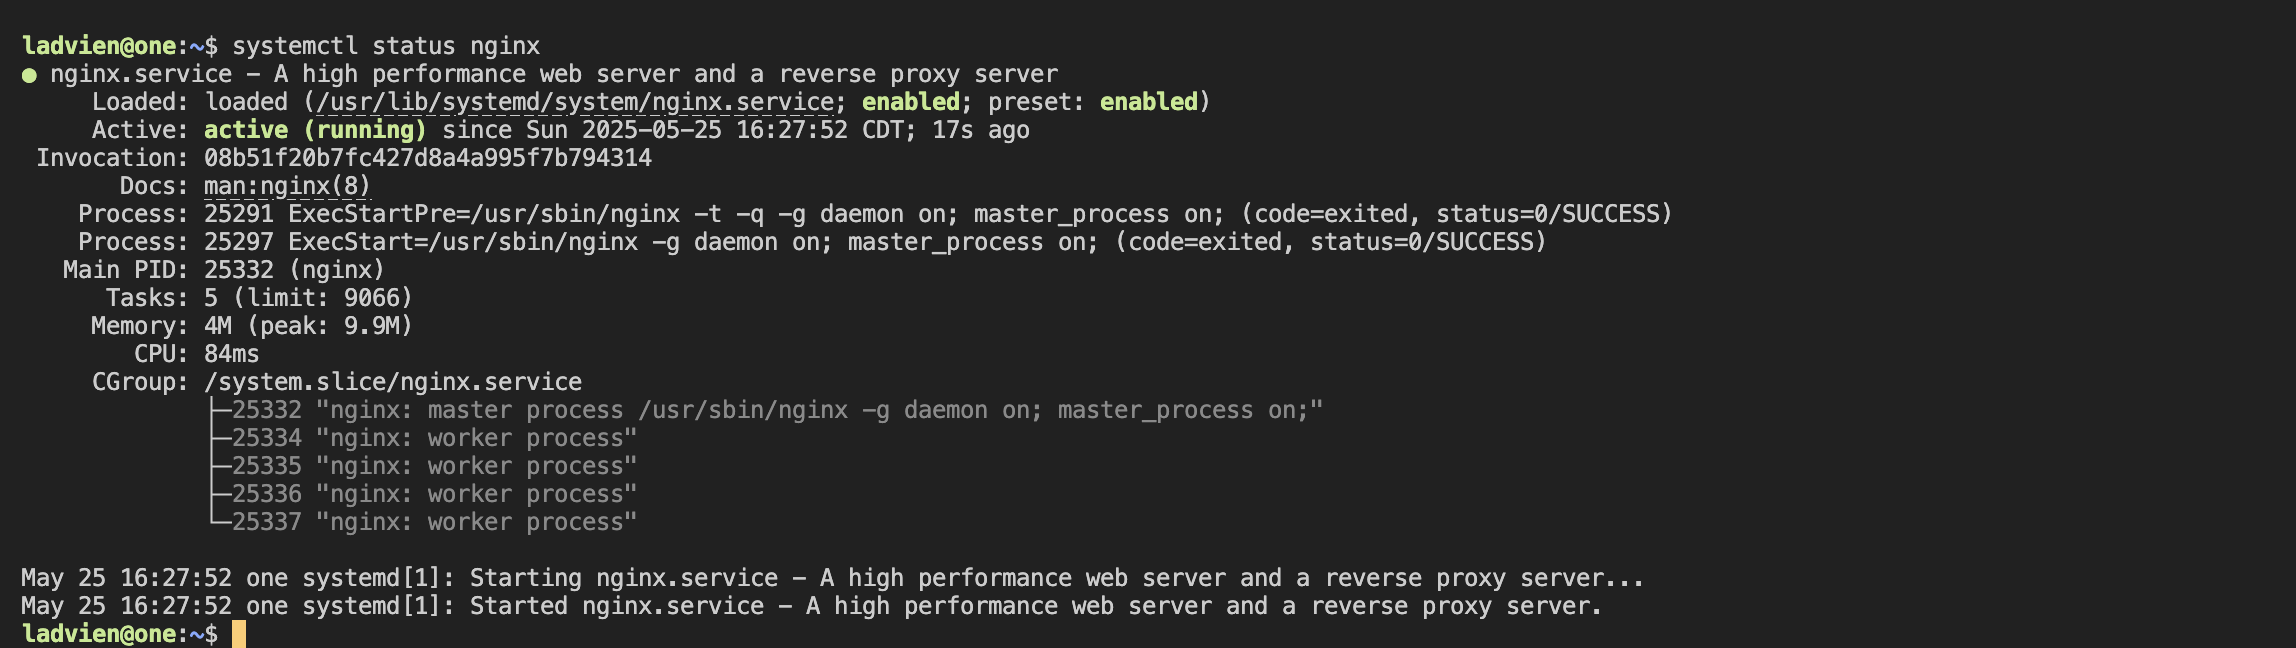
Then confirm
nginx
daemon is running:
systemctl status nginx
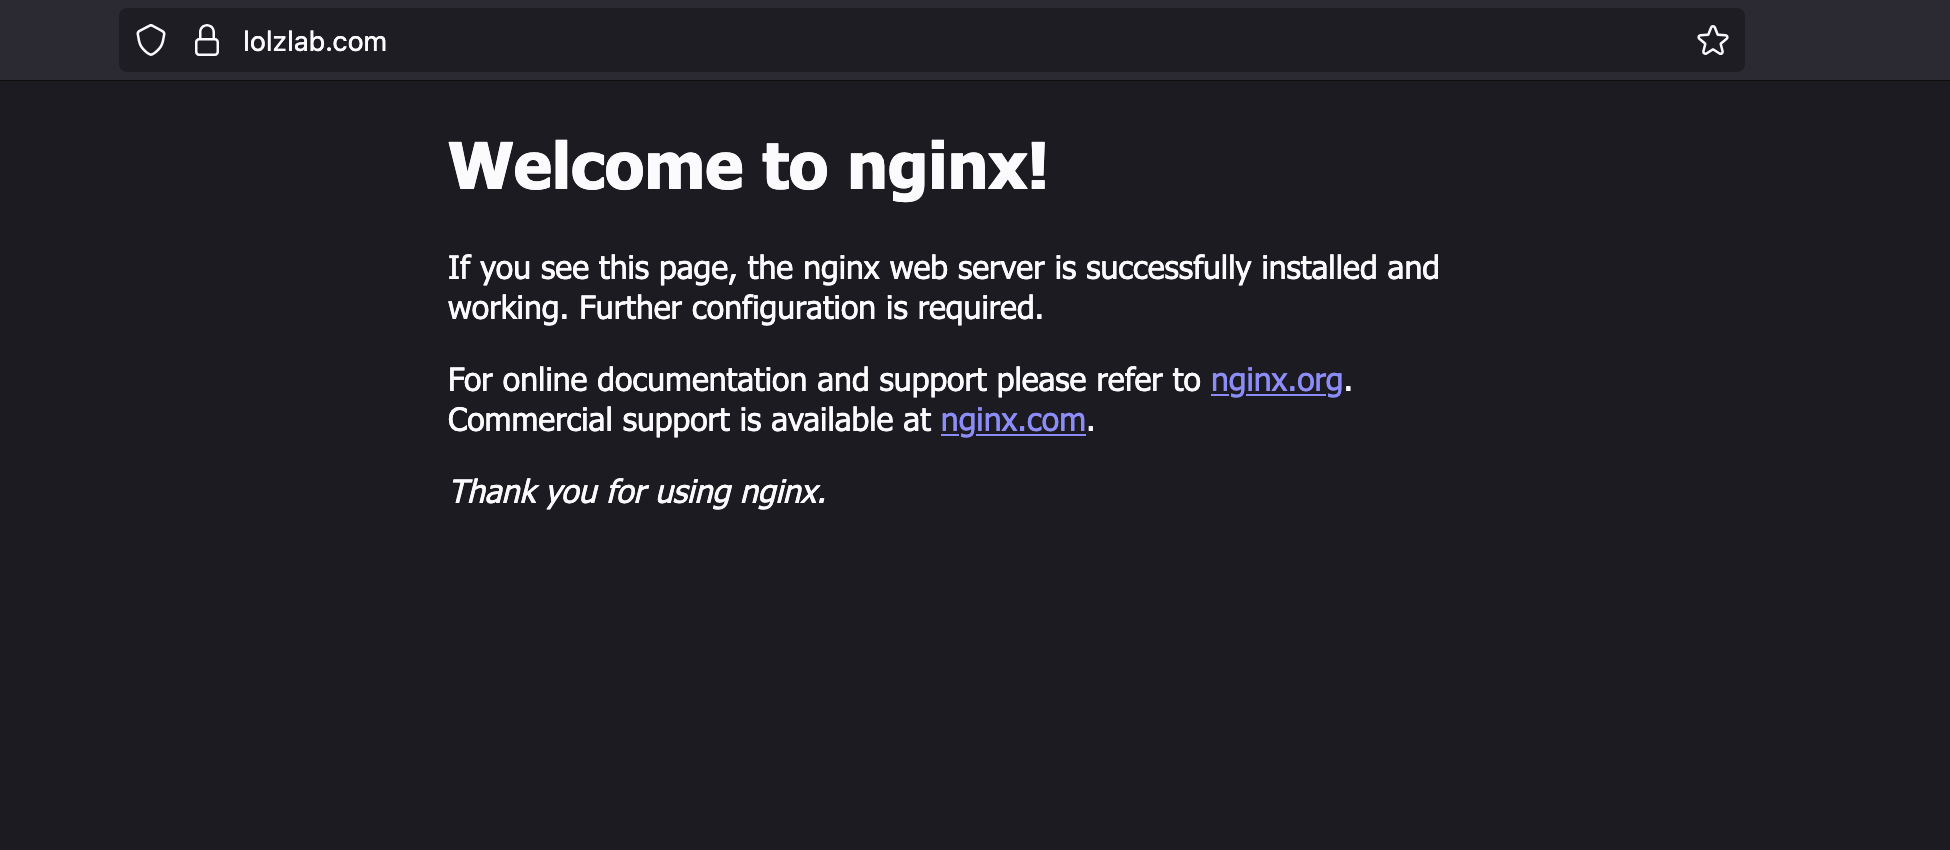
Now open your browser and visit your website, youl should be greeted by the
nginx
default HTML.
4. Setup Tunnel with Subdomains
I setup a Cloudflare tunnel in an earlier article:
I'm going to remove the existing tunnel by running:
cloudflared tunnel cleanup <tunnel_name>
cloudflared tunnel delete <tunnel_name>
However, I'm going to leave the credentials file in place, this should save us having to create new credentials.
Before setting up a new tunnel, we update the
config.yml
file. At the terminal run:
vim ~/.cloudflared/config.yml`
And add something like the following:
tunnel: <tunnel_name>
credentials-file: /home/pi/.cloudflared/<credentials_file>.json

ingress:
  - hostname: <website_name>.lolzlab.com
    service: http://localhost:80

  - hostname: <api_name>.api.lolzlab.com
    service: http://localhost:80

  - service: http_status:404
Mine ended up looking like:
tunnel: lolz_at_home
credentials-file: /home/ladvien/.cloudflared/lolz_at_home.json

ingress:
  - hostname: <website_name>.lolzlab.com
    service: http://localhost:80

  - hostname: <api_name>.api.lolzlab.com
    service: http://localhost:80

  - service: http_status:404
And let's re-create the tunnel now.
First, delete the existing
CNAME
record from Cloudflare's DNS.
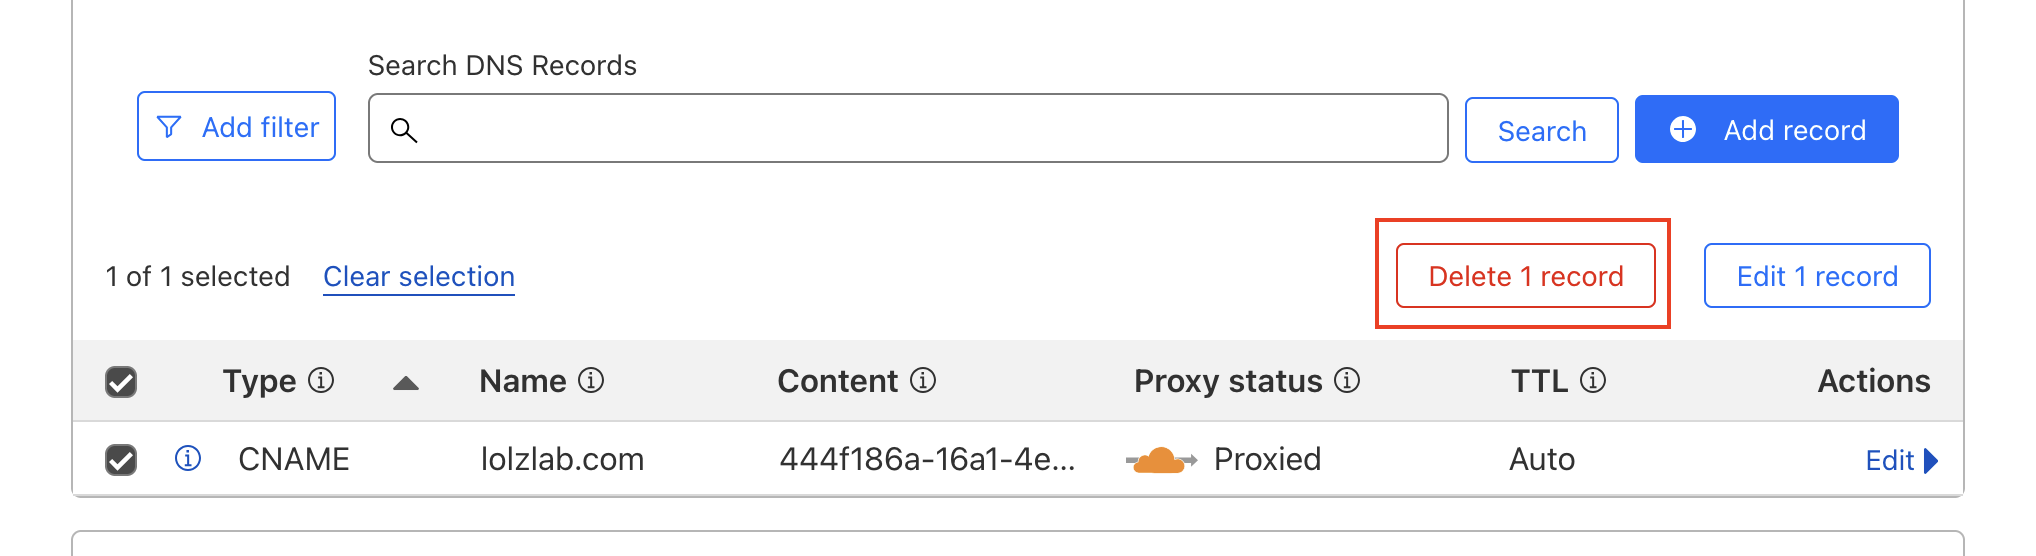
Then back at the Pi's terminal, let's re-create the tunnel by running:
cloudflared tunnel route dns <tunnel_name> <domain_name>
Mine ended up looking like:
cloudflared tunnel route dns lolz_at_home lolzlab.com
Lastly, let's ensure this tunnel runs as a daemon. Copy your configuration file to the location of the Cloudflare system configuration.
sudo cp ~/.cloudflared/config.yml /etc/cloudflared/config.yml
Then enable and start the service:
sudo systemctl enable cloudflared
sudo systemctl start cloudflared
5. Setup Path-Based Reverse Proxy Routing
Now, let's create a simple
nginx
for subdomain based routing. Still on the Raspberry Pi edit the file
sudo vi /etc/nginx/sites-available/reverse-proxy.conf
Let's add a subdomain based routing configuration:
# website_one.lolzlab.com
server {
    listen 80;
    server_name website_one.lolzlab.com;

    location / {
        proxy_pass http://192.168.1.101:8080;
        proxy_set_header Host $host;
        proxy_set_header X-Real-IP $remote_addr;
        proxy_set_header X-Forwarded-For $proxy_add_x_forwarded_for;
        proxy_set_header X-Forwarded-Proto $scheme;
    }
}

# website_two.lolzlab.com
server {
    listen 80;
    server_name website_two.lolzlab.com;

    location / {
        proxy_pass http://192.168.1.102:8080;
        ...
    }
}

# service_one.api.lolzlab.com
server {
    listen 80;
    server_name service_one.api.lolzlab.com;

    location / {
        proxy_pass http://192.168.1.103:5000;
        ...
    }
}

# service_two.api.lolzlab.com
server {
    listen 80;
    server_name service_two.api.lolzlab.com;

    location / {
        proxy_pass http://192.168.1.104:5000;
        ...
    }
}
This file takes traffic coming in from the tunnel and routes to a its final destination, a server on the home network.
I don't have many websites or APIs yet, so here's what my configuration file ended up looking like:
server {
    # My blog, a static Pelican based website.
    listen 80;
    server_name ladvien.lolzlab.com;

    location / {
        proxy_pass http://192.168.1.101:80
        proxy_set_header Host $host;
        proxy_set_header X-Real-IP $remote_addr;
        proxy_set_header X-Forwarded-For $proxy_add_x_forwarded_for;
        proxy_set_header X-Forwarded-Proto $scheme;
    }
}

server {
    # An API for saving my Apple health data to Postgres
    listen 80;
    server_name self-sensored.api.lolzlab.com;

    location / {
        proxy_pass http://192.168.1.101:5000;
        proxy_set_header Host $host;
        proxy_set_header X-Real-IP $remote_addr;
        proxy_set_header X-Forwarded-For $proxy_add_x_forwarded_for;
        proxy_set_header X-Forwarded-Proto $scheme;
    }
}
Lastly, let's enable the
reverse-proxy.conf
in the expected
nginx
way, by creating a symbolic link to the configuration file.
sudo ln -s /etc/nginx/sites-available/reverse-proxy.conf /etc/nginx/sites-enabled/
This ensures the configuration file can be enabled and disabled by creating and deleting the symbolic link. To ensure the link worked, check the
nginx
service status
Also, we need to remove the
default
entry in
/etc/nginx/sites-enabled
. Otherwise, the default nginx routes will be used.
sudo rm /etc/nginx/sites-enabled/default
Lastly, restart nginx and check the status:
sudo systemctl restart nginx
sudo systemctl status nginx
It should look something like:
ladvien@two:~$ sudo systemctl status nginx
● nginx.service - A high performance web server and a reverse proxy server
     Loaded: loaded (/usr/lib/systemd/system/nginx.service; enabled; preset: enabled)
     Active: active (running) since Sun 2025-05-25 16:31:28 CDT; 21h ago
 Invocation: 38dc80702ce74f86bc5430352ffb6e50
       Docs: man:nginx(8)
    Process: 14556 ExecStartPre=/usr/sbin/nginx -t -q -g daemon on; master_process on; (code=exited, status=0/SUCCESS)
    Process: 14561 ExecStart=/usr/sbin/nginx -g daemon on; master_process on; (code=exited, status=0/SUCCESS)
   Main PID: 14595 (nginx)
      Tasks: 5 (limit: 8673)
     Memory: 4.1M (peak: 10M)
        CPU: 332ms
     CGroup: /system.slice/nginx.service
             ├─14595 "nginx: master process /usr/sbin/nginx -g daemon on; master_process on;"
...