This article is part of a series.
View all 6 parts
- Part 1 – Setting up a Raspberry Pi NAS
- Part 2 – Setup Production Postgres Raspberry Pi 5 (Distro-Agnostic)
- Part 3 – Securely Expose Your Raspberry Pi 5 with Cloudflare Tunnel
- Part 4 – Nginx Reverse Proxy on Raspberry Pi (Ubuntu Server)
- Part 5 – Add HTTPS to Your Raspberry Pi with Nginx and Cloudflare
- Part 6 – This Article
If you use a Cloudflare Tunnel (instead of a public IP), traditional Let’s Encrypt HTTP challenges will fail. This guide walks you through replacing a Cloudflare Origin Certificate with a Let’s Encrypt certificate using Certbot with the DNS-01 challenge and the Cloudflare API.
Prerequisites
Ensure you have:
-
A domain (e.g.,
self-sensored-api.lolzlab.com) - DNS managed by Cloudflare
- A working Raspberry Pi with Nginx installed
-
sudoor root access - A Cloudflare account with API token permissions
Backup and edit your Nginx config:
sudo cp /etc/nginx/sites-available/reverse-proxy.conf ~/reverse-proxy.conf.backup
sudo nano /etc/nginx/sites-available/reverse-proxy.conf
Comment out the old Cloudflare SSL cert lines:
# ssl_certificate     /etc/nginx/ssl/lolzlab.com/cert.pem;
# ssl_certificate_key /etc/nginx/ssl/lolzlab.com/key.pem;
Reload Nginx:
sudo nginx -t && sudo systemctl reload nginx
⚙️ Step 2: Install Certbot with Cloudflare DNS Plugin
Install dependencies:
sudo apt update
sudo apt install certbot python3-certbot-dns-cloudflare
Step 3: Generate a Cloudflare API Token
- Visit Cloudflare API Tokens
- Click Create Token
- Use the "Edit zone DNS" template
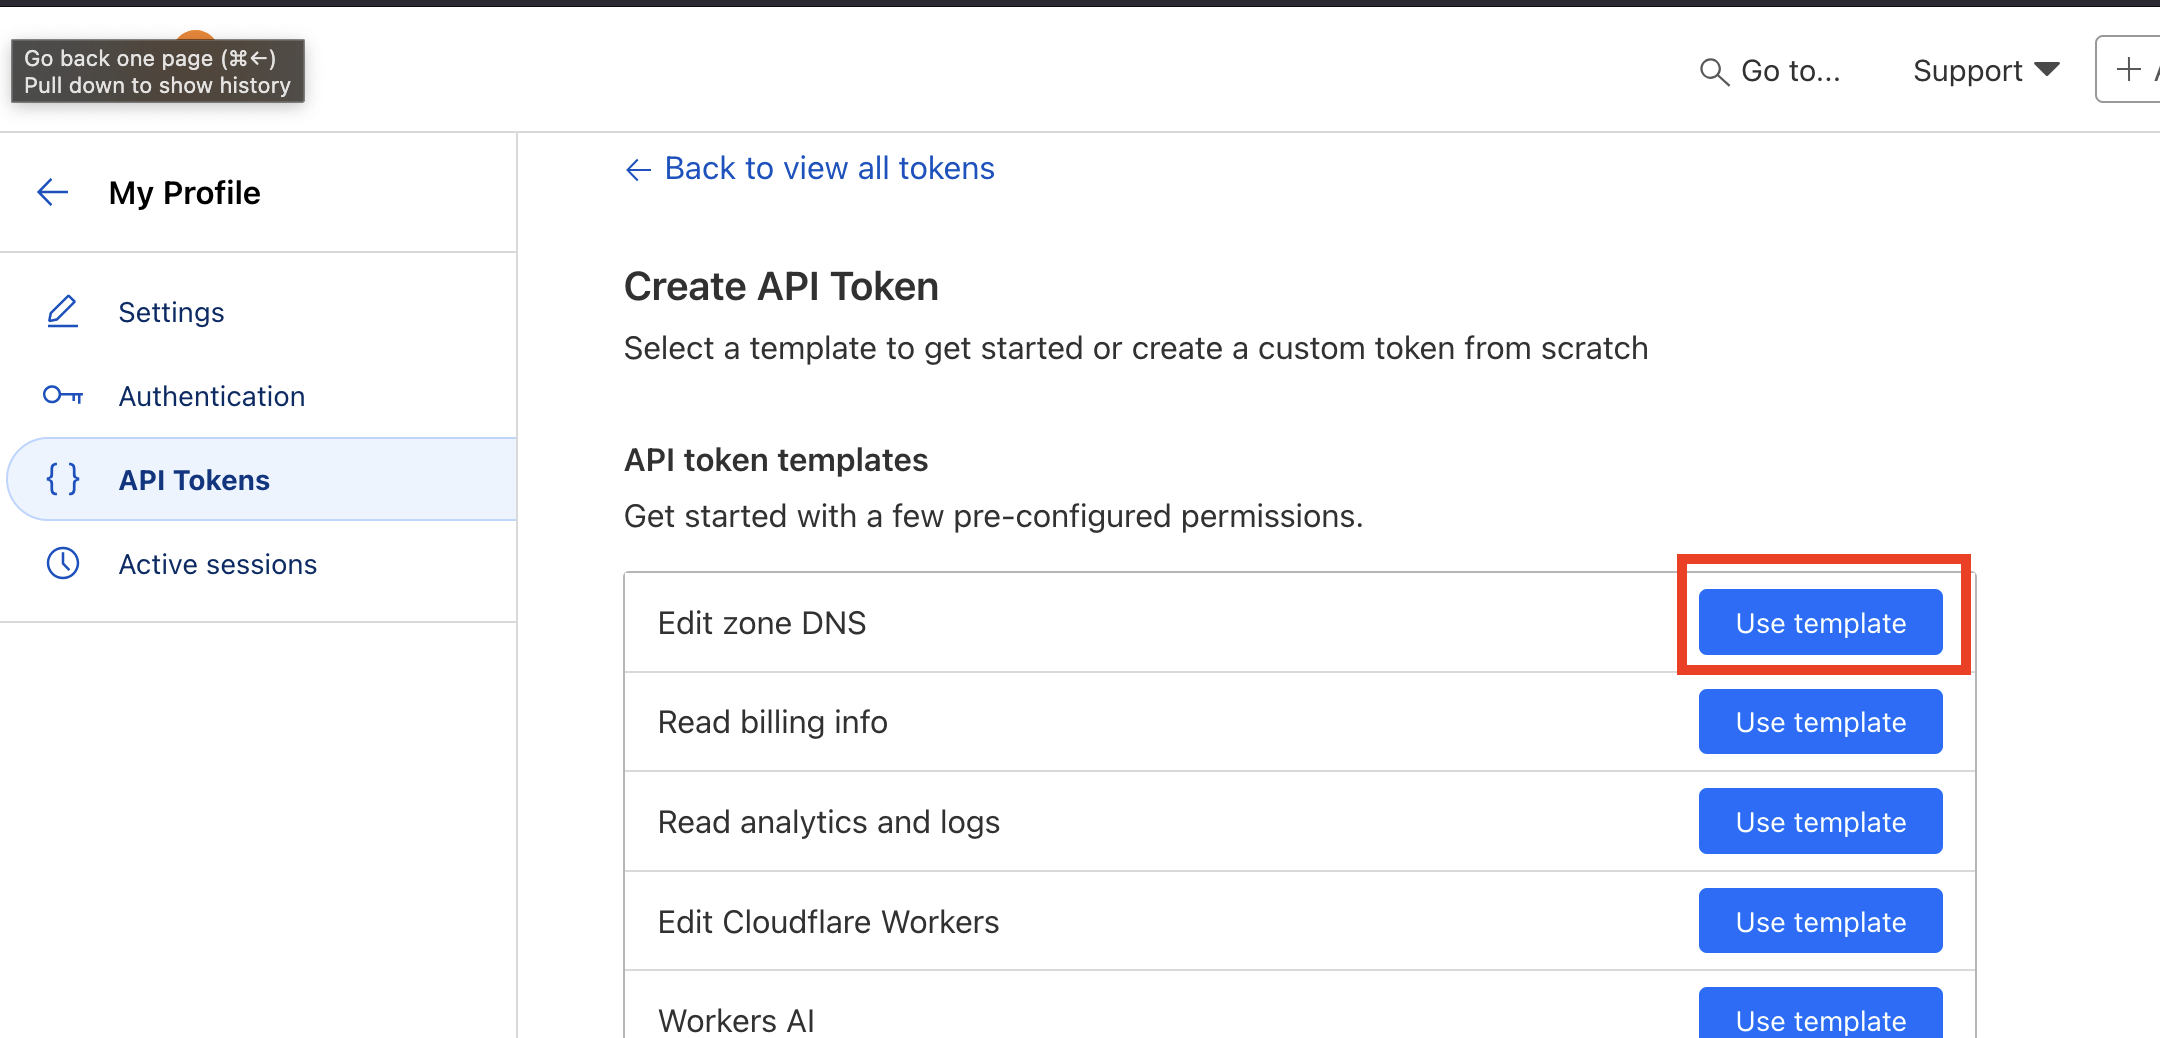
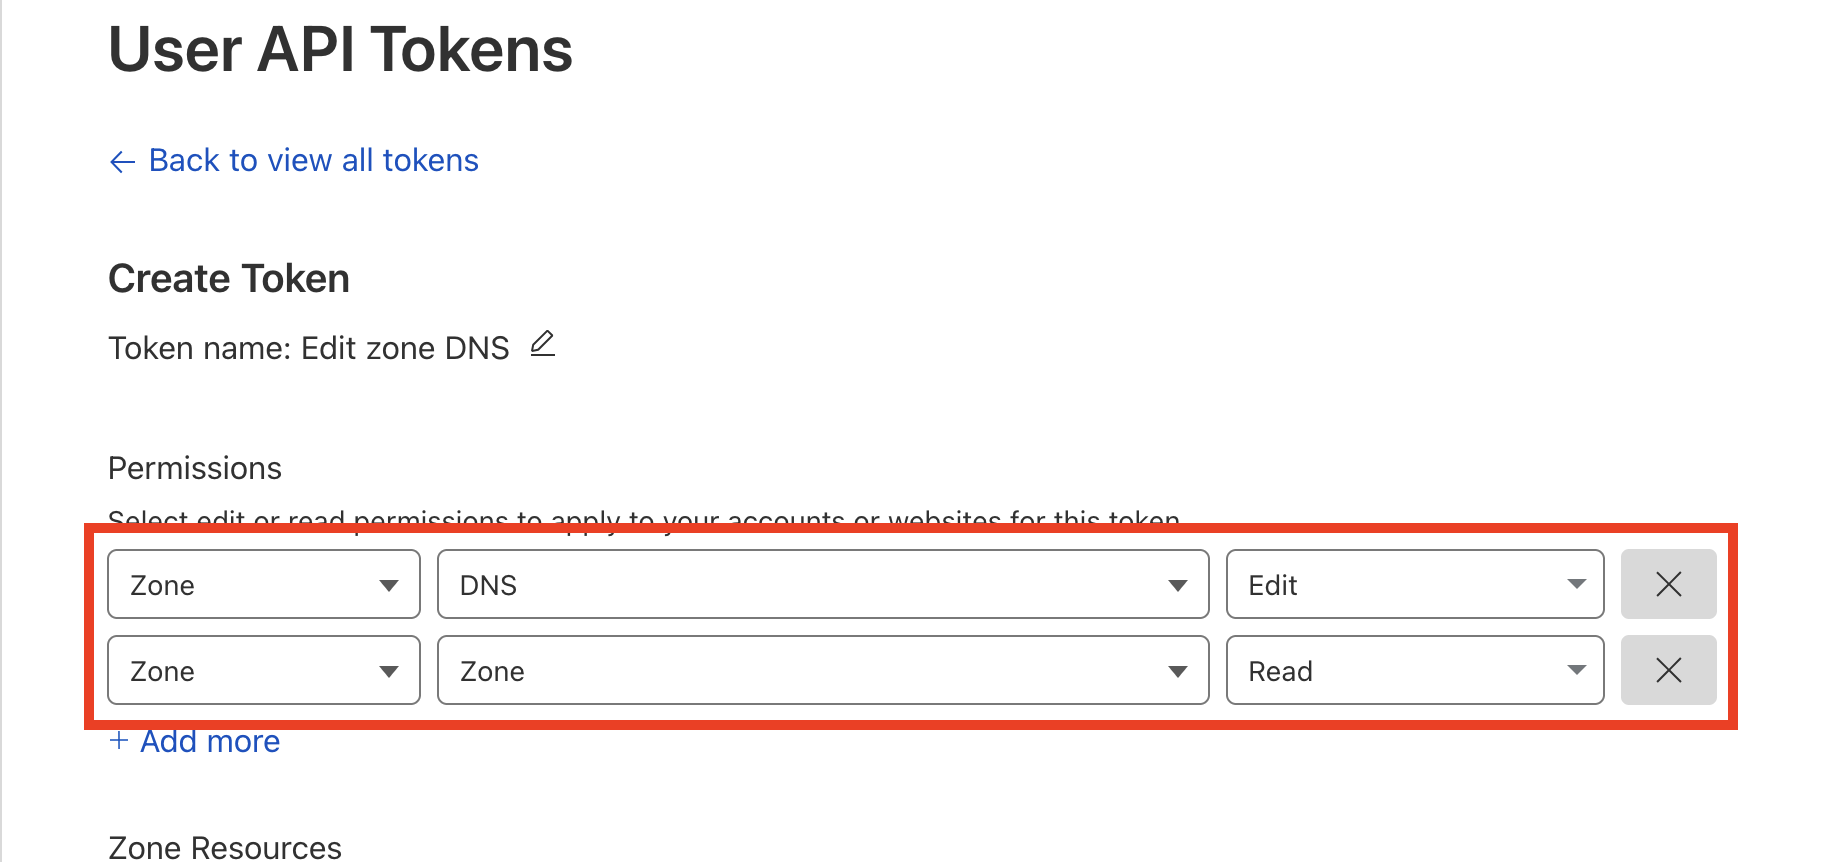
- Set the following permissions:
- Zone\:DNS → Edit
-
Zone\:Zone
→
Read
-
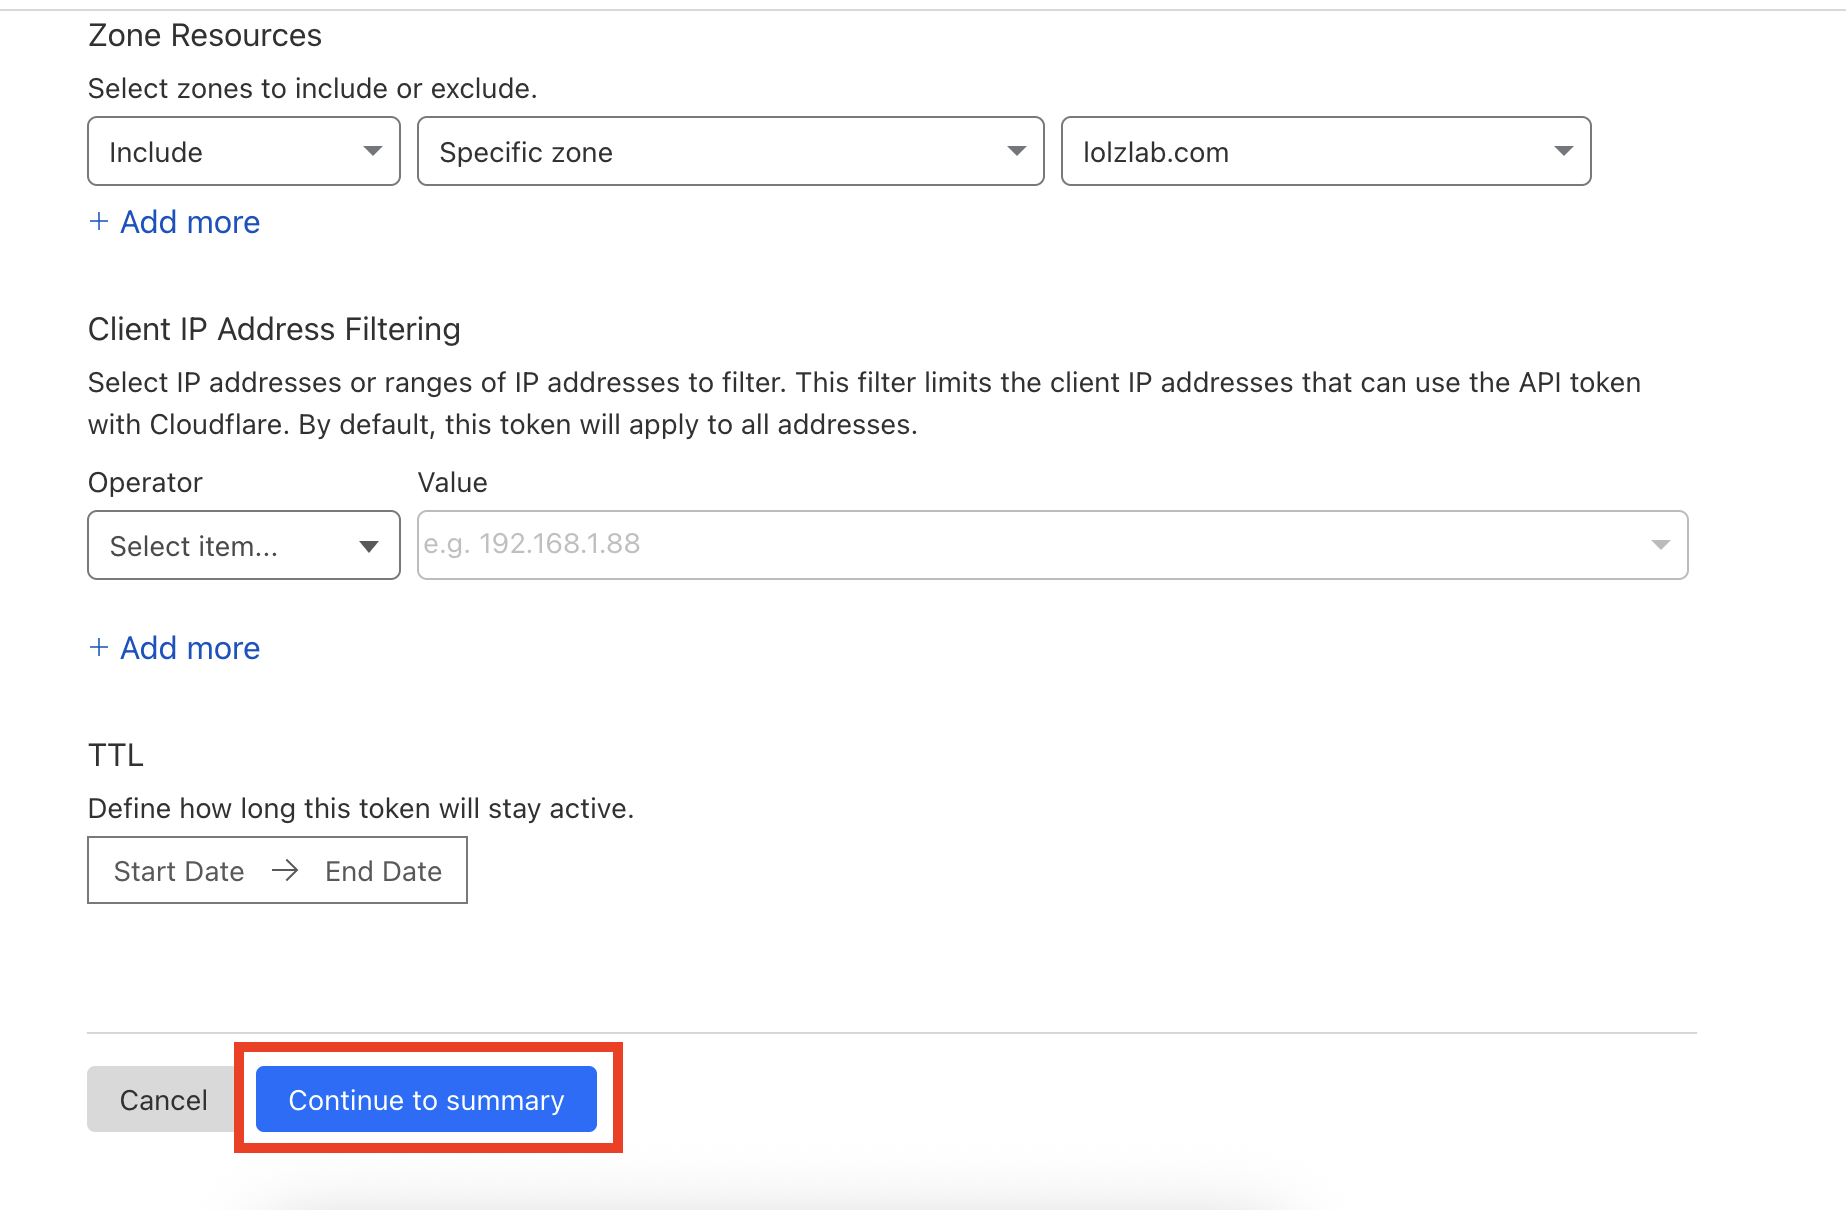
Under
Zone Resources
, choose
Include
→
Specific zone
, and select your domain (e.g.,
lolzlab.com) - (Optional) Add a client IP address filter if desired
- Set token expiration if needed
-
Click "Continue to summary" then "Create Token"
- Save this token. We will need it in the next step.
Step 4: Store Your API Token Securely
Certbot uses a credentials file to authenticate with the Cloudflare API when requesting or renewing certificates using the DNS-01 challenge.
This step will guide you through creating that file securely on your Raspberry Pi.
🪪 What Is This File?
The credentials file will contain your Cloudflare API token, which allows Certbot to temporarily add TXT records to your domain’s DNS zone for certificate verification. This file must be protected because it grants access to your domain's DNS settings.
Let's get going. Open a new file for writing the credentials. We'll place it in a secure system location used by Certbot:
sudo vi /etc/letsencrypt/cloudflare.ini
Paste the following line into the file, replacing the placeholder token with your actual Cloudflare API token received in the previous step:
dns_cloudflare_api_token = YOUR_CLOUDFLARE_API_TOKEN
E.g.,
dns_cloudflare_api_token = Ajgl65eadcASDAsdU$%uyhadsgfaset234
⚠️ Keep this token private — anyone with access can modify your domain's DNS.
Save and exit the file and lock down the permissions so that only the root user can read it:
sudo chmod 600 /etc/letsencrypt/cloudflare.ini
This prevents other users on the system from viewing or modifying the token.
Step 5: Request Let’s Encrypt Certificates
Temporarily disable DNS for the domain names you want covered by your certificate.

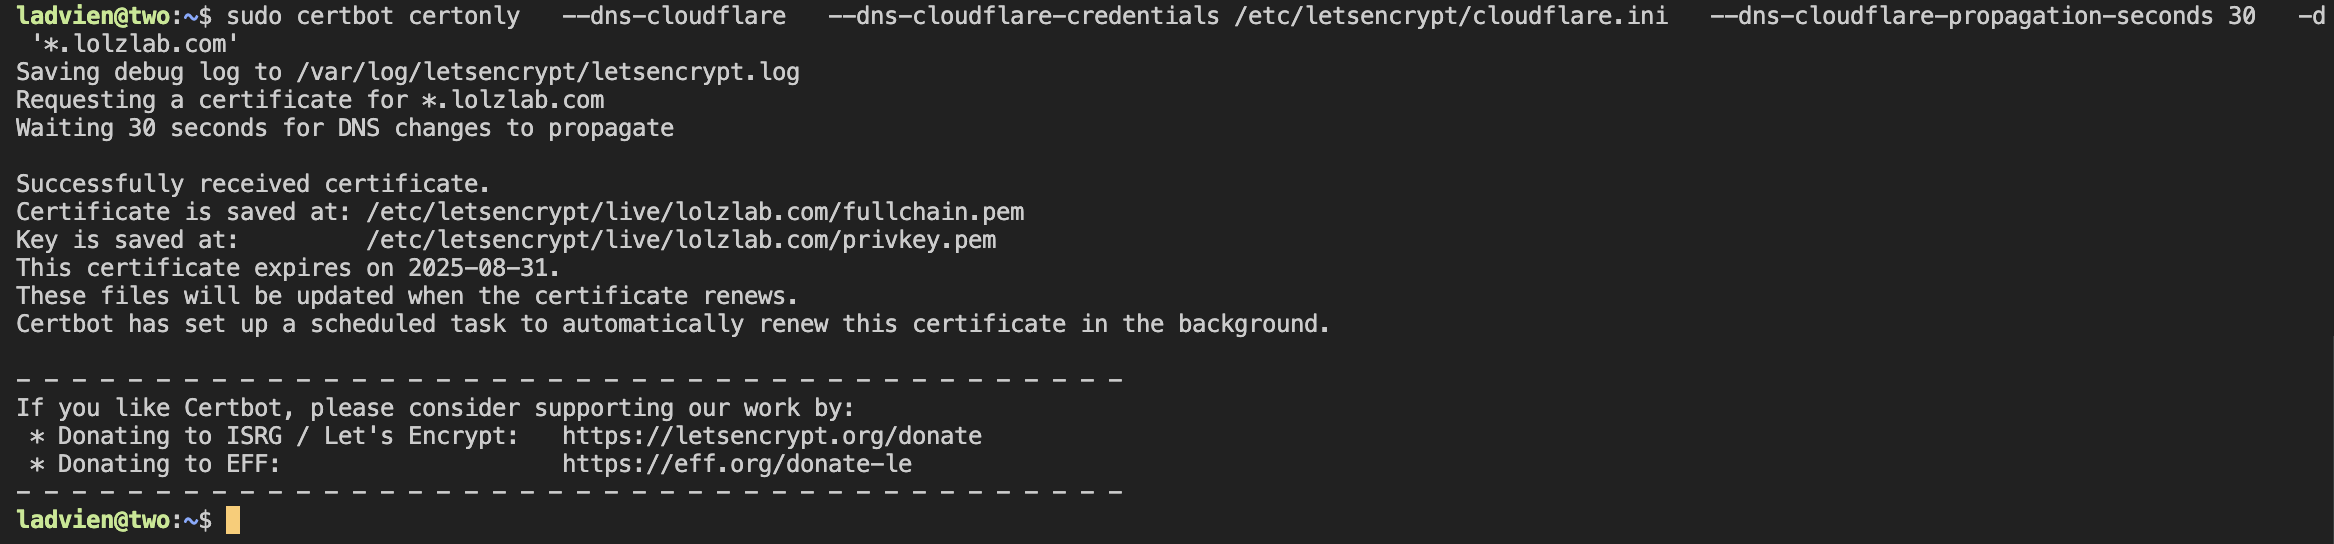
Run the Certbot DNS challenge:
sudo certbot certonly \
  --dns-cloudflare \
  --dns-cloudflare-credentials /etc/letsencrypt/cloudflare.ini \
  -d lolzlab.com \
  -d '*.lolzlab.com'
Please note, the following:
  -d lolzlab.com \
  -d '*.lolzlab.com'
Requests a certificate covering both the domain and all subdomains for my
lolzlab.com
domain name. If you would like to request other domain names, add them to this list.
E.g.,
-d self-sensored-api.lolalotlabs.com \
-d ladvien.lolalotlabs.com
Certbot will update DNS records and validate your domain without requiring public HTTP access.
If successful, don't forget to turn back on your DNS proxy in the Cloudflare dashboard!
Step 6: Update Nginx to Use Let’s Encrypt Certs
Open your Nginx config:
sudo vi /etc/nginx/sites-available/reverse-proxy.conf
Update SSL lines in each
server
block:
ssl_certificate     /etc/letsencrypt/live/lolzlab.com/fullchain.pem;
ssl_certificate_key /etc/letsencrypt/live/lolzlab.com/privkey.pem;
Then reload:
sudo nginx -t && sudo systemctl reload nginx
🔁 Step 7: Auto-Renewal Setup
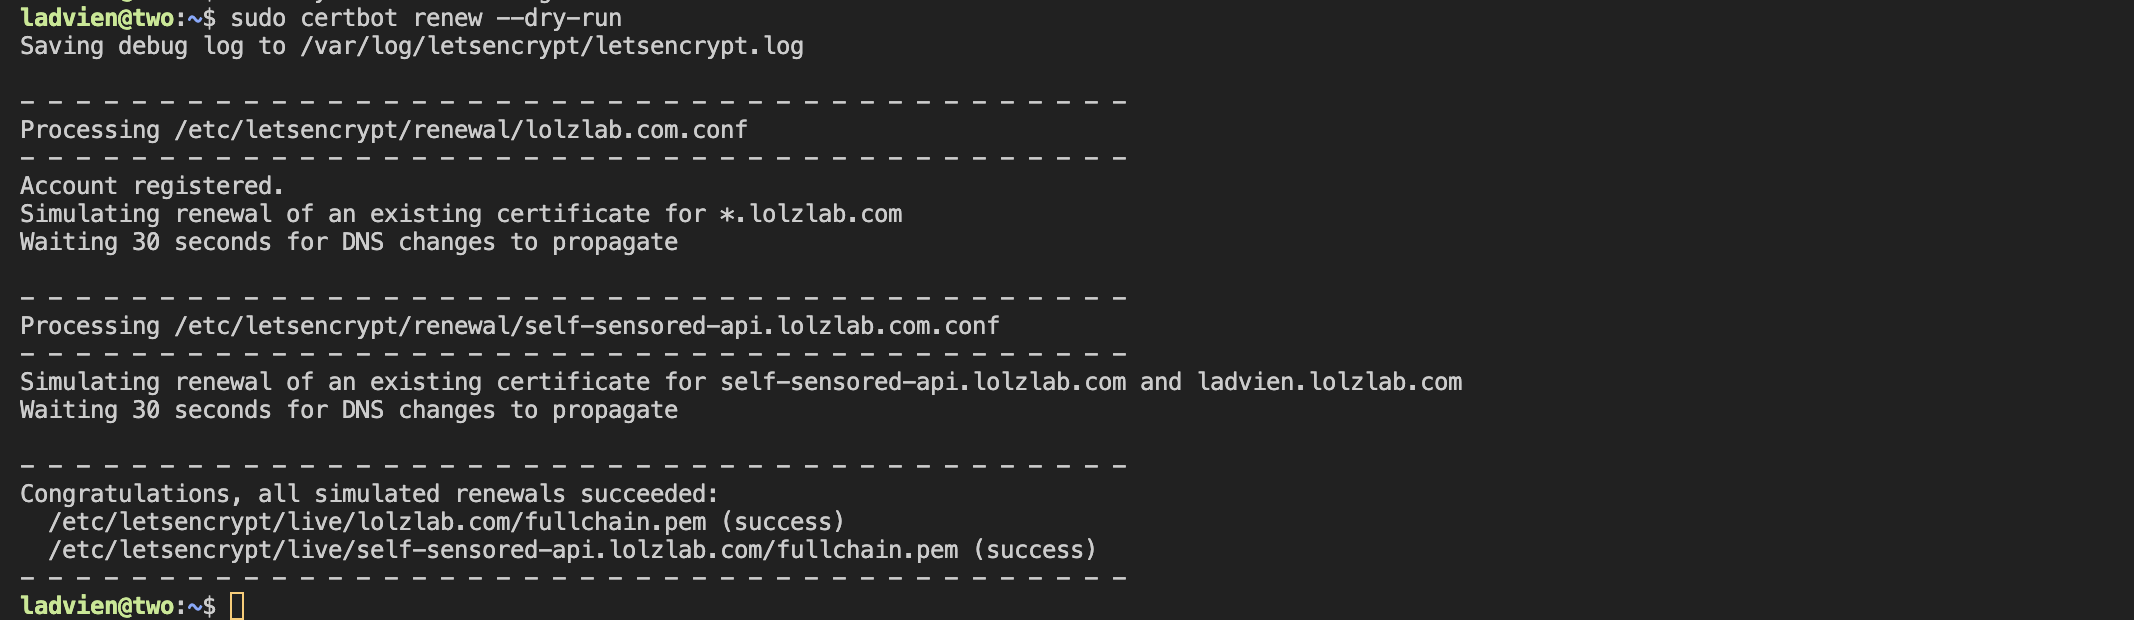
Let’s Encrypt certs renew automatically. Test the renewal process:
sudo certbot renew --dry-run
Done
You now have:
- Fully trusted HTTPS certificates.
- A secure setup compatible with Cloudflare Tunnels
- No need for special Cloudflare Origin certificates