
This article is part of a series.
View all 1 parts
- Part 1 – This Article
This article walks through building a working health data pipeline that automatically syncs your Apple Health data to a PostgreSQL database using FastAPI. No fluff, just the code that actually works.
The Problem: Health Data are Trapped

I've been wearing an Apple Watch for years, collecting thousands of data points about my heart rate, sleep, workouts, and more. But here's the thing—all that valuable data just sits there in the Health app, basically useless for any real analysis.
As a data engineer, this drives me nuts. I want to run SQL queries against my health data. I want to build dashboards. I want to correlate my stress levels with my sleep quality. But Apple keeps it all locked up in their walled garden.
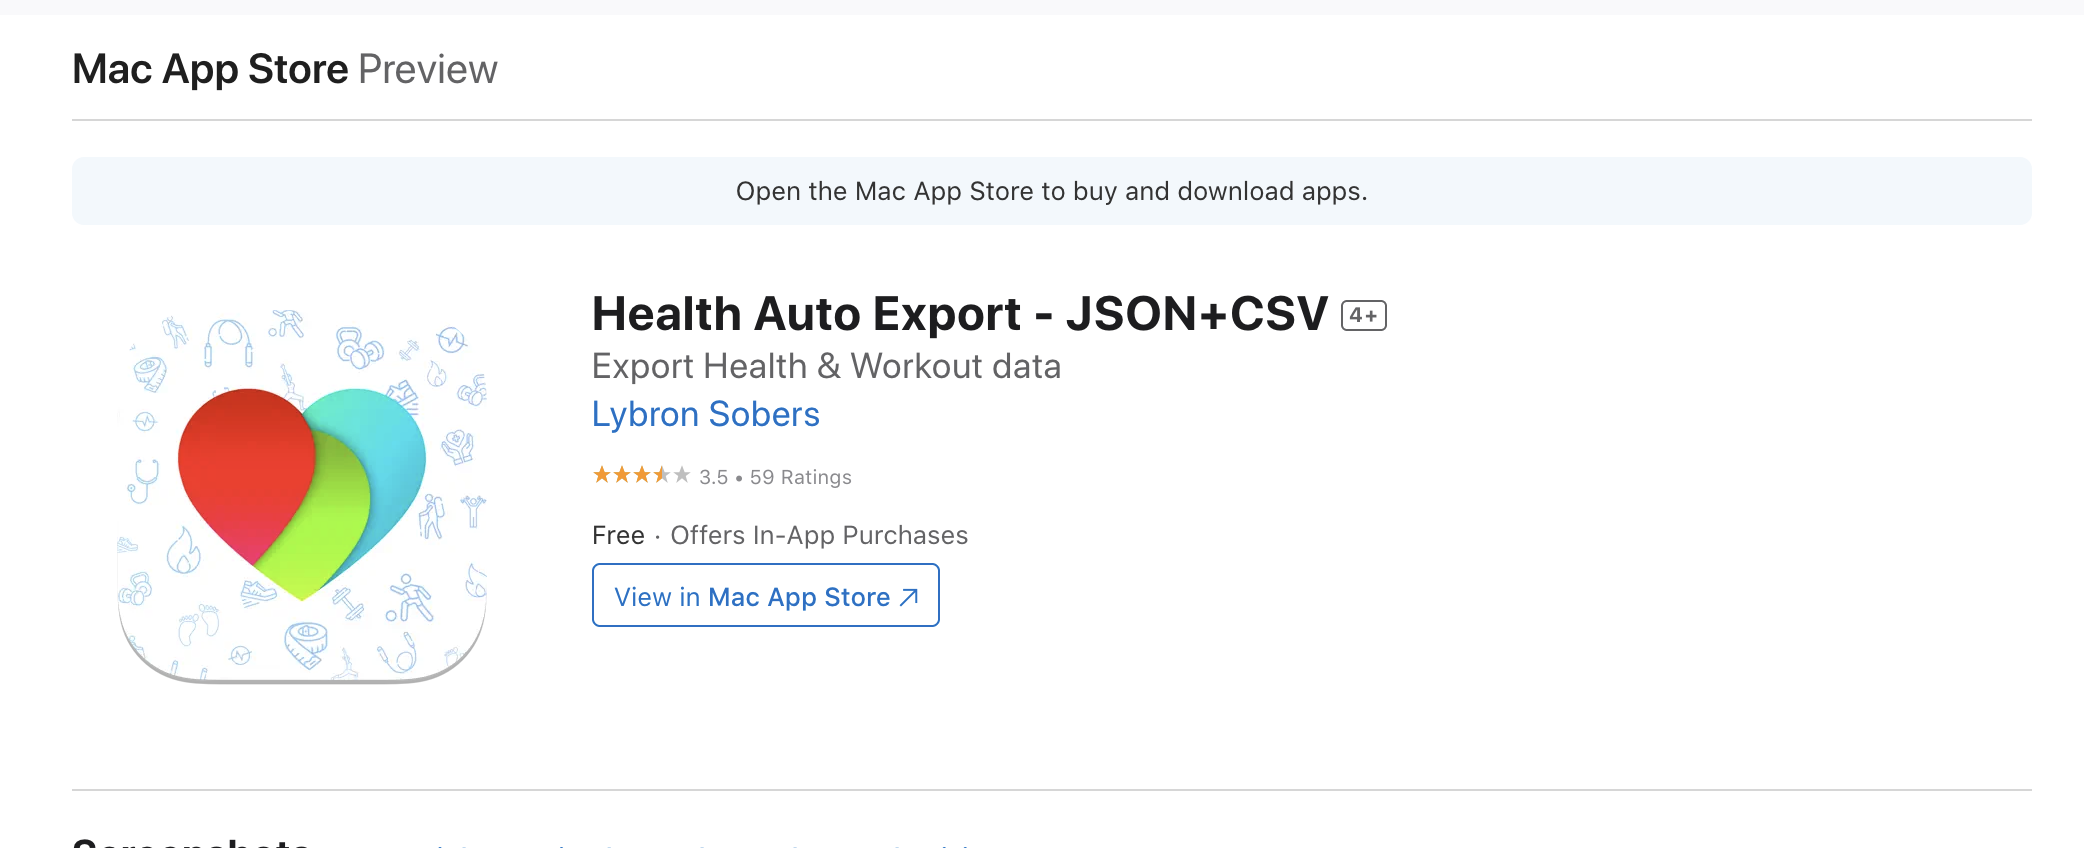
Enter the Auto Export iOS app . This little gem automatically exports your Apple Health data and can send it via webhook to any API endpoint. Perfect! Now I just need somewhere to catch that data and store it properly.
What We're Building
Here's what our pipeline looks like:
- Auto Export iOS App → Automatically exports health data from Apple Health
- FastAPI Server → Receives webhooks, validates data with Pydantic models
- PostgreSQL Database → Stores everything in a properly normalized schema
The best part? This is production code that I'm actually running. No toy examples here.
Setting Up Auto Export (The Easy Part)
First, grab the Auto Export app from the App Store. It's $2.99 and worth every penny.
Configuration Steps
-
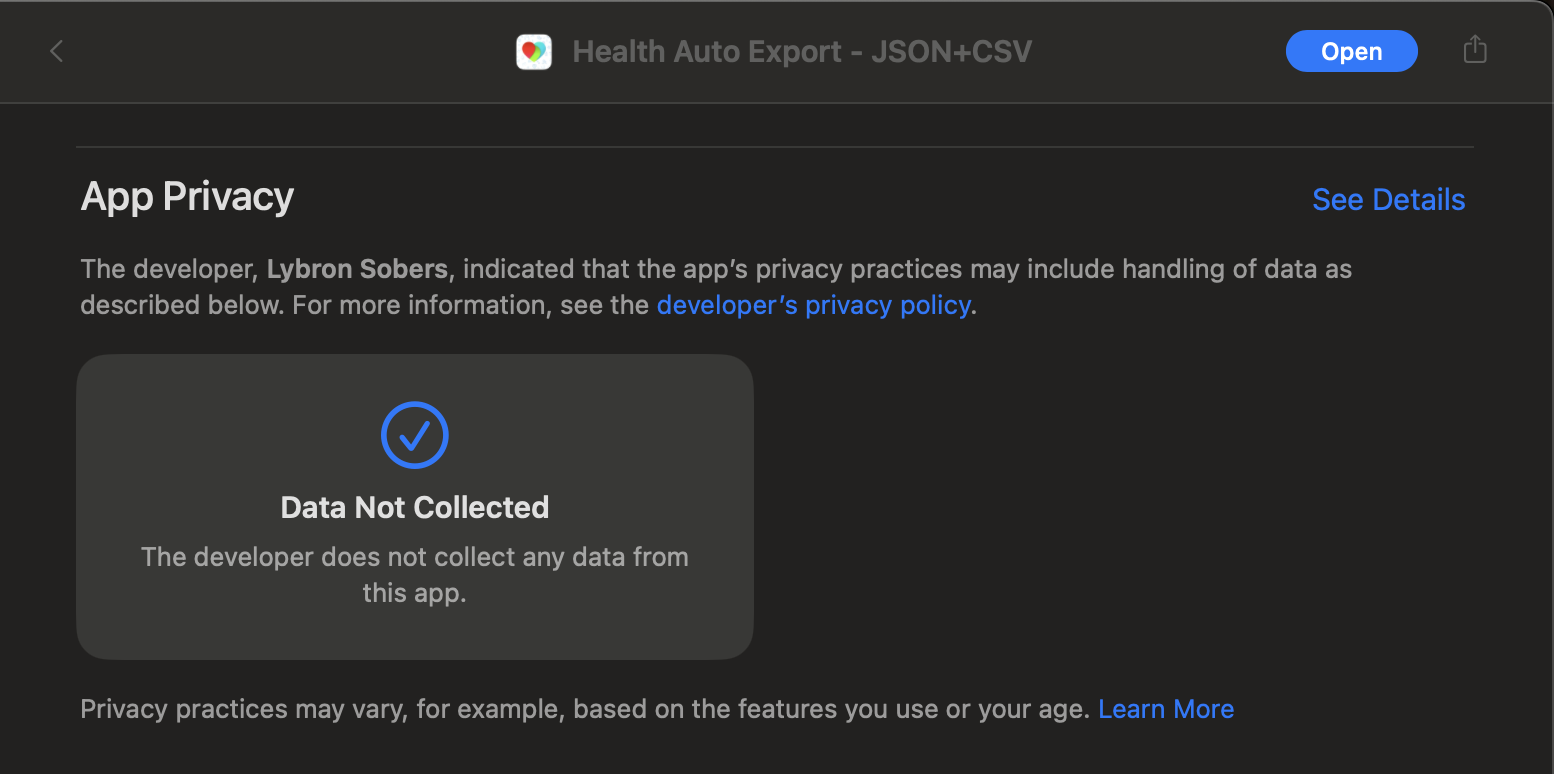
Grant Health Access : The app needs permission to read your Health data > Important note here, many apps collect tons of data about you. Auto Export does not. Try contrasting the app store's warning between Facebook Messenger and Auto Export. 😂
-
Choose Your Data : Select which metrics you want exported (I export everything)
-
Set Up Webhook
: Point it to
https://your-domain.com/api/v1/sync - Schedule Exports : I have mine set to sync every hour
The app will send JSON payloads that look like this:
{
  "data": {
    "metrics": [
      {
        "name": "heart_rate",
        "units": "bpm",
        "data": [
          {
            "date": "2024-01-01T12:00:00+00:00",
            "avg": 72,
            "min": 68,
            "max": 85
          }
        ]
      }
    ],
    "workouts": []
  }
}
Pretty clean! Now let's build something to catch it.
FastAPI Server: The Real Work Begins
Here's where things get interesting. Health data are messy. Different metrics have completely different structures. Heart rate has min/avg/max values. Blood pressure has systolic/diastolic. Sleep analysis has start and end times. How do we handle all this variety?
Project Structure
app/
├── __init__.py
├── main.py
├── dependencies.py
├── api/
│   ├── models.py          # Pydantic models for validation
│   └── v1/
│       └── endpoints.py   # API routes
└── db/
    ├── database.py        # Database connection
    ├── session.py         # Session management
    ├── models.py          # SQLAlchemy models
    ├── insert_logic.py    # Data insertion logic
    └── schema.sql         # Database schema
Pydantic Models: Taming the Data Beast
The heart of our validation system lives in
app/api/models.py
. Here's the base model:
class TZBaseModel(BaseModel):
    model_config = ConfigDict(str_to_datetime_mode="iso8601", populate_by_name=True)

    def get_date(self) -> datetime:
        return getattr(self, "date", getattr(self, "timestamp", None))
This handles timezone-aware datetime parsing automatically.
Recently, I was discussing the importance of data validation with a front-end engineer. The argument was "it was not too important"--and to be clear, this engineer saw it as a important, however, not "very" important. This was a problem for me. I explained my perspective.
Data are what is gained. As a user interacts with an application data are generated. Those data help ensure the user does not have to remember everything they've done--as the database can tell the user they bought lingerie on October 12th, 2018. But only if those data are validated when they are inserted into the database. Otherwise, users may end up making a lot of purchases on
1970-01-01T00:00:00Z
Always validate your data. 💯
Specialized Models for Different Health Metrics
Different health metrics need different validation. Here's how we handle that:
class BloodPressure(TZBaseModel):
    date: datetime
    systolic: float
    diastolic: float

class HeartRate(TZBaseModel):
    date: datetime
    min: Optional[float] = Field(None, alias="Min")
    avg: Optional[float] = Field(None, alias="Avg")
    max: Optional[float] = Field(None, alias="Max")
    context: Optional[str] = None
    source: Optional[str] = None

class SleepAnalysis(TZBaseModel):
    start_date: datetime = Field(..., alias="startDate")
    end_date: datetime = Field(..., alias="endDate")
    value: Optional[str] = None
    qty: Optional[float] = None
    source: Optional[str] = None
Notice how we use
Field
aliases to handle the inconsistent naming from the iOS app. Some fields are
Min
, others are
min
. Pydantic handles all of this gracefully. And after syncing 10 years of Apple Health data several times, I can say Health data can be a wee bit messy. The sort of flexibility SQLAlchemy and Pydantic provide is invaluable.
The Dispatcher Pattern
Here's where it gets clever. We use a dispatcher to route different metric types to their specialized models:
SPECIALIZED_METRICS = {
    "blood_pressure": BloodPressure,
    "heart_rate": HeartRate,
    "sleep_analysis": SleepAnalysis,
    "blood_glucose": BloodGlucose,
    # ... more metrics
}

def parse_metric(metric: HealthMetric) -> List[TZBaseModel]:
    model_cls = SPECIALIZED_METRICS.get(metric.name.lower())
    parsed = []

    for entry in metric.data:
        try:
            # Use specialized model if available, otherwise default
            model = model_cls(**entry) if model_cls else QuantityTimestamp(**entry)
            parsed.append(model)
        except Exception as e:
            logger.warning(f"Skipping invalid entry: {e}")

    return parsed
This means when we get heart rate data, it automatically uses the
HeartRate
model. Blood pressure uses
BloodPressure
. Anything we don't have a specialized model for falls back to the generic
QuantityTimestamp
.
Handling DateTime Chaos
iOS datetime formatting is... inconsistent. Sometimes you get
2024-01-01 12:00:00 +0000
, sometimes
2024-01-01T12:00:00+00:00
. Our normalization function fixes this:
def normalize_datetime_strings(payload: dict) -> dict:
    def fix_datetime_string(dt_str: str) -> str:
        dt_str = dt_str.strip()

        # Convert space to T: "2024-01-01 12:00:00" -> "2024-01-01T12:00:00"
        dt_str = re.sub(r"^(\d{4}-\d{2}-\d{2}) (\d{2}:\d{2}:\d{2})", r"\1T\2", dt_str)

        # Fix timezone: "+0000" -> "+00:00"
        dt_str = re.sub(r"([+-]\d{2})(\d{2})$", r"\1:\2", dt_str)

        # Remove extra spaces
        dt_str = re.sub(r"(T\d{2}:\d{2}:\d{2})\s+([+-]\d{2}:\d{2})", r"\1\2", dt_str)
        return dt_str

    def walk(obj):
        if isinstance(obj, dict):
            return {k: walk(v) for k, v in obj.items()}
        elif isinstance(obj, list):
            return [walk(i) for i in obj]
        elif isinstance(obj, str):
            if re.search(r"\d{2}:\d{2}:\d{2}", obj) and re.search(r"[+-]\d{2}:?\d{2}$", obj):
                return fix_datetime_string(obj)
        return obj

    return walk(payload)
This recursively walks through the entire payload and fixes any datetime strings it finds. Clean! However, may not be the must efficient.
The Main API Endpoint
Here's our webhook endpoint that receives the data:
@router.post("/sync", status_code=status.HTTP_201_CREATED)
async def receive_health_data(request: Request, db: AsyncSession = Depends(get_db)):
    try:
        raw = await request.json()
        normalized = normalize_datetime_strings(raw)
        parsed = api_models.parse_payload(normalized["data"])

        print(f"Received {len(parsed.metrics)} metrics and {len(parsed.workouts)} workouts")

        await insert_health_data(parsed, db)
        return {"message": "Data received and stored successfully"}

    except Exception as e:
        logger.exception("Failed to process /sync payload")
        return JSONResponse(status_code=400, content={"error": str(e)})
Simple and clean. Get the JSON, normalize the datetimes, parse with Pydantic, insert into the database.
PostgreSQL Schema: Where the Data Lives
Our database schema is designed around the hierarchical nature of the health data. Here's the core structure:
Core Tables
-- A batch of health data (one webhook call)
CREATE TABLE apple_health.health_payload (
    id UUID PRIMARY KEY DEFAULT gen_random_uuid(),
    received_at TIMESTAMP WITH TIME ZONE DEFAULT now()
);

-- Individual metrics within a payload
CREATE TABLE apple_health.health_metric (
    id UUID PRIMARY KEY DEFAULT gen_random_uuid(),
    payload_id UUID REFERENCES apple_health.health_payload(id) ON DELETE CASCADE,
    name TEXT NOT NULL,
    units TEXT NOT NULL
);

-- Default storage for simple quantity+timestamp data
CREATE TABLE apple_health.quantity_timestamp (
    id UUID PRIMARY KEY DEFAULT gen_random_uuid(),
    metric_id UUID REFERENCES apple_health.health_metric(id) ON DELETE CASCADE,
    date TIMESTAMP WITH TIME ZONE NOT NULL,
    qty DOUBLE PRECISION NOT NULL,
    source TEXT
);
Specialized Tables
For complex metrics, we have dedicated tables:
-- Blood pressure readings
CREATE TABLE apple_health.blood_pressure(
    id UUID PRIMARY KEY DEFAULT gen_random_uuid(),
    metric_id UUID REFERENCES apple_health.health_metric(id) ON DELETE CASCADE,
    date TIMESTAMP WITH TIME ZONE NOT NULL,
    systolic DOUBLE PRECISION NOT NULL,
    diastolic DOUBLE PRECISION NOT NULL
);

-- Heart rate with min/avg/max
CREATE TABLE apple_health.heart_rate (
    id UUID PRIMARY KEY DEFAULT gen_random_uuid(),
    metric_id UUID REFERENCES apple_health.health_metric(id) ON DELETE CASCADE,
    date TIMESTAMP WITH TIME ZONE NOT NULL,
    min DOUBLE PRECISION,
    avg DOUBLE PRECISION,
    max DOUBLE PRECISION,
    context TEXT,
    source TEXT
);

-- Sleep analysis with start/end times
CREATE TABLE apple_health.sleep_analysis (
    id UUID PRIMARY KEY DEFAULT gen_random_uuid(),
    metric_id UUID REFERENCES apple_health.health_metric(id) ON DELETE CASCADE,
    start_date TIMESTAMPTZ NOT NULL,
    end_date TIMESTAMPTZ NOT NULL,
    qty DOUBLE PRECISION,
    value TEXT,
    source TEXT
);
The beauty of this design is that simple metrics (like step count) go into the generic
quantity_timestamp
table, while complex metrics get their own specialized tables with proper typing.
SQLAlchemy Models
Our SQLAlchemy models mirror the database structure:
class HealthPayload(Base, AppleHealthMixin):
    __tablename__ = "health_payload"

    id = Column(UUID, primary_key=True, server_default=func.gen_random_uuid())
    received_at = Column(DateTime(timezone=True), server_default=func.now())
    metrics = relationship("HealthMetric", back_populates="payload", cascade="all, delete-orphan")

class HealthMetric(Base, AppleHealthMixin):
    __tablename__ = "health_metric"

    id = Column(UUID, primary_key=True, server_default=func.gen_random_uuid())
    payload_id = Column(UUID, ForeignKey("apple_health.health_payload.id", ondelete="CASCADE"))
    name = Column(Text, nullable=False)
    units = Column(Text, nullable=False)

    payload = relationship("HealthPayload", back_populates="metrics")
    quantity_data = relationship("QuantityTimestamp", back_populates="metric", cascade="all, delete-orphan")
    blood_pressure = relationship("BloodPressure", backref="metric", cascade="all, delete-orphan")
    heart_rate = relationship("HeartRate", backref="metric", cascade="all, delete-orphan")
Notice the
AppleHealthMixin
that sets up the schema and UUID generation automatically.
Data Insertion: Making It All Work
The insertion logic is where everything comes together. Here's how we handle the variety of metric types:
async def insert_health_data(payload: HealthPayload, db: AsyncSession):
    # Create the main payload record
    payload_obj = HealthPayload()
    db.add(payload_obj)
    await db.flush()  # Get the ID

    for metric in payload.metrics:
        # Create metric record
        metric_obj = HealthMetric(
            id=uuid4(),
            name=metric.name,
            units=metric.units,
            payload=payload_obj
        )
        db.add(metric_obj)

        if not metric.data:
            continue

        # Determine which database model to use
        metric_type = metric.name.lower()
        db_model_cls = SPECIALIZED_DB_MODELS.get(metric_type)

        try:
            if db_model_cls is None:
                # Default to QuantityTimestamp
                db_objs = [
                    QuantityTimestamp(
                        metric=metric_obj,
                        date=entry.get_date(),
                        qty=entry.qty,
                        source=entry.source,
                    )
                    for entry in metric.data
                ]
            else:
                # Use specialized model
                db_objs = [
                    db_model_cls(
                        metric=metric_obj,
                        **entry.model_dump(exclude={"id"}, exclude_unset=True),
                    )
                    for entry in metric.data
                ]

            db.add_all(db_objs)
            await db.flush()

        except Exception as e:
            logger.warning(f"Skipping metric '{metric.name}' due to error: {e}")

    await db.commit()
This creates the payload, then for each metric determines whether to use a specialized table or the default
quantity_timestamp
table.
FastAPI Setup and Dependencies
The main application setup is straightforward:
# app/main.py
from fastapi import FastAPI
from contextlib import asynccontextmanager

@asynccontextmanager
async def lifespan(app: FastAPI):
    # Run database initialization on startup
    await db.create_tables(engine)
    yield

app = FastAPI(lifespan=lifespan)
app.include_router(api_router, prefix="/api/v1")
The database dependency uses async sessions:
# app/dependencies.py
async def get_db() -> AsyncGenerator[AsyncSession, None]:
    async with AsyncSessionLocal() as session:
        yield session
Clean and simple!
Running the System
Development Setup
Install dependencies:
pip install poetry
poetry install
Set up your environment variables in
.env
:
DATABASE_URL=postgresql+asyncpg://user:password@localhost:5432/health_db
Run the development server:
poetry run poe dev
This starts uvicorn with hot reloading on port 8000.
What Actually Happens
Once everything is running:
- Auto Export sends a webhook every hour with your latest health data
- FastAPI receives the JSON payload
- Pydantic validates and parses the data into typed models
- The data gets inserted into the appropriate PostgreSQL tables
- You can now query your health data with SQL!
Querying Your Health Data
Now comes the fun part! With all your health data in PostgreSQL, you can run queries like:
-- Average heart rate by day
SELECT
    DATE(date) as day,
    AVG(avg) as avg_heart_rate
FROM apple_health.heart_rate
WHERE date > NOW() - INTERVAL '30 days'
GROUP BY DATE(date)
ORDER BY day;

-- Sleep duration trends
SELECT
    DATE(start_date) as night,
    EXTRACT(EPOCH FROM (end_date - start_date))/3600 as hours_slept
FROM apple_health.sleep_analysis
WHERE start_date > NOW() - INTERVAL '90 days'
ORDER BY night;
This is the payoff! Your health data are now queryable, joinable, and ready for analysis.
Production Deployment: The Real-World Gotchas
Getting this running locally is one thing. Getting it running in production? That's where you hit the fun stuff that nobody tells you about in tutorials.
SSL Certificates: iOS is Picky
Here's something that cost me a few hours of debugging: iOS doesn't like all SSL certificates equally. I initially tried using Cloudflare Edge certificates, and the Auto Export app would just fail silently. No error messages, no logs, just... nothing.
The fix? Use Certbot with Let's Encrypt certificates instead:
sudo apt update
sudo apt install certbot python3-certbot-nginx

# Get a certificate for your domain
sudo certbot --nginx -d your-api-domain.com
iOS is apparently pickier about certificate issuers than browsers are. Who knew? Save yourself the debugging time and just use Let's Encrypt from the start.
Nginx Configuration: Handle Large Payloads
The Auto Export app can send pretty hefty JSON payloads, especially if you're exporting workout data with GPS routes. The default nginx configuration will reject these with a 413 error.
Here's the nginx config that actually works:
server {
    listen 443 ssl;
    server_name your-api-domain.com;
    client_max_body_size 2000M; # 2GB - health data can get big!

    location / {
        proxy_pass http://127.0.0.1:8000;
        proxy_set_header Host $host;
        proxy_set_header X-Real-IP $remote_addr;
        proxy_set_header X-Forwarded-For $proxy_add_x_forwarded_for;
        proxy_set_header X-Forwarded-Proto $scheme;
    }
}
After updating your nginx config, always test and reload:
sudo nginx -t && sudo systemctl reload nginx
That
nginx -t
command has saved me from taking down production more times than I'd like to admit.
The Auto Export App Configuration
Once your server is running with proper SSL, configure the Auto Export app:
- Enabled : Make sure the webhook is enabled if you want it sync'ing in the background. Though, you might leave this off until you've verified everything is working.
-
Automation Type
: Set to
REST API -
Webhook URL :
https://your-api-domain.com/api/v1/sync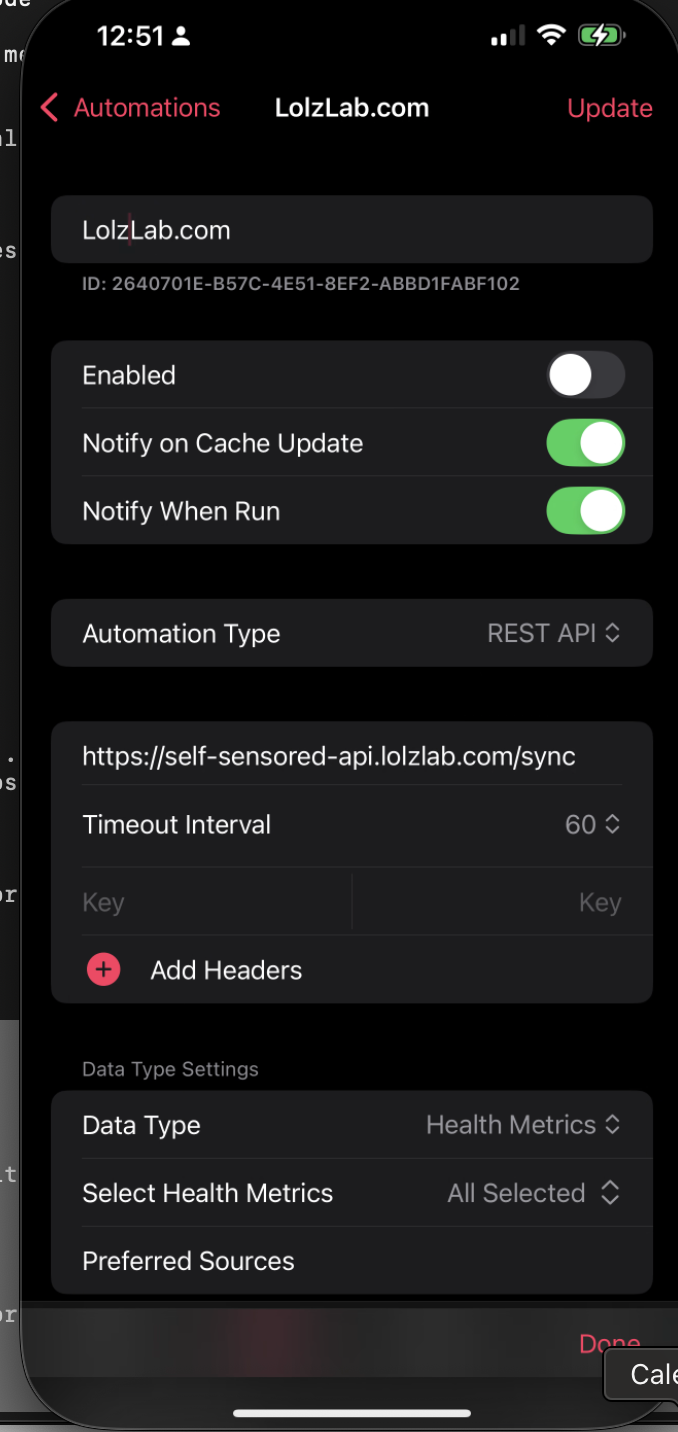
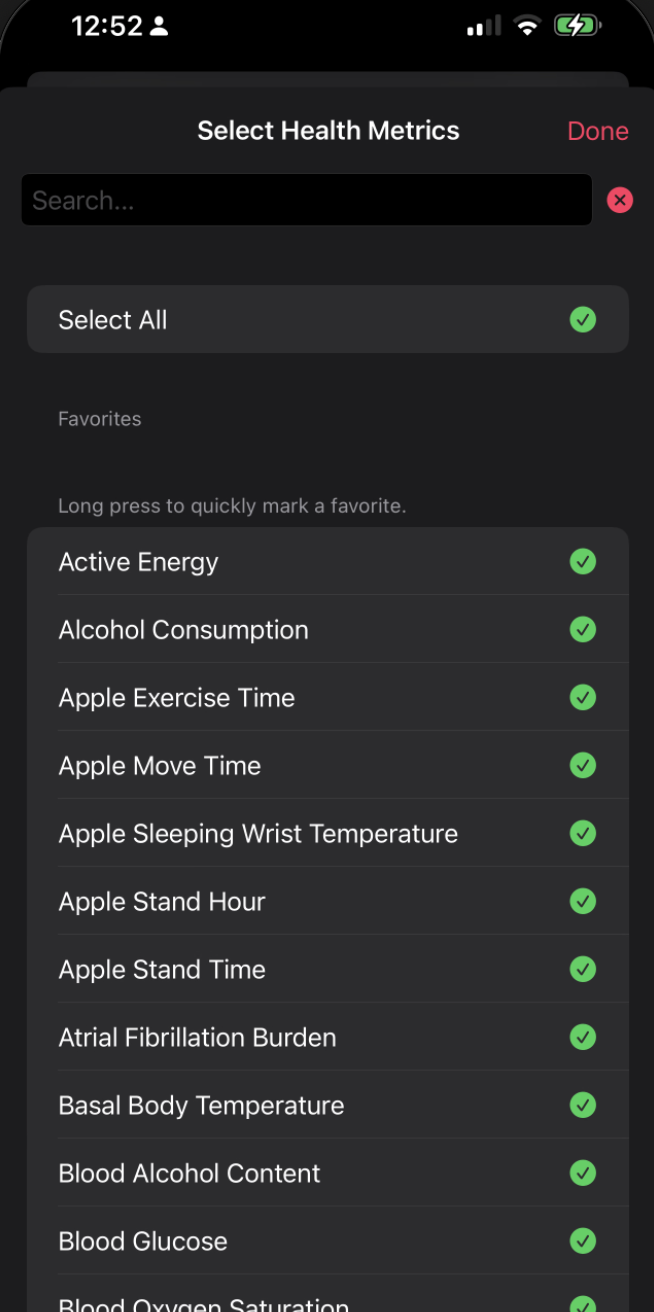
-
Select Health Metrics : I select everything, but you can choose specific metrics if you want to limit the data
-
Time Interval : I set it to 1 hour, but you can go as low as 5 minutes if you want more frequent updates
- Content Type : application/json (this may not be needed according to the documentation)
- Date Range : I set this to "Today" for now
-
Batch Requests : this one is important. Most likely, you have a lot of Health Data. Turning on batching will allow the Auto Export app to send chunks of your health data. This prevents your iOS device from crashing due to running out of memory and crashing.
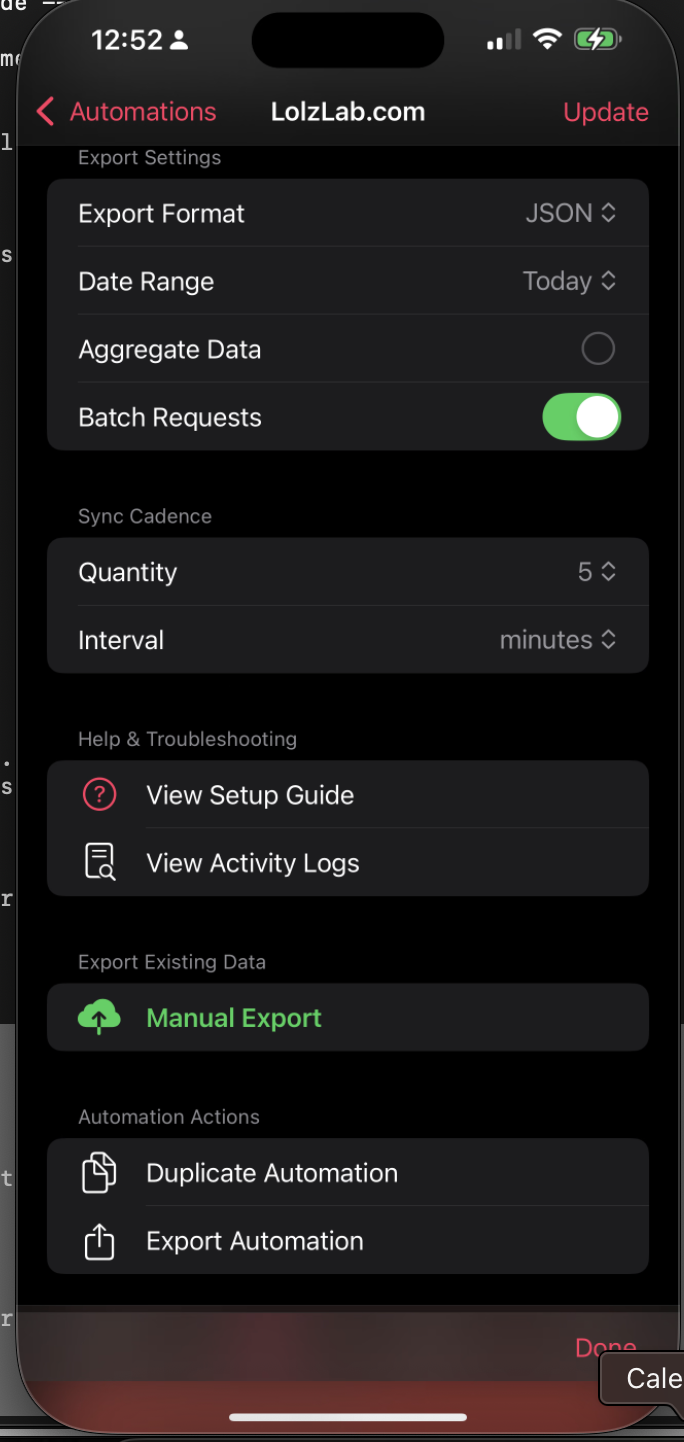
-
Export Format : JSON (the app supports CSV, but JSON is more flexible for our needs)
- Aggregate Data : I leave this unchecked, as I want raw data for analysis
- Export Schedule : I use every hour, but you can go as frequent as every 5 minutes
- Sync Cadence : I set this to 5 minutes, but you can adjust based on how often you want new data
- Interval : I set to minutes
The first successful sync is magical. You'll see your FastAPI logs light up with incoming data, and suddenly your database starts filling with actual health metrics.
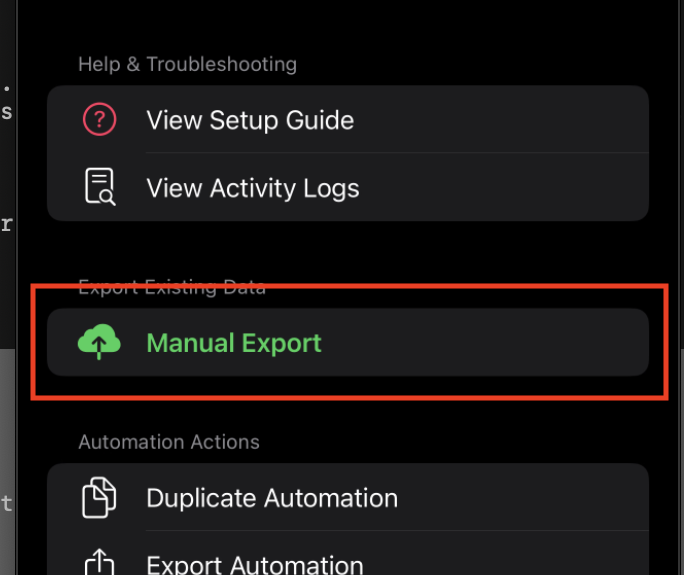
Manual Export
After you've setup the sync job, let's test it out. Go to
Manual Export
and tap it.
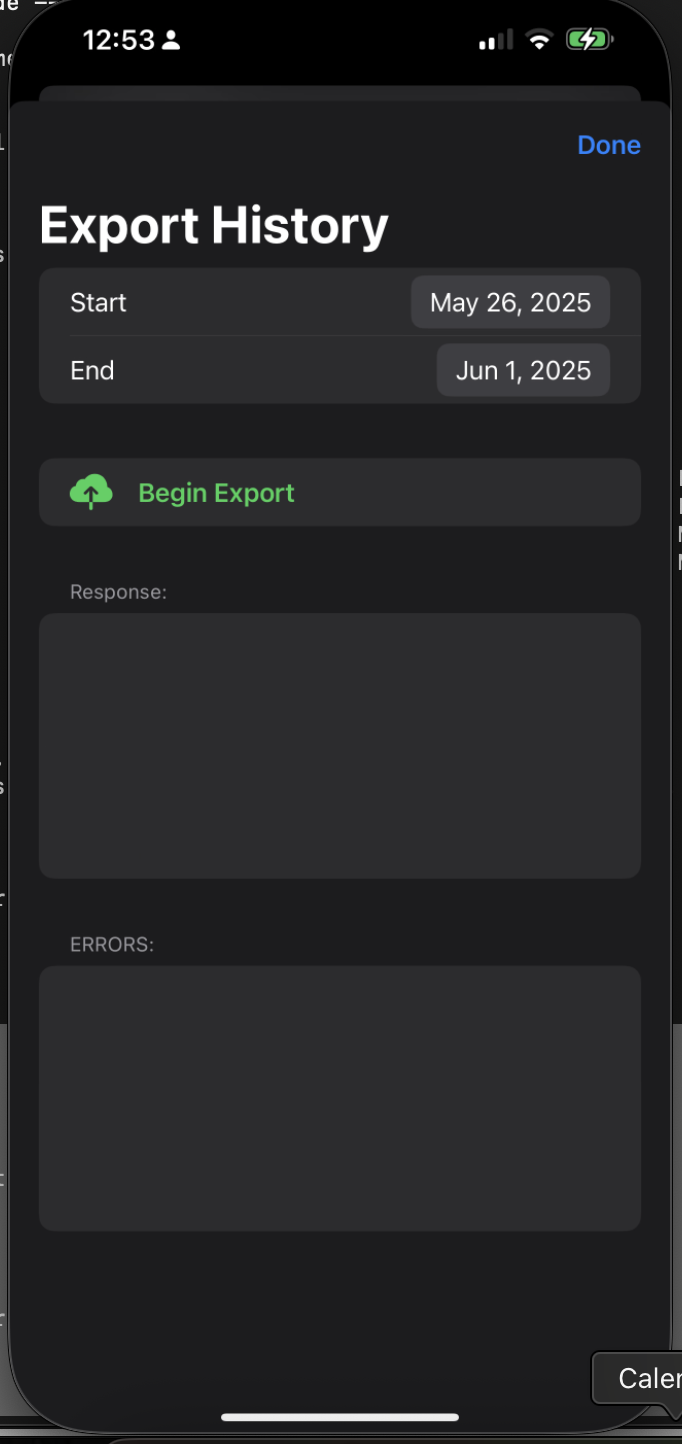
This should bring up the following screen. Ensure your FastAPI endpoint is ready. Then, set the date range to start and end on the same date. Lastly, hit the
Begin Export
button. This will begin sending your Apple Health data to your FastAPI endpoint. 🎉
Expectations
Apple Health data are high volume data. The initial sync may take several days. My recommendation is the following:
-
Before going to sleep, plug in your phone, ensure it is connected to the internet, bring the Auto Export app to the foreground, and then tap
Manual Export. Leave it over night - Try to sync chunks of data by date, using a date range that's easy to remember to prevent redundant syncing
- The REST API server and Postgres database will ensure duplicate data are not inserted, so you can safely re-run the sync if needed. Idempotent, they call it. Or so I'm told.
I'm exploring ways to make this faster on the REST API side, however, it appears the Auto Export app takes awhile to query the data, form them into JSON, and post them to our endpoint. Sadly, we can't do much about it, unless we want to write our own iOS app.
What's Next?
This system is working great for me, but there are plenty of directions to take it:
- Add data visualization with something like Lightdash
- Build automated health reports
- Set up alerts for concerning trends
- Add machine learning for health predictions
- Integrate with other health data sources
The foundation is solid and extensible. Adding new metric types is as simple as creating a new Pydantic model and database table.
The Real Win
The best part about this system? It just works. I set it up months ago, and it's been quietly collecting and organizing my health data ever since. No maintenance, no babysitting, just reliable data collection.
As data engineers, we often get caught up in complex architectures and fancy technologies. But sometimes the best solution is just clean code, good validation, and a solid database. This pipeline proves that with the right tools—FastAPI, Pydantic, and PostgreSQL—you can build something robust and maintainable that solves a real problem.
Now I can finally answer questions like "How does my sleep quality correlate with my heart rate variability?" and "What's my stress pattern throughout the week?" All because we took the time to build a proper data pipeline.
Your health data doesn't have to stay trapped in the iOS Health app. With a little code and the right architecture, you can set it free and start generating real insights about your well-being.